If you're dealing with a sloped yard, you know how much usable space you're losing. A block retaining wall can completely change that, turning a tricky hillside into a beautiful, functional part of your landscape. This guide is all about walking you through that process, from the first sketch to the final capstone. We'll even dig into the two main options you'll face: segmental retaining wall (SRW) blocks—which are interlocking and mortarless—and concrete masonry units (CMUs), which are traditional cinder blocks that require mortar. This distinction helps you figure out what’s best for your project.
Your Guide to Building a Flawless Block Retaining Wall
Taking on a block retaining wall project can seem daunting, but it's one of the most satisfying DIYs you can do. A properly built wall doesn't just stop erosion; it carves out new patios, garden beds, and level lawn areas, adding real value to your home. For example, a well-designed retaining wall can transform an unusable 20-degree slope into a terraced garden or a flat, grassy area perfect for outdoor seating.
This guide breaks everything down into clear, manageable chunks. We'll give you realistic timelines and a list of essential tools to take the guesswork out of it. The idea is to give you a bird's-eye view so you can decide if it's a project you want to tackle yourself or if Atlanta's notorious clay soil and terrain make it a job for the pros.
Why Retaining Walls Are a Smart Investment
Retaining walls aren't just for looks—they're a crucial piece of infrastructure. With more development happening, controlling soil erosion is a big deal, especially around the hilly parts of Atlanta. The numbers back this up: the global market for retaining wall blocks was valued at USD 3.27 billion in 2024 and is expected to hit USD 5.0 billion by 2035. That growth shows just how vital these structures have become.
Here in the metro Atlanta area, from Alpharetta and Marietta to Johns Creek, we see them everywhere. They're essential for:
- Creating Level Driveways: A property with a 15-foot drop from the street to the garage might seem impossible, but a series of retaining walls can create a safe, gradual driveway.
- Grading Commercial Sites: Think of a new shopping center built on a hillside. Retaining walls are what create the level parking lots and building pads necessary for construction.
- Stabilizing Community Spaces: In HOA neighborhoods, retaining walls are often used to shore up banks around retention ponds or create usable park areas on sloped common ground.
The Big Picture: Understanding the Project Phases
Building a retaining wall that lasts is about more than just stacking blocks. It's a sequence of deliberate steps, where each one sets the stage for the next. Before we get into the nitty-gritty, let's look at the overall project flow.
To give you a clearer idea, here's a table summarizing the entire process.
Retaining Wall Project at a Glance
| Project Phase | Typical Timeline (for a 3'x20' wall) | Essential Tools |
|---|---|---|
| Planning & Permits | 1-2 weeks (permit times vary) | Tape measure, spray paint, line level |
| Excavation & Base Prep | 1-2 days | Shovel, tamper, wheelbarrow, plate compactor |
| Foundation & First Course | 1 day | Level, rubber mallet, string line |
| Building Courses & Drainage | 1-2 days | Chisel, trowel, landscape fabric, drainage pipe |
| Backfilling & Compaction | 1 day | Shovel, tamper, gravel |
| Capping & Finishing | 1 day | Construction adhesive, caulk gun |
This timeline is a good estimate for a straightforward project, but weather and site conditions can always add a few twists. For example, a week of heavy rain can delay excavation and turn compactable soil into mud, adding days to your schedule.
You can see examples of how these phases come together on professionally managed jobs by checking out some completed projects.
A common mistake I see all the time is people rushing the prep work. Your wall is only as good as its foundation. If you skimp on the excavation and compaction, that wall is destined to fail. For instance, a base that settles just half an inch can cause a visible bulge in the finished wall within a year. Taking your time to build a solid base is non-negotiable if you want it to last for decades.
Planning Your Project and Navigating Local Regulations
Before a single shovel hits the dirt, every successful retaining wall project starts with a solid plan. This is where you sidestep the most common and expensive mistakes people make. It’s about more than just what the wall will look like; it’s about getting your measurements right, calculating your materials, and knowing the local rules you have to play by.
The first thing to do is get a visual. Grab some landscape spray paint or a few stakes and string to mark out the exact footprint of your wall. This simple step helps you see exactly how the wall will fit into your yard, navigating around trees, property lines, and anything else in its path. For example, marking the line might reveal that your planned wall ends too close to a large oak tree, whose roots could damage the foundation over time, forcing you to adjust the design.
Once you have your layout, you can get precise measurements for the wall's total length and final height. These two numbers are the starting point for everything that follows.
Calculating Your Material Needs
Guessing on materials is a surefire way to blow your budget and waste time with extra trips to the store. To get it right the first time, you need to calculate exactly what you'll need. Let's start with the blocks.
Just multiply the wall's length by its height to find the total square footage of the wall face. From there, look at the specs for the block you've chosen to see how many you'll need per square foot.
Here’s a quick rundown of the main materials you'll need to figure out:
- SRW Blocks: Calculate the total for the wall face, then add an extra 5-10% to cover cuts and the occasional broken block.
- Capstones: Simply measure the linear feet along the top of the wall to know how many finishing caps to buy.
- Base Gravel: You need a compacted gravel base that's at least 6 inches deep and twice as wide as your block. Calculate the cubic feet needed: Length (ft) x Width (ft) x Depth (ft). Remember to convert your depth from inches to feet (e.g., 6 inches = 0.5 feet).
- Drainage Stone: This clean, crushed stone needs to fill a space at least 12 inches wide directly behind the wall.
- Perforated Drain Pipe: Get a piece that matches the full length of your wall.
- Landscape Fabric: You'll need enough to wrap your drainage stone, separating it from the surrounding soil to prevent clogging.
For a real-world example, let's say your wall is 3 feet high and 20 feet long. That gives you a 60-square-foot face. If each block covers 0.5 square feet, you'd need 120 blocks just for the face. Adding a 10% overage (12 blocks) means you should order 132 blocks. This is the kind of prep that saves you serious headaches down the road.
Navigating Atlanta-Area Permits and Regulations
This is the one step that trips up DIYers more than any other, and ignoring it can lead to some major problems. Building codes are in place for a reason—to ensure your wall is safe and won't come tumbling down. The good news is that for smaller projects in the Atlanta metro area, the rules are usually pretty straightforward.
In many local jurisdictions, like Fulton and DeKalb counties, a retaining wall under four feet tall often doesn't require a building permit. But treat that as a general guideline, not a guarantee. You absolutely must verify the rules with your specific city or county planning department. For example, the City of Alpharetta might have different setback requirements from a property line than unincorporated Cobb County.
A quick call to your local building office is the single most important investment you can make at this stage. It will clarify height limits, property line setback requirements, and any engineering specs you need to know before you've spent a dime.
Things change once you go bigger. An engineer's stamped design is almost always required if your wall is taller than four feet, supports a heavy load (what we call a "surcharge") like a driveway or a steep hill, or is part of a series of tiered walls. Trying to skip this isn't just a risk; it's a code violation that can force you to tear the whole thing down.
The Most Important Phone Call You Will Make
Before you do any digging, there's one call you are required to make: call 811. This is the free national "call before you dig" service. They contact all the local utility companies, who will then come out and mark the approximate location of any underground lines for gas, water, and electricity using colored flags or paint. For instance, red indicates an electric line, while yellow marks a gas line.
Hitting a utility line is incredibly dangerous and can stick you with massive fines and repair bills. Make sure you call at least a few days before you plan to start digging. This focus on planning and safety is a big reason why North America has come to dominate the retaining wall sector, holding about 34-35.4% of the global market in 2024. This growth is fueled by infrastructure investment and a shift toward efficient building systems that can cut labor costs by up to 25%. You can read more about these global market dynamics to get a bigger picture of the industry.
Excavating and Building a Bulletproof Foundation
Let's be honest—the real muscle of any block retaining wall is completely hidden from view. It's the foundation you build underground that does all the heavy lifting, and this is where a project is either made or broken. If you skimp on the base, you're setting yourself up for settling, shifting, and eventual failure, no matter how carefully you stack the blocks.
Everything starts with digging a proper trench. This isn't just about clearing a path; it's about creating a stable, level footing that can support thousands of pounds. Your trench needs enough width for the blocks plus some wiggle room to work, and enough depth to bury the base course and the gravel footing that supports it. For a standard 12-inch-deep block, a trench that is 24 inches wide provides ample space.
Digging to the Right Depth
A good rule of thumb I've always followed is to bury the entire first course of blocks. So, you’ll need to dig deep enough for a compacted gravel base plus the full height of that first block. For most walls, burying about 10% of the total wall height is a solid target.
Say you're building a 3-foot (36-inch) tall wall with 8-inch-high blocks. You’ll want at least 3 to 4 inches of that first block below grade. Tack on another 6 inches for your compacted gravel base, and you’re looking at a trench depth of around 10 inches.
The number one reason retaining walls fail is a weak foundation. Rushing the excavation or being cheap with the base material is a surefire way to watch your hard work lean, bulge, or completely collapse in a few years. For example, building on uncompacted soil is like building a house on sand—the first heavy rain can cause it to shift and undermine everything. Take your time here; it's the best insurance you've got.
Here in the Atlanta area, we're almost always dealing with that infamous red clay. This stuff can hold a ton of water, causing it to swell and shrink dramatically. That movement puts incredible pressure on a wall. To fight back, I often dig an even deeper trench to pack in a thicker gravel base—sometimes 8 to 10 inches—to improve drainage and create a stable buffer. It's the same principle our team applies to any structural work; our residential foundation concrete services live and die by proper site prep.
Creating a Solid, Level Base
With your trench dug, it's time to build the leveling pad. Don't just dump gravel in and call it a day. This is a precisely compacted base that needs to be rock-solid. The go-to material for this is a ¾-inch crushed stone, which most suppliers around here call #57 stone.
The trick is to add the stone in 2- to 3-inch layers, or "lifts." If you try to dump all 6+ inches in at once, you'll never get the bottom compacted properly. After spreading each lift, you need to compact it until it's completely solid.
This is where a plate compactor is your best friend. A hand tamper might cut it for a tiny garden border, but for a real retaining wall, renting a gas-powered plate compactor is non-negotiable. It uses powerful vibrations to lock the gravel particles together, eliminating air pockets and creating a dense base that won’t settle. Make several passes over each layer until the gravel feels like concrete under your feet. A well-compacted base should not leave a footprint when you walk on it.
If you're new to this, it’s worth taking a moment to understand what groundwork entails for a solid foundation, as these core concepts are universal in construction.
Setting the First Course Perfectly Level
Once you've compacted that final layer of gravel, get your longest level out and check it obsessively—front-to-back and side-to-side. You want that pad perfectly flat before a single block touches it. If you find a low spot, use a little fine gravel or paver base to make small adjustments. For example, a quarter-inch dip over a 4-foot span can be corrected with a few handfuls of paver base, leveled with a trowel.
I can't stress this enough: preparing the first course is the most critical step of the entire build. Every tiny imperfection in this base layer will be magnified as you go up, leaving you with a wavy, unprofessional-looking wall that’s structurally weak. The first course dictates the success of all the others. Spend the extra time to get this foundation perfect; you'll thank yourself later.
Stacking Blocks, Backfilling, and Managing Drainage
Once you’ve got a perfectly compacted and level foundation, you've done the hardest prep work. Now for the satisfying part: stacking the blocks and watching your wall come to life. This is a methodical process, but it’s where your project really starts to transform a patch of dirt into a proper, solid structure.
The first course of blocks is, without a doubt, the most important one. You'll need to tap every single block into place with a rubber mallet, checking that it's perfectly level both front-to-back and side-to-side. Any tiny error here will get magnified as you go up, leading to a crooked, unstable wall down the road.
After that first row is locked in, things speed up considerably. Most segmental retaining wall (SRW) blocks have a handy locking lip or pin system that automatically creates the right setback and keeps everything aligned. As you stack, just remember to stagger the vertical joints in a running bond pattern—just like a bricklayer would. This means the joint on one course should line up with the middle of the block on the course below it. This simple step distributes the load and makes the entire wall face much stronger.
The Real Secret: Backfill and Drainage
Honestly, stacking the blocks is the easy part. The secret to a retaining wall that will stand for decades is what happens behind it in the drainage and backfill zone. This is where so many DIY projects go wrong, usually because people underestimate the power of water.
Hydrostatic pressure—the force of waterlogged soil—is the number one enemy of your wall. Here in Atlanta, where we get some serious downpours, that pressure can be immense. For example, saturated clay soil can exert over 100 pounds of pressure per square foot on a wall. It will find any weakness and can easily topple an improperly built wall. Your main goal is to give all that water an easy way out so it never gets a chance to build up.
Never, ever backfill your wall with the native soil you dug out, especially not Atlanta's heavy red clay. That stuff holds water like a sponge, which is the exact opposite of what you want. A proper drainage system isn't a suggestion; it's a non-negotiable part of the job.
The diagram below breaks down the fundamental process of prepping the ground before you even get to drainage.
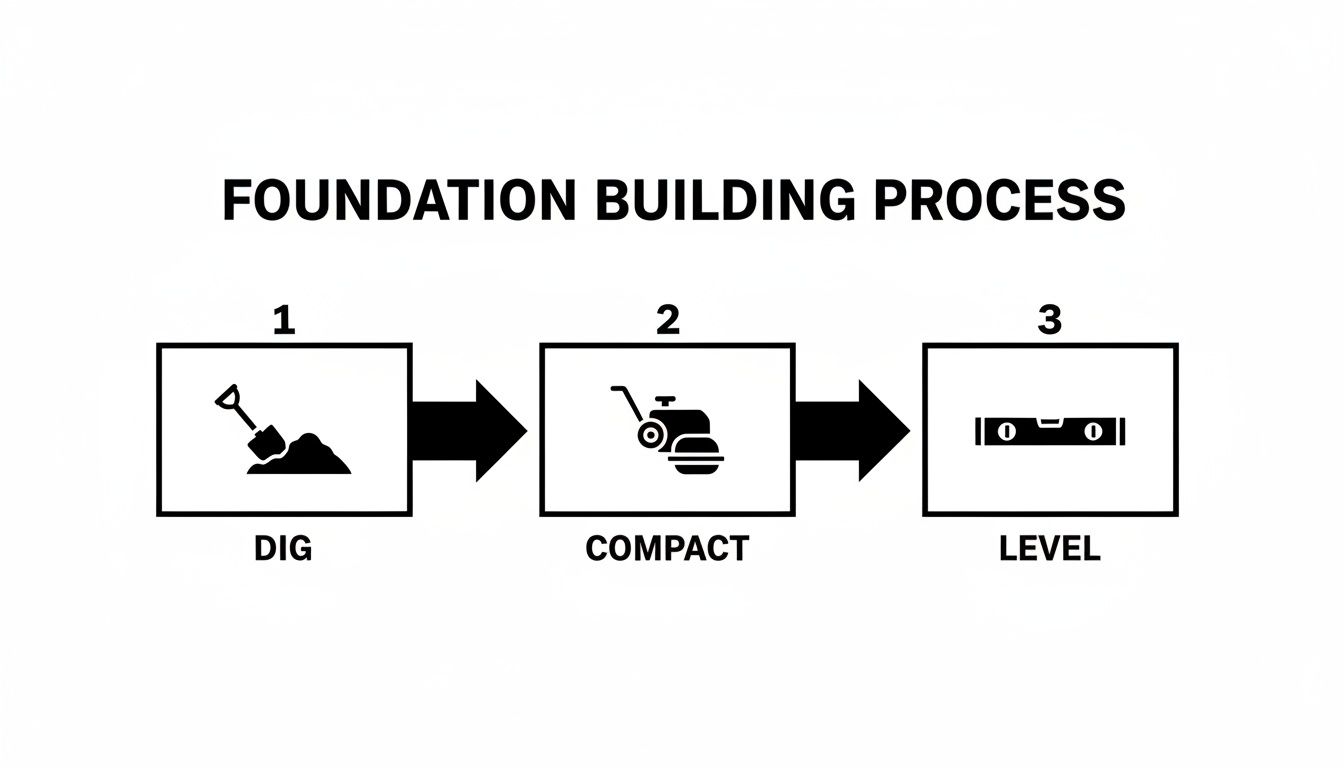
This simple three-step flow—dig, compact, level—is the bedrock of your entire project. Get this right, and you're setting the stage for effective drainage and a stable wall.
Installing Your Drainage System
A good drainage system has a few key parts that work together to keep water moving.
First, you'll lay a 4-inch perforated drain pipe right at the base of the wall, just behind that first course of blocks. The pipe's holes should face down to collect water and channel it away from the foundation. Give it a slight downward slope (about 1/8 inch per foot) so it drains to a "daylight" exit point, where the water can safely flow away from the area. A 20-foot long wall, for example, should have a total drop of about 2.5 inches from one end to the other.
Next comes the drainage aggregate. You'll want to use a clean, ¾-inch crushed stone to fill the space for at least 12 inches behind the wall. This clean stone creates a clear path for water to flow freely down to the pipe instead of getting trapped in the soil.
Finally, wrap that entire drainage zone—the pipe and all the stone—in a quality landscape fabric. Think of it as a filter. It stops soil and silt from eventually clogging your pipe and stone, which would make your whole drainage system useless over time.
Why You Might Need Geogrid Reinforcement
When you start building taller walls, usually anything over three or four feet, you need to add another layer of strength. That's where geogrid comes in. Geogrid is a super-strong polymer mesh that you lay horizontally between certain courses of blocks, stretching it back into the hillside.
As you build, you'll backfill and compact soil right on top of the geogrid. This literally locks the wall into the earth behind it, creating a single, unified soil mass. For example, a 6-foot-tall wall might require a layer of geogrid every two courses (16 inches), with each layer extending 4 feet back into the slope. This turns your wall and the soil into one incredibly strong structure that can stand up to immense pressure.
The global push for better infrastructure has led to some amazing innovations in these materials, making projects to build a block retaining wall more reliable than ever. Since the 1980s, segmental block systems have completely changed the game, cutting build times by as much as 50% compared to old-school methods. With worldwide infrastructure spending hitting USD 3.2 trillion in 2023, the need for effective soil stabilization is clear. This is especially true here in Atlanta, where more than 60% of retaining wall failures are directly caused by bad drainage—a problem that expert design and reinforcement can easily prevent. You can learn more about the trends shaping the retaining wall market to see how these advancements are being put to use.
Below is a quick reference for deciding on your backfill and reinforcement strategy based on the wall's height.
Retaining Wall Drainage and Reinforcement Guide
| Wall Height | Backfill Material | Geogrid Reinforcement Needed? | Drainage Pipe Requirement |
|---|---|---|---|
| Under 3 ft | Min. 12" clean crushed stone | Typically No | Required |
| 3-4 ft | Min. 12" clean crushed stone | Yes, per block specs | Required |
| Over 4 ft | Fully engineered backfill zone | Yes, per engineer's plan | Required |
This table provides a solid starting point, but always defer to the block manufacturer's guidelines or an engineer's specifications for taller, more complex walls.
The Right Way to Backfill and Compact
As you build your wall up, course by course, you have to backfill in layers, often called "lifts." A huge mistake is waiting until the wall is finished to dump all the backfill in at once.
Add your crushed drainage stone behind the wall and your compacted soil behind that, bringing them up in 6- to 8-inch lifts at a time. After you lay down each lift, use a hand tamper or a plate compactor to pack it down tight. This is crucial for preventing future settling, which can weaken your wall. Just be careful not to run heavy compaction gear too close to the back of the wall, as the vibrations can knock your freshly laid blocks out of alignment. A good rule is to stay about 3 feet away from the wall with a large plate compactor.
Finishing Your Wall and Avoiding Common Pitfalls
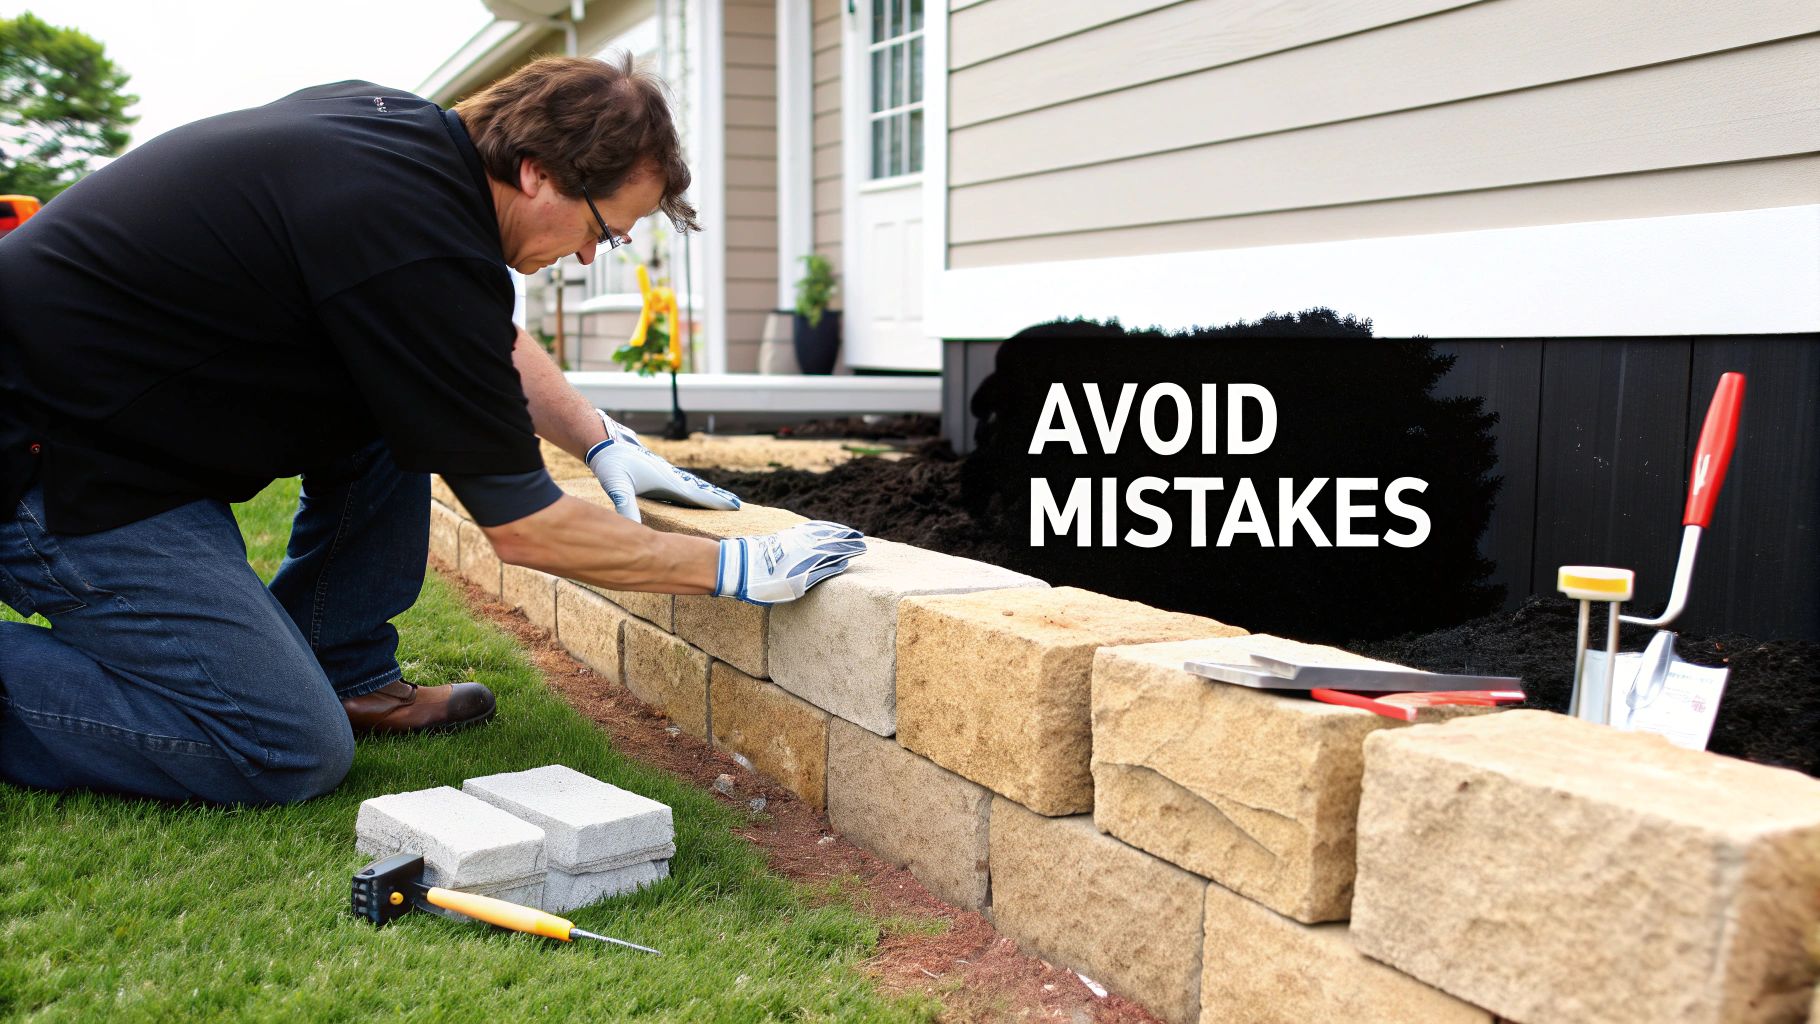
The final details are what really elevate a retaining wall from just functional to truly professional. Capping the wall is your last big move, and it does more than just look good—it gives the structure a clean, polished top while shielding the blocks below from rain and moisture.
To get those capstones on, you’ll need a good construction adhesive and a caulk gun. Lay down two thick, wavy beads of adhesive on top of your last row of blocks, one near the front and one near the back. Then, carefully set each capstone, giving it a few gentle taps with a rubber mallet to seat it firmly and make sure it’s sitting perfectly flush with the ones next to it.
Final Grading and Site Cleanup
After the adhesive has had time to cure properly (check the manufacturer's instructions, but typically 24 hours), it’s time to tackle the final landscaping. This isn't just about making things look tidy; proper grading is your wall's best friend. You’ll want to shape the soil behind the wall so it slopes gently away from the structure. A grade of at least one-quarter inch per foot is a good target. This simple step prevents rainwater from pooling up and putting pressure on your hard work.
Do the same for the soil in front of the wall, too, ensuring water has a clear path to drain away from the base. Once your grading is done, a final cleanup of the site will really let you stand back and appreciate the finished product.
Critical Mistakes That Can Doom Your Project
I’ve been doing this for years, and I’ve seen more than a few DIY projects that looked great at first but failed down the road because of a handful of avoidable errors. Knowing what these are ahead of time can save you a ton of frustration and the cost of major repairs later. Trust me, even pros can make missteps, so it's always good to be aware of the common mistakes in retaining wall design before you start.
Here are the biggest blunders we see right here in the Atlanta area:
- Building on Topsoil: This is a huge one. Never build your wall directly on loose topsoil. It will settle, and your wall will fail. For example, a wall built on 4 inches of unexcavated topsoil can sink unevenly after the first season of rain. A compacted gravel base isn't optional—it's essential.
- Forgetting to Bury the First Course: The entire first row of blocks has to be buried completely below grade. This is what anchors the whole wall and keeps the base from shifting or kicking out under pressure.
- Using Native Soil for Backfill: Backfilling with the same Georgia red clay you just dug up is asking for trouble. You absolutely have to use clean, crushed gravel to create a proper drainage zone behind the wall.
The toughest calls we get are from folks whose walls are leaning or bulging after just a couple of years. In almost every single case, the problem comes back to a weak foundation or zero drainage. Getting these two things right is 90% of the battle.
Another rookie mistake is not checking for level as you go. Each and every course needs to be checked constantly. A tiny wobble at the bottom turns into a massive, glaring gap by the time you get to the top. A half-inch error on the second course can become a two-inch lean at the top of a four-foot wall.
Finally, don't ignore local building codes, especially for any wall over four feet tall. That can get you a tear-down order from the city. If you ever see your wall start to lean, bulge, or crack, get on it right away. Knowing when to call for residential concrete and masonry repair can stop a small issue from turning into a total collapse. By sidestepping these common errors, you can confidently build a block retaining wall that will look great and stand strong for years to come.
When to Call an Atlanta Retaining Wall Professional
Knowing when to hang up the tool belt is the mark of a smart homeowner, not a failed DIY project. While tackling a small garden wall can be incredibly rewarding, some projects carry risks that just aren't worth it. Let's talk about the red flags that mean it's time to call in a pro to build a block retaining wall that's safe, up to code, and built to last.
The biggest tell-tale sign is the height. Once you start planning a wall over four feet tall, you’re entering professional territory. In most metro Atlanta jurisdictions, from Marietta to Johns Creek, a wall this high requires a building permit and, more importantly, a stamped plan from a licensed engineer. Professionals navigate this permitting process every day and understand the specific requirements to keep your project legal.
Beyond just height, take a hard look at your property. Are you dealing with a seriously steep slope (e.g., greater than a 2:1 ratio)? Is the area always soggy after a rain, indicating a high water table? Does the soil seem loose and unstable? These are all major variables that can lead to wall failure if not handled with expert precision.
When Your Project Gets Complicated
Here are a few scenarios where I’d strongly advise stepping back and getting a professional quote:
- Supporting "Critical" Structures: If your wall is holding up anything important—like a driveway, a patio, or worse, the foundation of your house—the stakes are simply too high for a DIY attempt. The engineering has to be perfect.
- Complex Designs: Thinking about a beautiful, sweeping curve? Or maybe a multi-level terraced wall with built-in stairs? These designs look amazing but require advanced knowledge of load distribution and reinforcement. For example, a curved wall experiences different forces than a straight one and must be built to resist outward pressure at its center.
- Tough Site Access: If your backyard is hard to get to, professionals have the right-sized equipment, like a mini-excavator or a tracked wheelbarrow, to move earth and materials efficiently. It's a matter of safety and getting the job done without tearing up your entire property.
Hiring a pro isn’t throwing in the towel. Think of it as a smart investment in your property's safety and value. An expert ensures the job is done right the first time, saving you from the headache and expense of a catastrophic failure down the road.
Frequently Asked Questions
When you're planning a retaining wall project, a lot of questions come up. It's only natural. Especially here in Atlanta, where our unique soil and weather can throw a few curveballs. Let's tackle some of the most common things people ask so you can move forward with confidence.
What’s the Real Cost of a Block Retaining Wall in Atlanta?
This is usually the first question on everyone's mind, and the answer really depends on the scale of your project. The height of the wall, the specific blocks you choose (for instance, a decorative, textured block can cost twice as much as a standard one), and even how tricky it is to get materials to your site all play a role.
If you’re tackling this yourself, you should budget for materials in the range of $15 to $25 per square foot. For a 100-square-foot wall, that's a material budget of $1,500 to $2,500, not including tool rentals.
Bringing in a professional crew? The all-in cost typically lands between $30 and $60+ per square foot. That price can climb if your project has extra layers of complexity, like needing an engineer's stamp of approval, a ton of excavation, or a fancy curved design.
What’s the Best Foundation for a Wall in Georgia Clay?
You can’t talk about building in Georgia without talking about our infamous red clay. For a retaining wall to last, you absolutely need a solid base of compacted ¾-inch crushed stone. Just ask any local supplier for #57 stone—they'll know exactly what you need.
Don't even think about cutting corners here. We recommend a base that's at least 6 inches deep and extends 6 inches in front of and behind the block. This gives water a place to go and keeps the wall stable as that clay expands and contracts through our hot summers and wet winters. Building directly on topsoil or uncompacted clay is a guaranteed way to watch your hard work fail.
It’s worth remembering that a well-built segmental block wall is a serious long-term investment. With a rock-solid foundation, proper drainage, and good materials, it can easily last 50 to 100 years. The single biggest threat is water pressure building up behind it, so getting the drainage right is everything.
Can I Put a Retaining Wall on a Steep Hill?
Building on a steep slope isn't just harder—it's a whole different ballgame. The amount of pressure the soil exerts is massive, and these projects almost always demand a professional design from a licensed engineer to be safe.
In my experience, the best approach for a steep grade is often a series of shorter, tiered walls instead of one giant one. This method is much better at distributing the load and is far more stable. For example, instead of one 8-foot wall, two 4-foot walls set back from each other creates a much more stable and visually appealing solution. If your property has a significant slope, I can't stress this enough: talk to an expert before you break ground.
Feeling like your project might be a bit more than you want to handle? The team at Atlanta Concrete Solutions lives and breathes this stuff. We have the local know-how to build complex retaining walls that are safe, look great, and are built to last a lifetime. For a professional consultation and a free quote, check us out at https://atlantaconcretesolutions.com.