Yes, you can absolutely put asphalt over concrete. It's a common practice for driveways and parking lots, but whether it’s a smart move or a future headache depends entirely on the condition of that concrete slab. When the concrete is in good shape, this can be a fantastic, budget-friendly way to get a new surface. For instance, a homeowner with a structurally sound but stained and faded 20-year-old concrete driveway can save thousands by opting for an overlay instead of a full demolition. But if that base is a crumbling mess, the new asphalt is just lipstick on a pig—it’s doomed to fail.
Understanding Asphalt Overlays on Concrete
Think of it like putting new siding on a house. If the house’s frame is solid, the siding looks great and protects the home for years. But if the frame is rotten and shifting, that beautiful new siding will warp, crack, and pull away in no time. Your concrete is the frame, and the asphalt is the siding. The new layer is only as good as the foundation it’s sitting on.
When done right, an asphalt overlay gives you a brand-new, smooth surface without the massive expense and disruption of tearing everything out and starting from scratch. It's a go-to method for big infrastructure projects for a reason. In fact, road construction eats up about 70% of all bitumen (a key asphalt ingredient) produced, which shows just how much we rely on overlays to keep our roads in good shape. For example, municipalities often use asphalt overlays on older concrete city streets to extend their life and improve ride quality without closing them for weeks for a full rebuild.
Key Factors for Success
Deciding to pave over concrete isn't just about taking a shortcut; it's a calculated decision that demands a hard look at what you're working with. Before a single drop of asphalt is laid, you have to check off a few crucial boxes:
- Structural Integrity: Is the concrete solid? We’re looking for a base free from major issues like heaving, big dips from settlement, or widespread, spiderweb-like "alligator" cracking. A good example of a solid base is a driveway where all slabs are level with each other and there are no signs of sinking or tilting.
- Surface Condition: A few minor hairline cracks? Usually not a dealbreaker. But deep, wide cracks are red flags signaling that the slab itself is failing, and an overlay won't fix that. If a crack is wide enough to fit a car key into, it likely needs more than just a simple overlay.
- Proper Drainage: Water is the enemy. The existing slab must have a good slope to direct water away. If water gets trapped between the concrete and the new asphalt, it's going to cause serious problems, especially during freeze-thaw cycles. A clear example is a driveway that slopes gently toward the street, allowing rainwater to run off completely.
The Challenge of Reflective Cracking
The biggest ghost in the machine for this kind of project is reflective cracking. This is what happens when the joints and existing cracks in the concrete eventually transfer, or "reflect," straight up through the new asphalt. Asphalt is flexible, and concrete is rigid. Any movement in those concrete slabs below—expanding in the summer heat, contracting in the winter cold, or shifting slightly under load—will eventually show up on the surface.
The core principle is simple: An asphalt overlay inherits the strengths and weaknesses of the concrete base. A stable base leads to a durable surface, while a flawed one guarantees premature failure.
This is why proper prep work is everything. We'll get into the specific steps later, but things like cleaning, crack filling, and applying a special tack coat are non-negotiable. They are what minimize this risk and create a lasting bond. The success of projects like these almost always comes down to the quality of the prep work, as you can see in these professional paving projects.
Before we dive deeper, here’s a quick summary to keep in mind.
Asphalt Over Concrete At a Glance
This table breaks down the essentials—the good, the bad, and the non-negotiables—when you're considering paving over an existing concrete surface.
| Consideration | Key Details & Examples |
|---|---|
| Ideal Conditions | Structurally sound concrete with only hairline cracks. Example: A 15-year-old driveway that is level and has proper drainage but is cosmetically worn. |
| Primary Benefit | Significant cost and time savings. Example: Paving a 1,000 sq ft driveway might cost $3,000-$5,000, versus $8,000-$12,000 for a full tear-out and replacement. |
| Major Risk | Reflective cracking, where concrete joints reappear in the new asphalt within 2-5 years if prep work is poor. |
| Best For | Driveways, parking lots, or pathways where the concrete base is stable but the surface needs renewal. |
Getting these basics right from the start is the difference between a project that lasts for years and one that needs fixing again next season.
How to Evaluate Your Existing Concrete Surface
Before you can even think about paving over concrete, you have to play detective. The existing slab tells a story, and it's your job to read it. Is it a story of stability, or one of underlying failure? An honest, hands-on evaluation is the single most important step you'll take—it's what separates a lasting investment from a costly mistake.
Think of it like being a home inspector for your driveway or parking lot. You're looking for the difference between a few cosmetic blemishes and the tell-tale signs of a deep, structural problem. A beautiful asphalt overlay is only as good as the foundation it sits on, and this inspection will tell you exactly what you're working with.
Reading the Cracks: What Are They Telling You?
Cracks are the most obvious clues, but you have to know what you're looking at. They're not all the same, and understanding the different types is key to making the right call.
- Hairline Cracks: We're talking about very thin, shallow cracks, usually less than 1/8th of an inch wide. These are almost always from the concrete shrinking as it cured. They're not a structural red flag and can typically be cleaned and filled during prep work. An example is a fine crack that you can see but can't feel when you run your hand over it.
- Wide or Deep Cracks: Any crack wider than a quarter-inch is a major warning sign. It often means the slab has split right through, likely due to the ground shifting or bearing loads it couldn't handle. Just paving over these is a guaranteed way to see reflective cracking—the same exact crack pattern will show up in your new asphalt in no time.
- Alligator Cracking: If you see a web of interconnected cracks that looks like an alligator's back, stop right there. This is the classic sign of base failure. The soil or gravel underneath the concrete has given up, leaving the slab unsupported. Paving over this is like putting a band-aid on a broken bone. The problem is underneath, and the new asphalt will fail just as quickly.
For example, a homeowner with a few thin, random cracks across their driveway has a manageable situation. But if you see a commercial parking lot with those web-like alligator cracks near the entrance where heavy trucks turn? That’s a failing sub-base. It's a terrible candidate for an overlay.
Checking for Heaving and Settlement
Cracks are only part of the story. You also need to look at the overall landscape of the concrete. Grab a long, straight board or a level and check for high and low spots across the different slabs. Two big issues to hunt for are heaving and settlement.
Heaving is when a section of the slab pushes upward, creating a nasty trip hazard. This is often the work of freeze-thaw cycles or expansive clay soils that swell up when they get wet. For example, if one corner of a sidewalk slab is an inch higher than the next, that's heaving.
Settlement is the opposite—a slab sinks. This almost always points back to a poorly compacted sub-base or soil that has washed away over time. An example of this is a driveway slab sinking near the garage, creating a dip that collects water. Both problems create uneven stress points that will telegraph right through a new asphalt layer and tear it apart.
A stable, level concrete slab is the ideal canvas for an asphalt overlay. If your concrete looks more like a series of rolling hills than a flat plain, you're looking at a structural problem that an overlay cannot solve.
The Non-Negotiable Drainage Test
Water is public enemy number one for any kind of pavement. When it gets trapped, it erodes the base, makes cracks worse when it freezes, and can destroy the bond between the new asphalt and the old concrete. A solid drainage assessment is absolutely non-negotiable.
The easiest way to do this is to watch what happens after a good rainstorm (or just use a garden hose).
- Does water pool in certain spots for hours? Standing water points to low spots or improper grading. A puddle that's still there the next day is a major red flag.
- Does water flow away from buildings and toward a drain or the street? If it’s flowing back toward your garage or foundation, an overlay will only raise the surface and make a bad situation much worse.
- Are the joints between slabs packed with dirt and weeds? This is a dead giveaway that water is getting stuck in the joints instead of running off the surface. This trapped moisture can cause slabs to shift and heave.
You have to fix drainage problems before you even think about paving. While an asphalt overlay might help with minor surface flow, it will never fix fundamental grading issues. If your concrete slab is a poor foundation, the best move is almost always a full removal and replacement. That's the only way to guarantee you have a stable, properly graded base for a brand-new surface that will actually last.
The Essential Asphalt Overlay Preparation Process
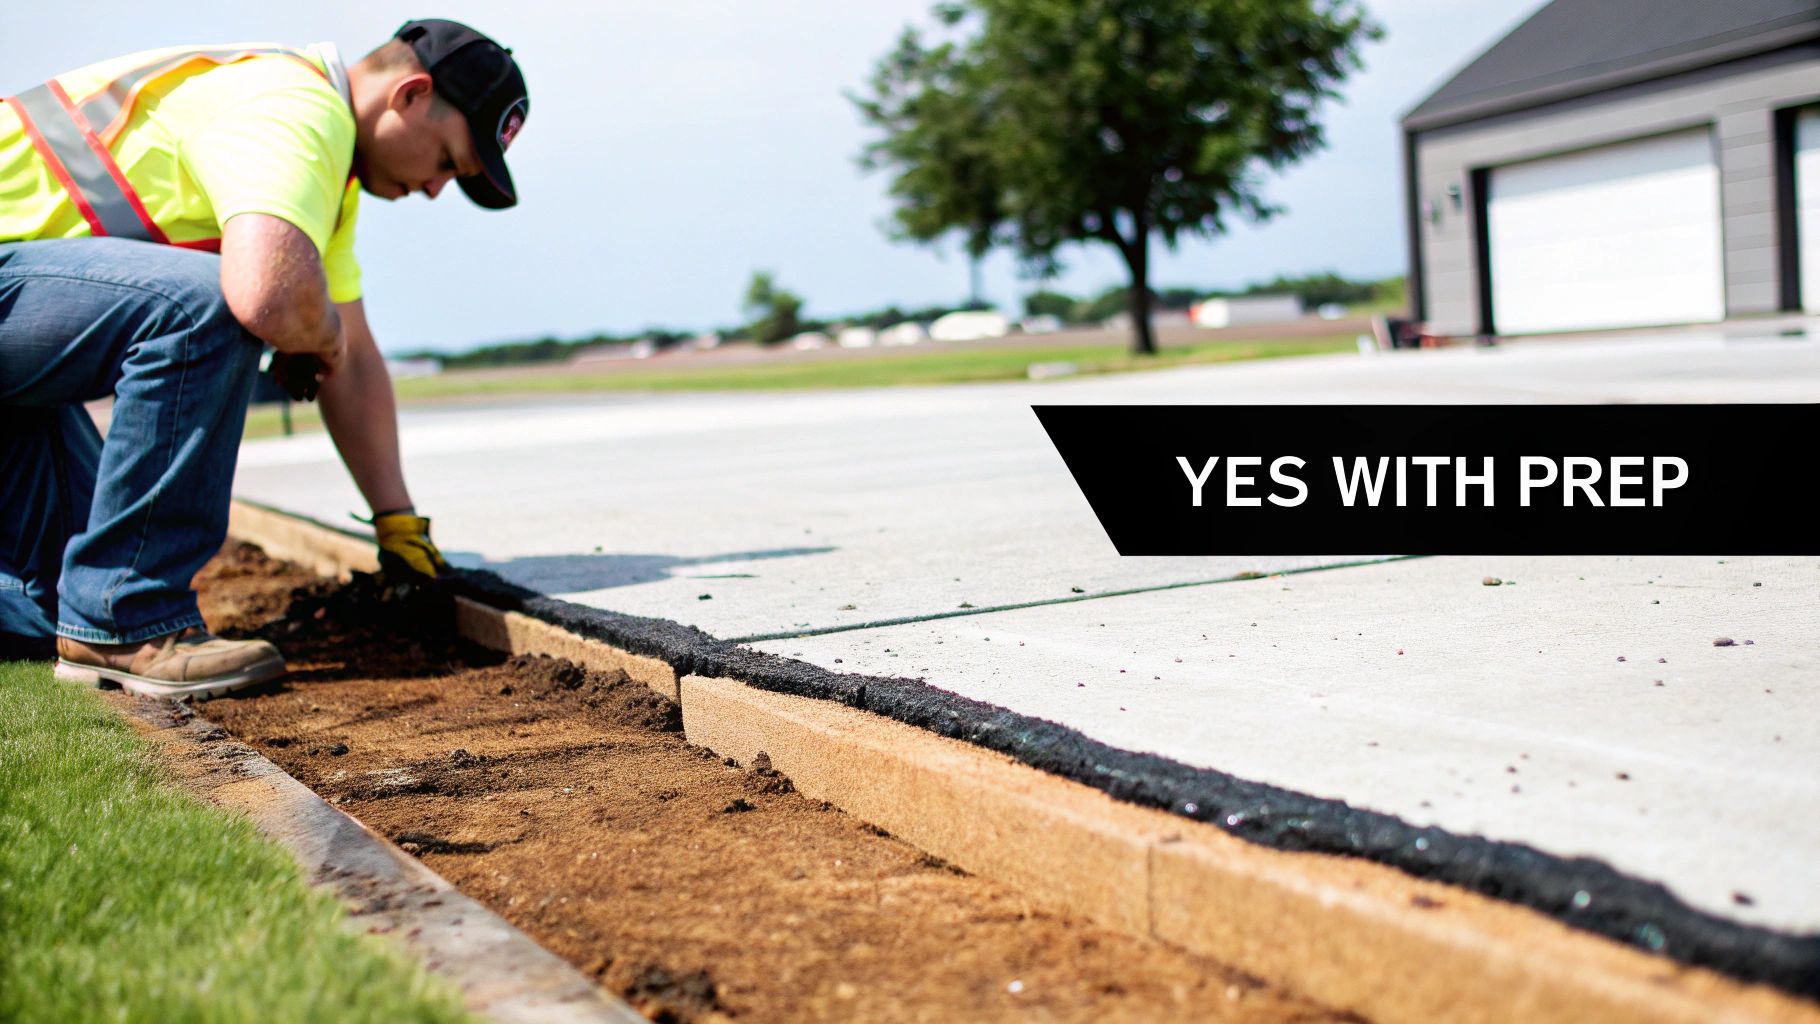
Once your concrete slab gets the green light, the real work begins. Here’s a little secret from the pros: the success of an asphalt overlay isn't determined when the hot mix shows up. It's all won or lost in the prep work. Cutting corners here is the number one reason these projects fail.
Think of it like painting a car. You wouldn't just spray a new coat of paint over dirt, rust, and old dings. You'd sand it down, fill the imperfections, and lay down a primer first. It's the exact same principle for paving—the prep work ensures the new asphalt can grab hold and act as a single, tough surface with the concrete underneath.
Intensive Surface Cleaning
First things first, the concrete needs a deep, thorough cleaning. Over the years, driveways and parking lots get coated in oil stains, grease, leaked fuel, and layers of grime. If you leave that stuff there, it acts as a bond-breaker, stopping the new asphalt from sticking properly.
This isn't a job for your garden hose. We bring in high-powered pressure washers (typically 3,000+ PSI) and industrial-grade degreasers to strip everything away. For example, a dark oil stain from a leaky car must be completely removed, as any residue will prevent the tack coat from adhering. The goal is a clean, porous surface that's ready to form a strong chemical bond with the tack coat.
Strategic Crack and Joint Repair
Next up, we have to deal with every significant crack and control joint. Simply paving over them is a recipe for disaster, leading to what we call reflective cracking. As the concrete naturally expands and contracts with Atlanta’s temperature swings, those old cracks will telegraph right up through your brand-new asphalt.
To stop that from happening, a good crew will:
- Clean Out Debris: Blast every crack and joint with compressed air to clear out dirt, weeds, and any loose bits of concrete.
- Apply a Filler: Inject a specialized, hot-pour rubberized sealant or a similar flexible filler deep into the cleaned-out cracks. This material is designed to stretch and compress with the concrete's movement.
- Level It Off: Make sure the filler is applied flush with the concrete surface so it doesn't create a bump under the new pavement.
This process doesn't magically "fix" the concrete, but it seals the cracks from water and creates a flexible buffer to absorb movement. It's a crucial step that can dramatically delay reflective cracking. For seriously damaged slabs, you may need some expert advice on specific residential concrete and masonry repair options before an overlay is even on the table.
This infographic gives you a peek into what a professional looks for during that initial inspection, well before any prep work starts.
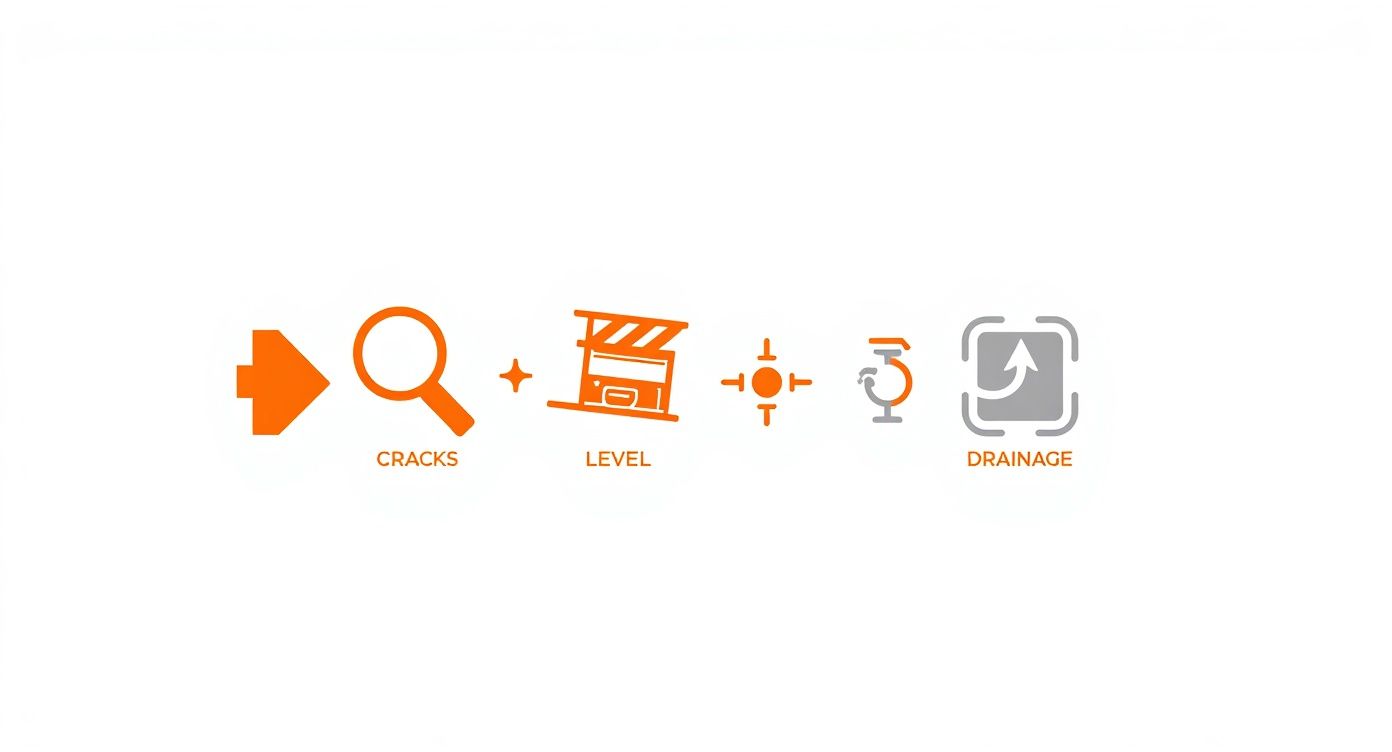
You can see how everything is connected—cracks can affect the levelness, which in turn impacts drainage. That's why a comprehensive look is so important.
Precision Leveling and Milling
An asphalt overlay demands a smooth, even base. Any major high spots or "bird baths" (low spots where water pools) in the old concrete have to be corrected. If a concrete slab has heaved up, we can use a technique called milling to grind down the high point and make everything level. For the opposite problem, we'll fill any depressions with a leveling course of asphalt before laying down the final surface layer. A good example is filling a 1-inch deep birdbath with a preliminary layer of asphalt binder to create a flat plane for the final surface.
The Critical Tack Coat Application
Finally, we get to what is arguably the most critical step of all: applying the tack coat.
A tack coat is to asphalt what primer is to paint. It’s a hot, liquid asphalt emulsion sprayed evenly across the entire prepared concrete surface. Its only job is to act as the superglue that chemically bonds the new hot mix asphalt layer to the old concrete slab.
Without a good tack coat, the new asphalt is just sitting there, ready to shift, slide, or peel away. This adhesive layer is what fuses the two materials into a single, monolithic structure, giving it the strength to handle cars, trucks, and the weather. The reliability of this bonding process is a huge reason why hot mix asphalt is so dominant in a global market valued at USD 65.91 billion. In fact, its 72.1% revenue share is largely thanks to its strength and suitability for projects just like this.
Weighing the Pros and Cons of an Asphalt Overlay
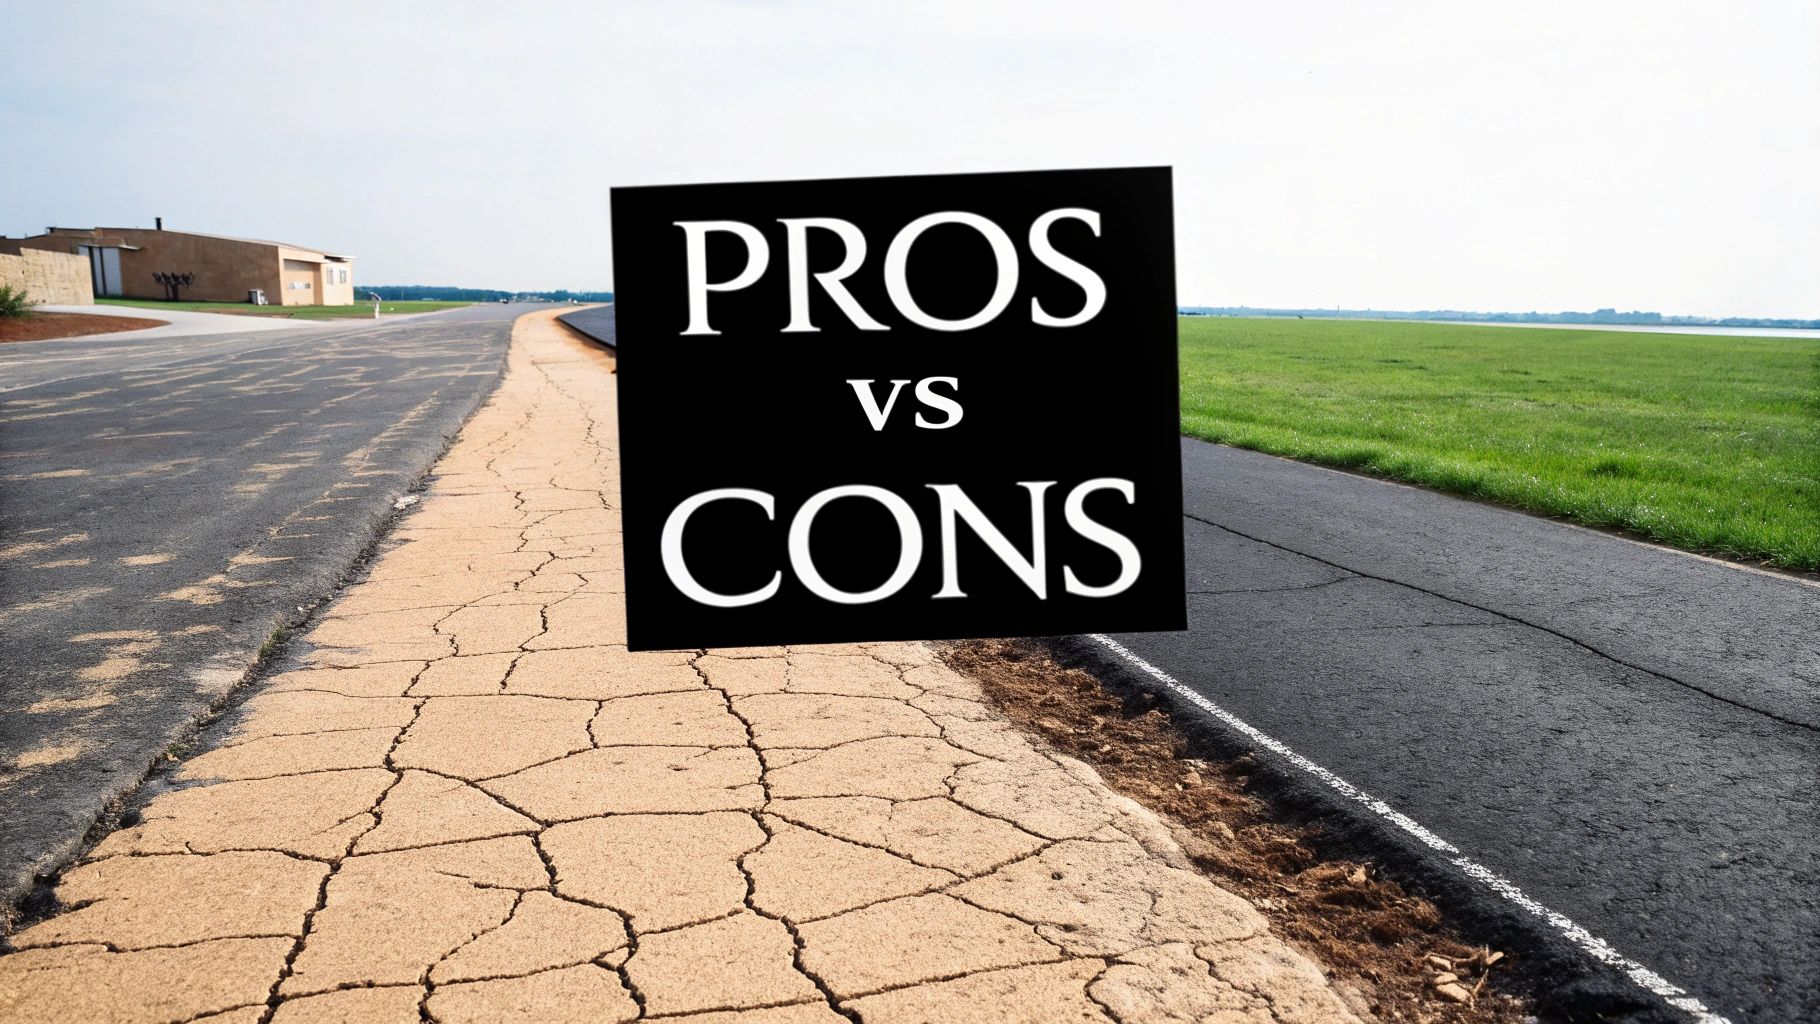
Deciding to install asphalt over an existing concrete driveway or parking lot is always a trade-off. It's a popular solution for a reason, but it’s certainly not foolproof. To figure out if it's the right move for your property, you have to honestly weigh the immediate wins against the long-term risks.
Think of it like putting new siding on a house. If the frame underneath is solid, it's a fantastic, cost-effective upgrade. But if the foundation is crumbling, you’re just putting a pretty face on a bigger problem that will eventually show through.
The Clear Advantages of an Asphalt Overlay
For many property owners, the big draws of an overlay come down to two things: time and money. When you're up against a tight budget or deadline, these benefits can make it a very tempting option.
- Significant Cost Savings: This is the big one. By skipping the demolition and disposal of the old concrete, you’re cutting out a huge chunk of labor and expense. It’s not uncommon to see cost reductions of 30-50% compared to a full tear-out and replacement. For a typical 600 sq. ft. driveway, this could mean saving $3,000 or more.
- Faster Project Timeline: Tearing out concrete is a noisy, messy, and time-consuming job. An overlay project, on the other hand, moves much faster. Most can be prepped, paved, and ready for use in just a couple of days, which means less disruption for your home or business.
- Instant Curb Appeal: Nothing beats the look of fresh, black asphalt. It immediately covers up old stains, cracks, and discoloration, giving your property a clean, uniform, and well-maintained appearance.
Imagine you’re a commercial property manager in Atlanta with a large, faded concrete parking lot that’s still structurally sound. An overlay lets you quickly refresh the entire property’s look before your busy season kicks in, all without draining your capital improvement budget.
The Unavoidable Disadvantages and Risks
While the upside is compelling, the potential downsides are directly tied to the future performance and longevity of your new surface. Overlooking these risks is a classic mistake that can lead to disappointment and costly repairs sooner than you’d expect.
The most critical thing to understand is this: The lifespan of an asphalt overlay is completely at the mercy of the concrete base it's covering. Any flaw in that original foundation will eventually work its way to the surface.
This fundamental dependency introduces a few major challenges you need to be aware of.
The Problem of Reflective Cracking
The number one enemy of an asphalt overlay is reflective cracking. It’s a simple concept: concrete is rigid and installed in separate slabs, but asphalt is flexible. As those concrete slabs underneath expand and contract with Atlanta's temperature swings, the stress transfers straight up.
Eventually, the grid pattern of the control joints and any existing cracks in the concrete will "reflect" right through the new asphalt. You'll see the exact same pattern appear on your beautiful new surface. While a good installation can delay this, it’s often a matter of when, not if, these cracks will show up. For example, the straight lines of the concrete expansion joints will often be the first to appear in the asphalt, sometimes within a few years.
Potential Drainage Complications
Paving adds a new layer of material, typically 1.5 to 3 inches thick, which raises the entire surface. If this isn't planned for, you can accidentally create a new drainage nightmare. Water that used to flow away might now be trapped against your garage, building foundation, or sidewalks.
This is why proper site prep is non-negotiable. A professional crew will mill down the edges at transitions to ensure water still has a clear path to run off. For instance, they might grind down a 3-foot wide strip of asphalt where the driveway meets the garage floor to create a smooth, seamless transition that doesn't block water. Just paving over the top without thinking about water flow is asking for trouble.
Asphalt Overlay vs. Full Replacement: A Head-to-Head Comparison
So, how do the two options really stack up? Seeing them side-by-side helps clarify which path makes more sense for your specific situation.
| Factor | Asphalt Overlay Over Concrete | Full Concrete Removal & Replacement |
|---|---|---|
| Upfront Cost | Lower (30-50% less) | Higher |
| Project Timeline | Faster (1-3 days) | Slower (1-2 weeks due to demolition & curing) |
| Disruption | Minimal | Significant (noise, dust, access) |
| Main Risk | Reflective cracking and base issues | Minimal (new stable base) |
| Lifespan | Shorter (8-15 years) | Longer (20-30+ years) |
| Best For | Stable concrete; budget/time constraints | Failing concrete; long-term investment |
Ultimately, the choice comes down to your priorities. An overlay is a great short-to-mid-term solution for a stable surface, while a full replacement is a true long-term investment in your property's foundation.
Costs, Timelines, and Finding a Qualified Contractor
Before you commit to any major property improvement, it's crucial to understand the practical side of things. Deciding to put asphalt over concrete isn't just about getting a new surface; you're investing in a whole process involving materials, skilled labor, and real expertise.
Getting a handle on the typical costs, project timelines, and—most importantly—how to spot a truly qualified contractor will give you the confidence to make the right call for your property.
It's a big industry. The global market for asphalt concrete is projected to hit over USD 4.68 billion, growing at nearly 6% each year through 2033. This boom is mostly thanks to new infrastructure and city growth, which shows that paving over existing surfaces like concrete is a well-established and smart way to get more life out of pavement. You can read more about the growth of the asphalt concrete market if you're interested in the trends.
Breaking Down the Cost of an Asphalt Overlay
The price for an asphalt overlay is almost always calculated by the square foot, but the final bill can swing wildly depending on a few key things. It’s less like buying something off a shelf and more like getting a custom quote tailored to your specific property.
Here are the main factors that will move the needle on your project's cost:
- Existing Concrete Condition: This is a big one. The more work your old concrete needs—for example, filling 100 feet of cracks versus 10 feet—the more you'll spend on labor and materials before a single drop of asphalt is laid.
- Asphalt Thickness: For a standard residential driveway, you're usually looking at 1.5 to 2.5 inches of new asphalt. If you need something thicker to handle heavier vehicles like an RV, opting for a 3-inch layer will increase material costs.
- Project Size and Accessibility: Big, open areas like a square parking lot often cost less per square foot because the crew can use large, efficient equipment. A narrow, winding driveway with tight corners requires more manual labor and can drive up the cost.
- Tack Coat Quality: While it's a small part of the total budget, using a high-quality tack coat to get a solid bond is non-negotiable for a job done right. Any good contractor will insist on it and factor it into their quote.
What to Expect for Project Timelines
One of the best things about an asphalt overlay is how fast it happens. A full tear-out and replacement can drag on for weeks, but an overlay is a much quicker affair.
For a typical residential driveway, the project usually unfolds like this:
- Preparation (Day 1): This is where the real work begins. The crew will spend several hours pressure washing, cleaning out cracks with an air compressor, filling them, and then applying that all-important tack coat.
- Paving (Day 2): The hot mix asphalt arrives, is laid down with a paving machine, and then compacted with heavy rollers to get that smooth, dense finish. This phase is often completed in just a few hours.
- Curing (24-72 Hours): The new asphalt needs a little time to cool down and harden. You can usually walk on it within 24 hours, but you’ll want to wait at least 48-72 hours before driving on it to avoid leaving tire marks, especially in hot weather.
How to Find a Qualified Contractor
Hiring the right contractor is, without a doubt, the most critical decision you'll make. A great crew can turn a challenging project into a success, while an inexperienced one can mess up even the most straightforward job. You need a pro who truly gets the specific challenges of paving asphalt over concrete.
When you're talking to contractors, don't just ask for the price. Ask about their process. A real professional will be happy to walk you through how they do the job right, not just tell you that they will.
Use this checklist to help separate the experts from the amateurs:
- How will you prepare my existing concrete surface before you start paving? (Look for mentions of power washing, crack cleaning, and filling.)
- What kind of tack coat do you use, and what’s your method for ensuring it's applied evenly? (A good answer involves spray application for full coverage.)
- How do you plan to handle the height transitions to my garage, sidewalks, and the street to make sure water drains properly? (They should mention milling or creating smooth transitions.)
- What specific steps do you take to prevent reflective cracking down the road? (Listen for details about high-quality crack fillers and sometimes fabric underlays for severe cases.)
A contractor who gives you confident, detailed answers to these questions is probably the right partner for your project. To get a better idea of what goes into professional-grade work, you can review the different types of concrete services that cover everything from new foundations to detailed repair jobs.
Answering Your Top Questions About Asphalt Overlays
When you're thinking about laying asphalt over an old concrete driveway or parking lot, a few key questions always pop up. Let's walk through the most common ones we hear from property owners here in Atlanta, so you can get a clear picture of what to expect.
How Thick Should the New Asphalt Be?
This is probably the number one question people ask. For most projects, such as a typical residential driveway that sees only cars and light SUVs, we recommend a new layer of asphalt between 1.5 and 3 inches thick after compaction. That’s really the sweet spot—it gives you a tough, long-lasting surface without adding too much weight or getting too expensive.
It's tempting to think that thicker is always better, but that's not the case here. Going beyond 3 inches can create a whole new set of problems. You might end up with an awkward lip at your garage entrance or where the driveway meets the sidewalk, which can cause trips or drainage headaches. We're aiming for the right balance of durability and practicality.
Will This Finally Fix My Puddles and Drainage Issues?
Here's the straight answer: an overlay can help water run off the surface, but it will not fix underlying grading problems. If your concrete already has low spots where water pools after it rains, simply paving over it means the new asphalt will just follow those same dips.
Think of it this way: an overlay is like putting new siding on a house with a crooked foundation. For a real fix, the prep work is everything. We need to mill down the high spots and build up the low areas before we even think about paving. For example, a "skin patch" of asphalt can be used to fill a low spot before the main layer is applied. That’s how you actually get the water to flow where you want it to go.
How Long Will an Asphalt Overlay Actually Last?
If the concrete base is solid and the job is done right, you can expect your new asphalt surface to last anywhere from 8 to 15 years. But that number depends heavily on a few key things.
The condition of the concrete underneath is the single most important factor. After that, it comes down to:
- Good Prep Work: A clean surface, properly filled cracks, and a high-quality tack coat make all the difference.
- Atlanta's Weather: Our mix of scorching summers that soften asphalt and surprise freeze-thaw cycles that expand cracks is tough on any pavement.
- Regular Upkeep: You absolutely have to sealcoat it every 3-5 years. This simple maintenance, which costs a fraction of a repaving job, protects the asphalt from sun and water damage and is the best way to maximize its lifespan.
Can You Just Pave Over My Stamped Concrete?
Paving over decorative surfaces like stamped or colored concrete is tricky. The unique textures and patterns that make stamped concrete look great also make it a terrible surface for a new asphalt layer to stick to. You just can't get a solid, even bond over a surface that mimics cobblestone or brick, for example.
To do it right, the surface needs serious prep. This almost always means we have to bring in a milling machine to grind down the entire stamped pattern. This creates a uniform, slightly rough surface that the tack coat and new asphalt can actually grab onto. Skipping this step is just asking for the overlay to fail, and fast.
Ready to see if an asphalt overlay makes sense for your Atlanta property? The team at Atlanta Concrete Solutions can give you a professional on-site evaluation and an honest recommendation. Get your free, no-obligation quote today and get started on a beautiful, durable new surface. Visit us at https://atlantaconcretesolutions.com to learn more.