Absolutely. Staining concrete is not only possible, but it's one of the best ways to completely transform a dull, gray slab into a beautiful, vibrant surface. Forget about paint, which just sits on top and eventually chips and peels. Staining is different. It soaks into the concrete, creating a rich, permanent color that becomes part of the slab itself. For example, a basic gray patio can be stained to look like rich, marbled brownstone, or a basement floor can be transformed into a warm, leather-like surface.
Yes, You Can Stain Concrete and Transform Your Space
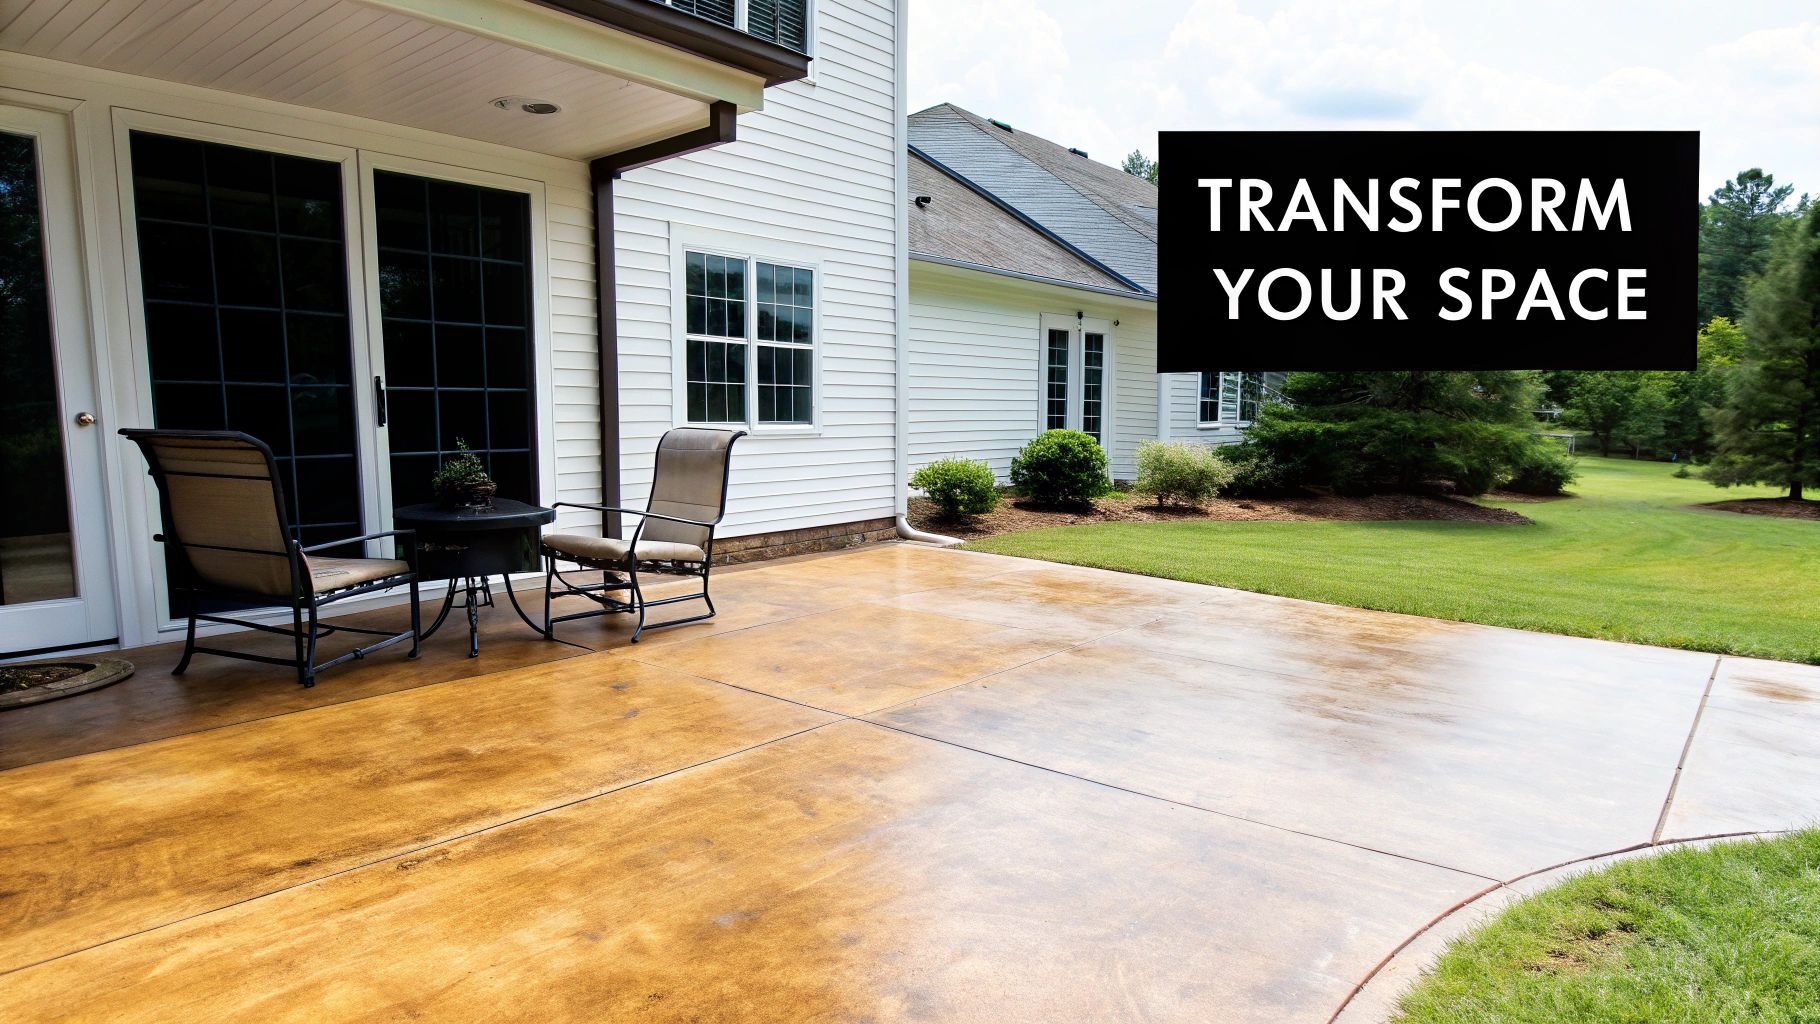
If you're like many Atlanta homeowners, you've probably looked at a plain concrete patio, driveway, or basement floor and seen its untapped potential. The fantastic news is that staining offers a practical and absolutely stunning solution to bring that vision to life.
Think of it like staining a piece of wood. The stain doesn't hide the grain or unique character of the material; it enhances it. By penetrating deep into the concrete's pores, the stain creates a durable, translucent finish that lets the slab's natural variations and texture shine through. The result is often a marbled, stone-like appearance that brings a real sense of depth and sophistication to any area. For example, minor imperfections and subtle texture differences in the concrete will absorb the stain differently, creating natural highlights and lowlights that mimic materials like granite or aged flagstone.
A Growing Trend in Home and Property Enhancement
More and more, homeowners and business owners are catching on to just how smart an investment decorative concrete is. It's a proven way to boost both the look and value of a property, and the market numbers back that up. For instance, a beautifully stained concrete driveway can significantly increase curb appeal, making a property more attractive to potential buyers.
Market analysis projects the global concrete stains market to jump from USD 1.47 billion to USD 2.14 billion by 2033. North America is the biggest player, commanding over 40% of the market. Acid-based stains are particularly popular, holding a dominant 55% share thanks to their uniquely beautiful and long-lasting results.
This isn't just a fleeting trend. It shows a real shift in how we view our functional surfaces—they're no longer just utilitarian slabs but key design elements of our homes.
Endless Possibilities for Your Home
Whether your concrete is freshly poured or has been around for decades, staining opens up a world of creative possibilities. It’s an incredibly versatile technique that works just as well indoors as it does outdoors.
To give you a better idea of what's possible, here’s a quick overview with some specific examples.
Quick Guide to Concrete Staining Possibilities
| Surface | Staining Potential | Common Applications & Examples |
|---|---|---|
| Patios & Pool Decks | High | Create an inviting outdoor oasis with warm, earthy tones like terra cotta or sandy tan. |
| Driveways & Walkways | High | Achieve an elegant, slate-gray or deep brown look for stunning curb appeal. |
| Basement Floors | Excellent | Turn a cold, sterile space into a warm, finished living area with a rich coffee or amber finish. |
| Garage Floors | Excellent | Get a polished, high-end look that’s also incredibly tough, for example, a solid charcoal gray or a marbled design. |
| Interior Floors | High | Perfect for kitchens or sunrooms with a variegated, stone-like appearance. |
As you can see, the options for transforming your property are extensive.
By staining these surfaces, you're not just improving their appearance for the short term. You’re investing in a durable, long-lasting solution that adds real value and enjoyment to your home for years to come. Check out our guide on residential decorative concrete to see even more incredible examples of what's possible.
Choosing Your Stain: Acid-Based vs. Water-Based
So, you've decided to stain your concrete. Great choice! Now comes the fun part: picking the right type of stain. This decision is everything, as it will completely shape the final look of your floors, patio, or driveway. The two main players on the field are acid-based stains and water-based stains, and they couldn't be more different in how they get the job done.
Think of an acid-based stain as a true chemical process. It’s not paint. It actually reacts with the lime and minerals already inside your concrete slab. This reaction permanently changes the concrete's color, creating a look that's rich, deep, and full of unique character. For example, the same brown acid stain applied to two different slabs can result in one looking like weathered bronze and the other like rich mahogany, depending on the concrete's composition.
A water-based stain, on the other hand, works more like a high-tech dye. It’s made of super-fine pigments that seep into the concrete's pores and lodge themselves there, depositing color without a chemical reaction. This gives you a level of control and predictability that acid stains just can't match. This means you can create a uniform, solid black floor or a vibrant, ocean-blue patio.
The Artistic Charm of Acid-Based Stains
If you love the look of natural stone, aged leather, or something with an organic, earthy feel, an acid-based stain is probably for you. Because it's a chemical reaction, the results are always one-of-a-kind. Seriously, no two acid-stained floors will ever be identical.
That unpredictability is what many people find so appealing. The stain creates these beautiful, marbled patterns with translucent tones that bring a sophisticated, high-end vibe to any space. Imagine a patio that looks like weathered flagstone or a basement floor with the warm, variegated look of worn leather. That’s the magic of acid.
But this artistic quality comes with a catch: the color palette is pretty limited. You’re working with what the chemistry gives you, which means you'll mostly find:
- Examples: Rich, deep browns (like walnut or coffee), subtle tans (like sand), warm terra cottas (like fired clay), and soft, watery blue-greens (like oxidized copper).
You won't find a fire-engine red or a deep navy blue in an acid stain. The colors come from the metallic salts in the stain reacting with the concrete itself.
The Bold Versatility of Water-Based Stains
What if you have a very specific vision? Maybe you want a sleek, solid gray for your modern loft, a bold checkerboard pattern for your garage, or even your company logo right on the showroom floor. For that kind of precision, you’ll want a water-based stain.
Since it works by depositing pigment, the color is far more uniform and predictable. What you see on the color chart is pretty much what you’ll get on the floor. For example, if you want a bright red and crisp white pattern for a retro-style diner floor, water-based stains are the only way to achieve it.
This opens up a whole world of creative possibilities. Sharp lines, intricate stencils, and custom graphics are all on the table. You can get crisp, consistent color that stands out.
Water-based stains are also the more eco-friendly option, with very low to zero Volatile Organic Compounds (VOCs). This makes them a fantastic choice for indoor projects, especially in living areas like kitchens and basements where air quality is a big deal.
The color spectrum is massive. From brilliant whites and deep blacks to practically any vibrant shade you can think of, a water-based stain can match any design scheme. It's the go-to for modern, custom looks.
A Head-to-Head Comparison
To help you decide, it’s useful to see them side-by-side. Understanding these key differences will make sure the final result is exactly what you were hoping for.
Acid-Based Stain vs Water-Based Stain
| Feature | Acid-Based Stain | Water-Based Stain |
|---|---|---|
| Color Effect | Translucent, marbled, variegated (e.g., natural stone look) | Opaque, uniform, consistent color (e.g., solid gray or blue) |
| Color Palette | Limited earthy tones (browns, tans, blue-greens) | Wide spectrum of colors (reds, blues, blacks, etc.) |
| Application | Chemical reaction, requires neutralization | Simple penetration, no reaction |
| Best For | Achieving a natural, one-of-a-kind look | Creating custom designs, logos, and bold, solid colors |
| VOC Level | Low | Very Low to Zero |
| Durability | Color becomes part of the concrete | High, but is a coating that can wear |
At the end of the day, the choice boils down to your aesthetic goal. Are you after the organic, unpredictable beauty that comes from a chemical reaction? Or do you need the control and consistent color of a modern dye? Both can look absolutely incredible and last for years when done right.
Can Your Concrete Actually Be Stained?
Not every concrete slab is a blank canvas just waiting for color. Because concrete stains are translucent, they’re designed to enhance the surface, not cover it up like paint. This means every bit of your concrete's history—its age, condition, and past life—will play a role in the final look. Before you fall in love with a particular color, you need to figure out if your concrete is even a good candidate.
Taking the time to understand what you're working with is the single most important step. It sets you up for realistic expectations. For example, a 20-year-old garage floor that has had oil spilled on it will stain very differently than a newly poured patio. A few minutes of assessment now can save you a world of disappointment later.
What Makes or Breaks a Staining Project
At the end of the day, a successful staining job comes down to one thing: porosity. The stain has to be able to soak into the concrete's pores. Anything getting in the way of that will ruin the final result. It's a lot like trying to stain a piece of wood that's already been sealed or painted—the stain just sits on top, unable to penetrate.
Several common issues can create a barrier and stop the stain from doing its job. Here are the main things you need to be on the lookout for, with examples:
- Existing Sealers or Coatings: If your concrete has an old sealer, paint, or curing compound on it, that layer has to come off completely. For example, a clear acrylic sealer on a patio must be chemically stripped or ground off first.
- Deep-Set Stains: Oil and grease are the classic culprits. A dark oil stain from a car leak in the garage, for instance, will prevent the stain from absorbing, leaving a light, unstained spot in the shape of the spill.
- Glue and Mastic Residue: This is a big one. For example, after removing old vinyl tiles from a basement floor, the sticky black adhesive left behind will create a negative image of the old tile grid if not completely ground away.
- The Surface Condition: Small, hairline cracks can actually add some cool, rustic character. But major issues like spalling (where the surface is flaking off) or wide cracks will be highlighted, not hidden. You'll need to patch those up beforehand.
The Simple Water Test: Your DIY Porosity Check
So, how do you know if your concrete is ready to drink up that stain? Luckily, there’s a dead-simple test you can do yourself in a matter of seconds. All you need is a glass of water.
The Water Test: Just pour a little bit of water onto a few different spots on the slab. Now, watch closely. If the water immediately darkens the concrete and soaks in within a minute or two, you’re in business. That means the slab is porous and ready for staining.
If the water beads up on the surface and just sits there, you've got a problem. That's a tell-tale sign of a sealer or some other contaminant blocking the pores. That barrier will have to be stripped or ground off before you can even think about applying stain.
When Staining Just Isn’t the Right Move
Look, while most concrete can be brought back to life, some slabs just aren't good candidates for staining. For example, if your concrete is incredibly old and crumbly, riddled with deep, sprawling cracks, or severely damaged from years of salt and freeze-thaw cycles, staining is probably a bad idea. It will only make all those flaws more obvious.
For slabs in really rough shape, you're much better off looking into a concrete overlay. Think of it as a fresh start—a thin, new layer of a cement-based mix is applied right over your old slab. This gives you a brand-new, perfectly smooth surface that's an ideal canvas for staining or any other decorative finish you want. It’s the perfect way to get that beautiful stained look without tearing everything out and starting from scratch.
The Professional Staining Process from Start to Finish
Getting that flawless, durable finish on your concrete is about much more than just slapping on some color. A true professional follows a methodical, multi-stage process where every single step builds on the last. If you rush or skip a step, the entire project can be compromised, which is why we have a proven system to guarantee a beautiful result that lasts for years.
Think of it like getting a high-end paint job on a classic car. You wouldn't just spray new paint over old rust and dirt, would you? Of course not. You'd have it meticulously cleaned, sanded, and primed. Staining concrete requires that same obsessive level of care to create a finish that truly becomes one with the slab itself.
Let's walk through the four critical stages of a professional job.
Stage 1: Surface Preparation
This is, without a doubt, the most important part of the entire job. A shocking 90% of stain failures can be traced right back to poor prep work. The goal here is simple: create a clean, porous, and perfectly neutral canvas that’s ready to drink in the stain evenly.
This phase usually involves a few key steps with specific examples of what we do:
- Deep Cleaning: We use industrial-grade degreasers and 3500-PSI power washers to remove surface dirt, grime, and even stubborn oil spots from a garage floor.
- Stripping Old Coatings: If an old, flaky paint is present, we use powerful diamond grinders to mechanically grind it off, revealing the fresh concrete underneath.
- Opening the Pores: For a very smooth, hard-troweled slab, we often use a light muriatic acid solution to gently etch the surface, giving it the texture of fine-grit sandpaper so it can properly absorb the stain.
Proper prep ensures the stain soaks deep into the concrete instead of just sitting on top. That’s the real secret to rich, permanent color.
This simple flowchart shows the initial check every pro performs before even thinking about prep work.
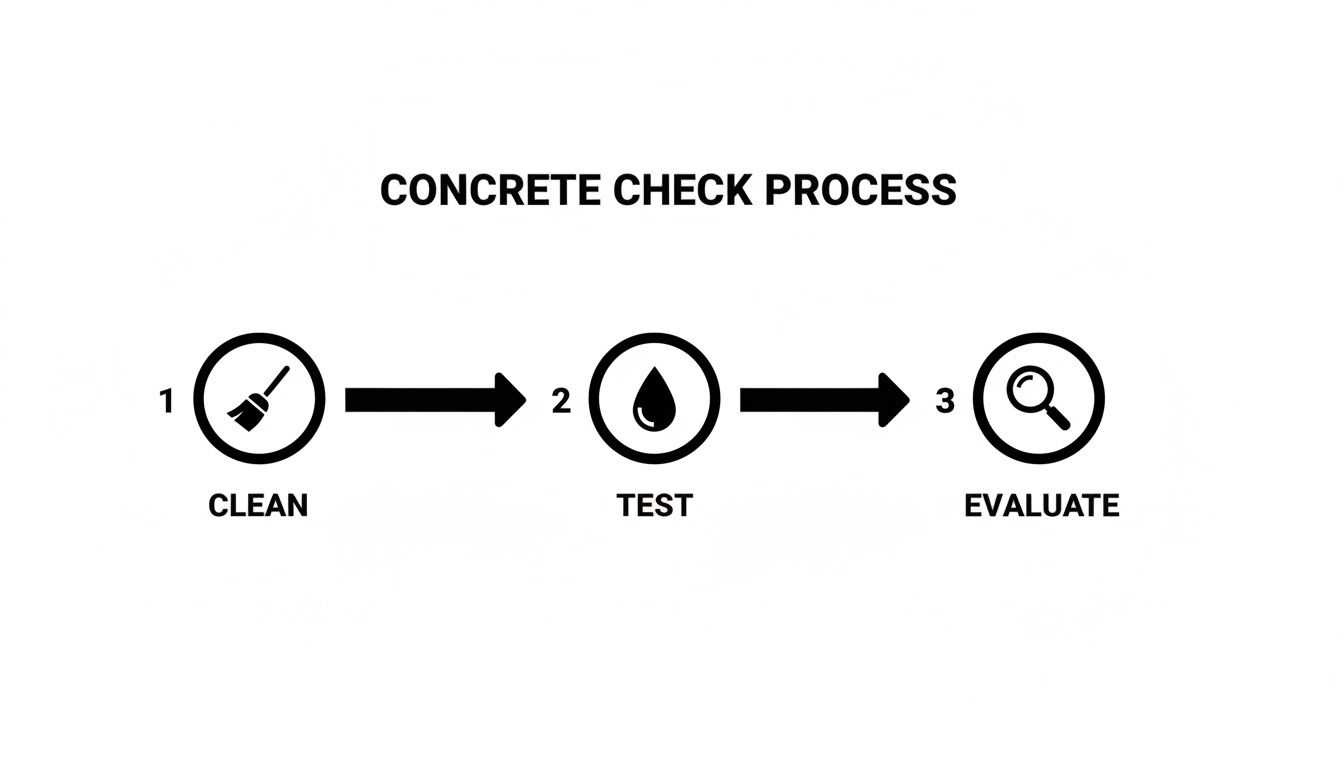
This initial evaluation tells us exactly which cleaning and profiling methods are right for your specific slab.
Stage 2: Stain Application
Once the concrete is perfectly prepped and bone dry, the real artistry begins. When it comes to applying the stain, technique is everything. An amateur application can easily leave behind ugly streaks, roller marks, or a blotchy mess that completely ruins the look.
Professionals rely on specialized gear, like HVLP (High Volume, Low Pressure) sprayers, to apply the stain in fine, even coats. For example, we might apply a base color of sandy tan and then lightly mist a darker brown over it in a random, circular motion to create a beautiful, layered, marbled effect. For custom graphics or multi-color designs, this step involves painstaking taping and layering to get those crisp, clean lines just right.
Stage 3: Neutralization and Cleanup
This step is an absolute must when working with acid-based stains. The acid’s job is to react with the lime in the concrete, but you have to stop that reaction once you've got the color you want. If left unchecked, the acid can keep eating away at the surface.
To stop the chemical reaction cold, we apply a neutralizing solution—usually a mix of water and ammonia or baking soda—across the entire floor. This brings the concrete's pH level back to neutral. For instance, you will see the solution foam slightly as it works. Afterward, the surface is rinsed thoroughly to wash away any leftover stain residue. This is critical for making sure the final sealer can get a proper grip.
Stage 4: Sealing and Curing
The final stage is arguably just as important as the first. The sealer is what protects your beautiful new floor from the real world. A high-quality sealer acts as a clear, protective topcoat, guarding the color against foot traffic, moisture, scuffs, and—for outdoor surfaces—the brutal UV rays from the Georgia sun. You can see how incredible these finished, sealed surfaces look by checking out a gallery of professional concrete staining projects.
We apply several thin coats of a compatible sealer (urethane for a garage, acrylic for a patio). For outdoor areas like pool decks and walkways, we always mix a slip-resistant additive into the final coat for safety. Once the last coat is down, the surface needs time to fully cure—usually 24-72 hours—before it’s ready for foot traffic and its brand new life.
What About Cost, Durability, and Upkeep?
Once you see how beautiful stained concrete can be, the practical questions always follow: How much does it cost? How long is it going to last? And what do I have to do to keep it looking good?
These are the right questions to ask, and the answers are why stained concrete is such a smart investment. It delivers a high-end, custom look without the high-end price tag or the demanding maintenance that comes with materials like hardwood or natural stone.
Unlike paint, which just sits on the surface waiting to get scuffed up, stain works its way deep into the concrete's pores. The color becomes part of the concrete itself. That's a crucial difference—it means you’ll never see it chip, flake, or peel. This built-in durability is exactly why it’s a fantastic long-term choice for just about any space, inside or out.
How Long Will Stained Concrete Really Last?
Once your concrete is stained and sealed, it’s incredibly resilient. The real lifespan of the finish boils down to two things: where it is and how good the protective sealer is.
For interior floors, for example, a stained basement floor that sees regular family use can easily look great for 15-20 years or more before the sealer might need refreshing. Tucked away from the elements, these floors are easy to care for and hold up beautifully against everyday life.
Exterior surfaces here in the Atlanta area have a tougher job. A stained concrete patio, for instance, must deal with the Georgia sun, heavy rain, and seasonal temperature swings. All of that puts the sealer to the test. While the stain itself is permanent, the sealer will wear down over time. To keep the color looking rich and protected from the elements, you should plan on having a fresh coat of sealer professionally applied every 3 to 5 years.
Keeping It Looking Great is Simple
Honestly, one of the best things about stained concrete is how little work it takes to maintain. You can forget about special chemicals or back-breaking cleaning routines.
- Daily Care: A quick sweep with a microfiber dust mop is usually all it takes to handle dust and dirt on an interior floor.
- Deeper Cleaning: For muddy footprints on a stained patio, just use a garden hose and a soft-bristle broom with a pH-neutral cleaner.
- Smart Protection: Little things make a big difference. Put felt pads under heavy furniture legs and use welcome mats at doorways to cut down on scratches and wear on the sealer.
- What to Avoid: Steer clear of harsh, acidic cleaners like vinegar. They can eat away at the sealer and leave your floor looking dull.
This "set it and forget it" appeal is a huge reason stained concrete has become so popular. Data shows stain penetrates 1-4 mm into the concrete, making the color far more resistant to fading and wear than any paint could ever be. This durability explains why the commercial market for stained concrete is expected to hit USD 1,260 million by 2035.
Breaking Down the Costs
So, what should you actually budget for a project like this? The final price isn't a simple square-foot calculation. A few key things will shape the total cost.
The price to stain concrete isn’t just for the materials. It’s a reflection of the prep work, labor, and artistry needed to get a beautiful, long-lasting result. More often than not, the condition of your existing concrete is the single biggest factor in the final cost.
Here’s what a professional contractor will look at when putting together your quote, with examples:
- Size of the Project: A large 1,000 sq. ft. driveway will have a lower price per square foot than a small 150 sq. ft. entryway patio.
- Condition of the Concrete: A newly poured, clean slab will be less expensive to stain than an old basement floor that requires grinding to remove old carpet glue and patching several cracks.
- Type of Stain: While material costs are similar, an acid stain job might be slightly more expensive due to the extra labor involved in neutralization and cleanup compared to a simple water-based stain application.
- Complexity of the Design: A simple, single-color application of brown stain is the most budget-friendly. A complex design, like a two-color checkerboard pattern with a 4-foot company logo stenciled in the middle, will cost significantly more due to the detailed labor required.
It's also worth looking into related finishes like residential polished concrete, which offers a different kind of beauty but shares many of the same durability and cost factors. The best way to know for sure is to get a detailed quote that breaks down how each of these elements applies to your specific space.
Why Hiring a Professional Staining Contractor Matters
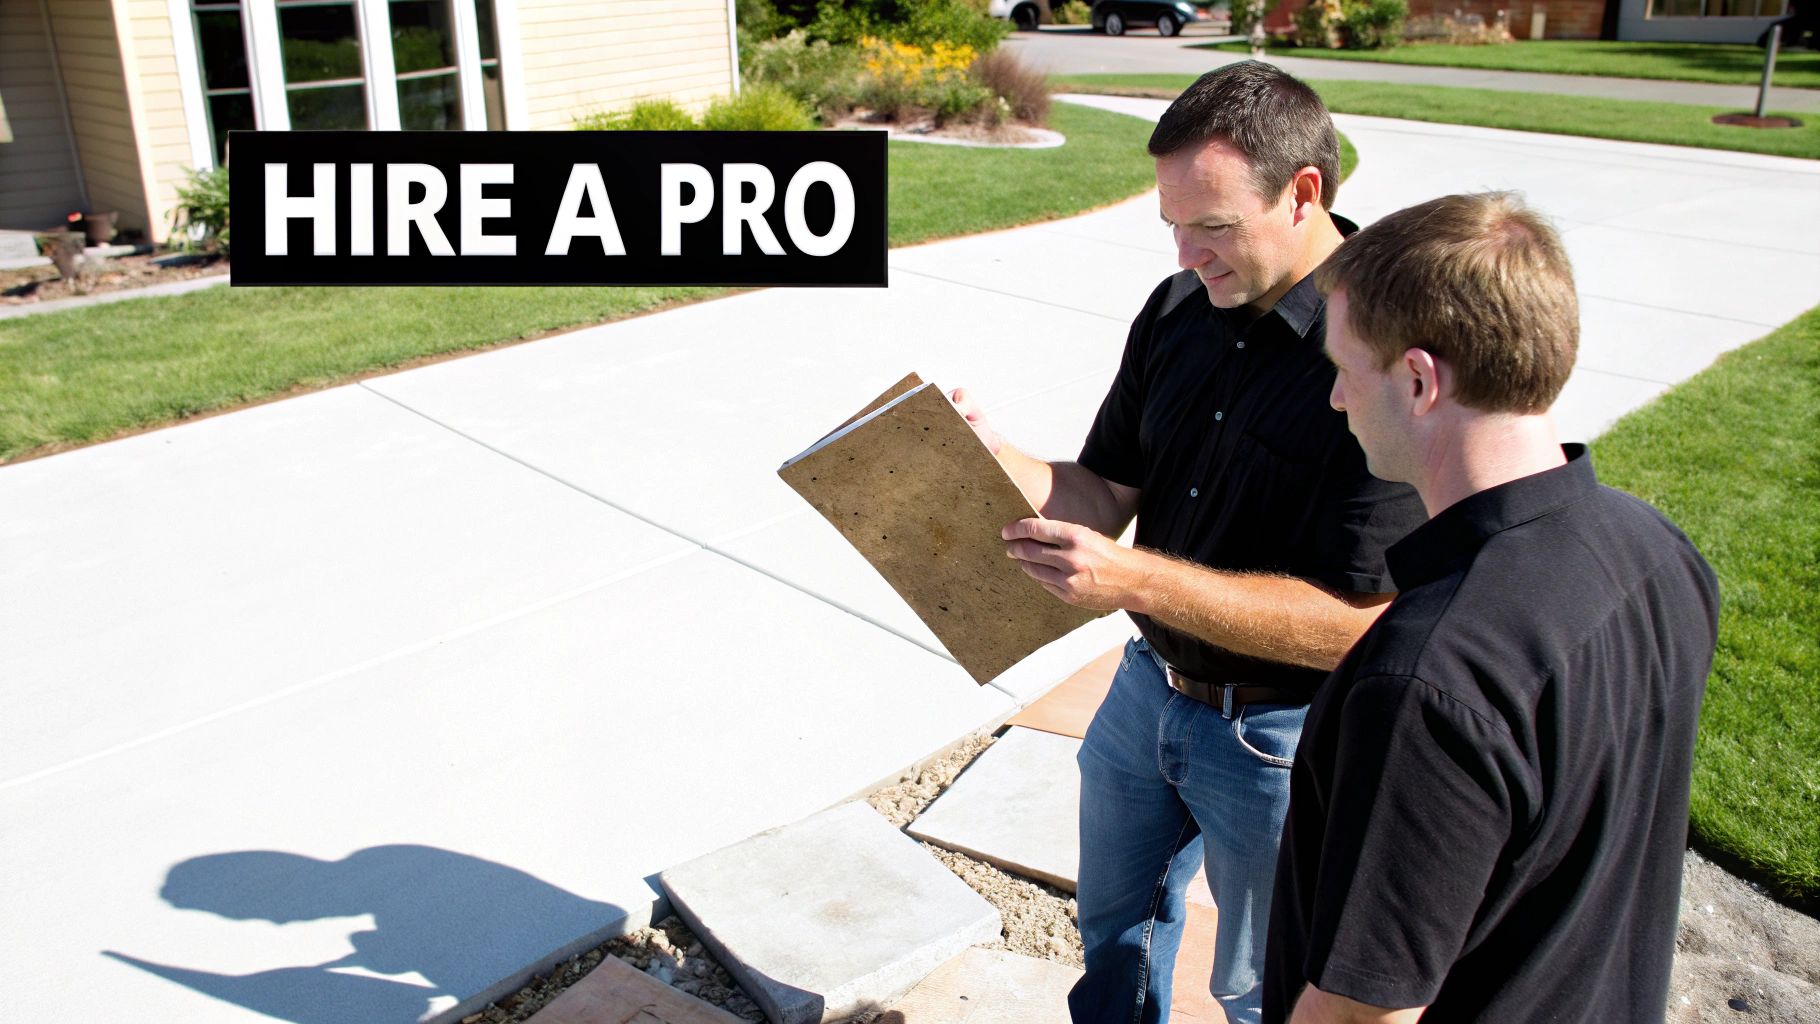
It’s easy to see those DIY concrete staining kits at the hardware store and think it's a simple weekend project. But the truth is, staining concrete is less like painting a wall and more like finishing a beautiful piece of hardwood. It’s an art form guided by chemistry, and it’s incredibly unforgiving. One small mistake can leave you with a permanent, blotchy mess that’s costly to fix.
This is where a pro’s experience really shines. A seasoned contractor knows that every concrete slab has its own personality. For example, they can recognize that a slab poured in summer will be much denser than one poured in winter, and adjust their etching process accordingly to ensure proper stain absorption.
Common DIY Pitfalls and How Pros Avoid Them
DIY staining projects often go south in a few predictable ways, turning what was supposed to be a beautiful upgrade into a source of constant frustration. Professionals have the experience—and the right gear—to navigate these common traps.
Here are a few of the most frequent DIY mistakes I've seen:
- Blotchy, Uneven Color: For example, a homeowner fails to completely remove faint oil spots on their garage floor. The stain can't penetrate those areas, resulting in light, unattractive blotches all over the finished surface.
- Lap Marks and Streaks: An example of this is when someone uses a roller to apply stain and you can see every single line where the wet edge of the roller overlapped a partially dried section, creating a striped or "tiger stripe" effect.
- Sealer Failure: A common DIY mistake is applying sealer on a humid day, trapping moisture underneath. This turns the clear sealer into a cloudy, milky-white mess that completely obscures the beautiful stain color.
Hiring a professional isn't just another project cost; it's an investment in your property's value and your own peace of mind. It’s the difference between a floor you have to live with and a floor you’ll love for years to come.
The Professional Advantage: Equipment and Expertise
Beyond just avoiding mistakes, professionals deliver a level of quality that a DIY kit could never replicate. A true expert has invested thousands in specialized equipment that is absolutely essential for getting a flawless result.
Industrial-Grade Grinders: For example, when removing old epoxy coating from a basement floor, a professional uses a planetary grinder with diamond tooling. This is the only way to effectively strip the coating and create a perfectly profiled surface for the new stain.
Specialized Application Tools: Professionals rely on HVLP (High Volume, Low Pressure) sprayers that turn the stain into a fine, controllable mist. This allows them to create subtle, blended color transitions, such as fading from a dark walnut brown at the edges to a lighter amber color in the center of a room.
Knowledge of Materials: A pro knows that a high-traffic retail entryway requires a durable two-part urethane sealer, while a residential patio that gets a lot of sun needs a UV-stable acrylic sealer that won't turn yellow over time. This expertise ensures the finish is not only beautiful but built to last.
In the end, a professional contractor manages the whole process—from painstaking prep to the final coat of sealer—with a precision that only comes from years of hands-on experience. They can troubleshoot problems on the fly and guarantee a durable, gorgeous outcome. So when you ask, "can you stain concrete professionally?", the answer is a process that protects you from costly errors and ensures the final result genuinely enhances your home’s value.
Your Concrete Staining Questions, Answered
It's one thing to see pictures of beautiful stained concrete, but it's another to commit to it for your own home. You've probably got some questions, and that's a good thing. Let's walk through some of the most common things homeowners ask us before they decide to stain their concrete.
How Long Does Stained Concrete Last?
The color itself? Pretty much forever. Unlike paint that sits on top of the surface, stain soaks into the concrete, becoming a permanent part of the slab itself. That means you'll never see it chip, peel, or flake off.
The real key to longevity is the protective sealer applied over the stain. For an indoor floor in your basement or kitchen, that beautiful finish can easily last for decades with just basic cleaning. For outdoor surfaces here in Georgia, the sun and rain are a different story. For example, a dark brown stained driveway will start to look a little faded after 3-4 years as the sealer wears down. Reapplying the sealer will restore its deep, rich color and protection.
What About Staining Concrete That's Cracked or Damaged?
You can, but there's a catch: those issues need to be fixed first. Think of stain like a transparent veil—it enhances what's underneath, it doesn't hide it. So, while a few tiny hairline cracks might add a bit of rustic character, a quarter-inch-wide crack that's been filled will still look like a scar, even after staining.
If your concrete has seen better days, we'd probably recommend a concrete overlay instead. This involves spreading a thin, new layer of a cement-based coating right on top of the old slab. For example, we can cover a badly pitted and cracked patio with an overlay, and then stain it to look like brand-new flagstone.
Is Stained Concrete Slippery When Wet?
That’s a smart question, especially for pool decks and patios. The stain itself doesn't change the concrete's texture at all. The slipperiness, or lack thereof, comes entirely from the sealer we apply as the final topcoat.
For any area that's going to get wet, we always mix a slip-resistant additive directly into the sealer. It's a gritty material, almost like fine sand, that creates a safe, textured surface with plenty of grip. For example, on a pool deck, this additive gives bare feet the traction needed to walk safely, even when the surface is wet. You get the stunning look without any of the worry.
When we install a stained concrete surface, safety is just as important as appearance. By using the right sealer and additives for the job, we can create a finish that's not only beautiful but also completely secure underfoot.
Ready to see what's possible for your dull gray slab? The team at Atlanta Concrete Solutions has the hands-on experience to turn your vision into a durable work of art. Reach out today for a free, no-obligation quote!