When you’re weighing a concrete vs. asphalt basketball court, it boils down to a fundamental choice: do you want professional-grade performance and incredible durability, or are you looking for a lower upfront cost with a more forgiving, cushioned feel? Ultimately, your decision will hinge on whether long-term value and true gameplay trump immediate budget and player comfort. For example, a family with a teenager training for their school team will likely prioritize the true bounce of concrete, while a family looking for casual weekend fun might prefer the lower cost and softer feel of asphalt.
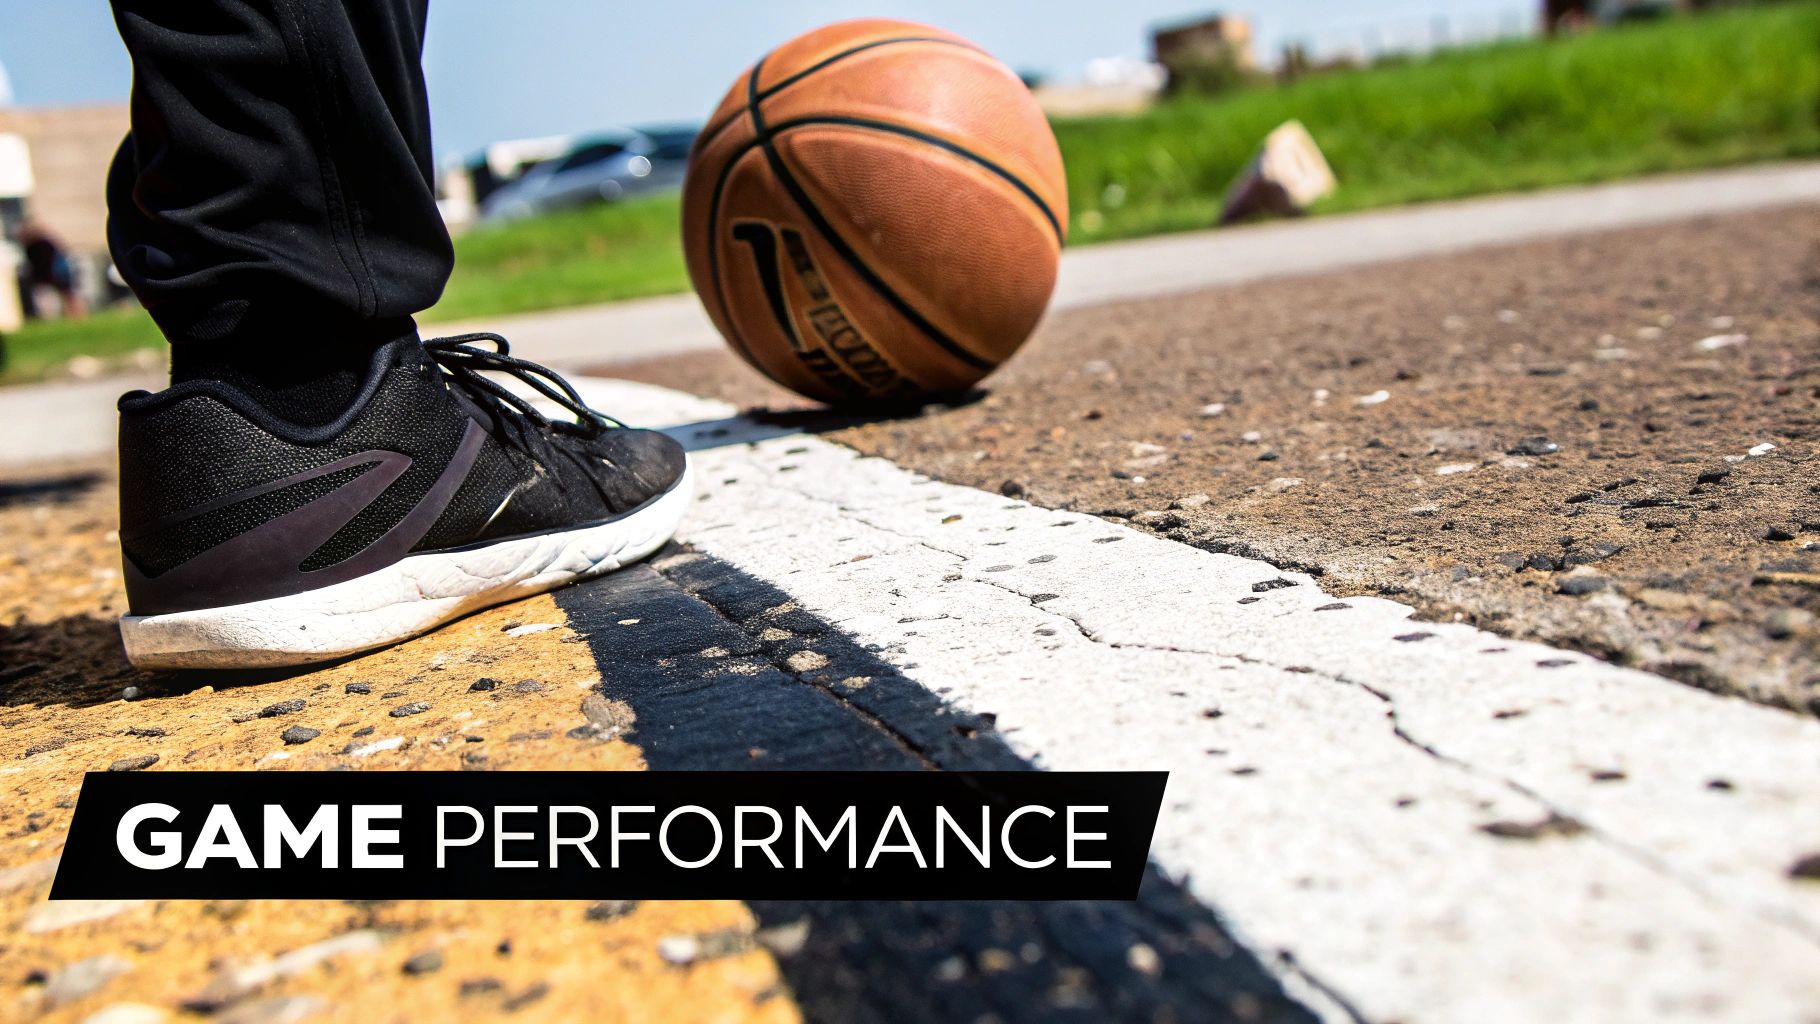
Foundational Choices for Your Court
Picking the right surface for your home basketball court is easily the most critical decision you'll make. This isn't just about what you'll be playing on; it's the foundation that dictates everything from the initial budget and installation process to how the court performs, how long it lasts, and how much work it'll take to maintain. It's the literal platform for every crossover, jump shot, and victory for years to come.

Before we get into the nitty-gritty, let's look at the big picture. You're essentially choosing between a surface that feels like a professional arena and one that feels more like a versatile community park court.
- Concrete is all about performance. Its hard, unyielding surface delivers a true, consistent ball bounce that serious players love because it mimics an indoor gym floor. For instance, a player practicing free throws on concrete can expect the exact same bounce height and speed every time, which helps build muscle memory.
- Asphalt is the practical, budget-conscious choice. It has a bit more flexibility, which provides some cushion underfoot and can be a little easier on the joints during long games. A perfect example is a neighborhood court where kids of all ages play for hours; the softer surface helps reduce fatigue and soreness.
Quick Look: Concrete vs. Asphalt Court Attributes
To give you a quick reference, this table breaks down the key differences between the two materials. It’s a great way to see which surface lines up best with your goals and budget right from the start.
| Attribute | Concrete Court | Asphalt Court |
|---|---|---|
| Initial Cost | Higher, typically $4 to $8 per square foot for the base slab. | Lower, usually $2 to $5 per square foot for the base. |
| Lifespan | Extremely durable, often lasting 20+ years with proper care. | Shorter lifespan, typically 10-15 years before major resurfacing. |
| Maintenance | Low; requires occasional cleaning and sealing small cracks. | Higher; needs regular sealcoating every 3-5 years to prevent damage. |
| Gameplay Feel | Fast, consistent ball bounce, much like professional indoor courts. | Slower bounce with more cushioning, making it gentler on joints. |
| Curing Time | Long; needs up to 28 days to fully cure before it's ready for play. | Short; often ready for light play within just 2-3 days. |
After reviewing the facts, it's clear that one material stands out for those who see their court as a long-term investment.
For homeowners who want a truly premium court that will last a generation, a concrete base is the way to go. It simply delivers a level of durability and playability that asphalt can't match.
Another major plus for concrete is the aesthetics. Many Atlanta homeowners are surprised to learn they aren't stuck with a plain gray slab. You can explore a range of finishes, and learning more about the options for residential decorative concrete can open your eyes to design possibilities that turn your court into a stunning backyard feature. For example, you can get concrete stained to match your home's exterior or stamped with a pattern to mimic high-end pavers.
Analyzing the Full Cost of Ownership
When you're deciding between a concrete or asphalt basketball court, it's easy to get fixated on the initial price tag. But that's just the first chapter of a long financial story. To make a truly smart investment, you have to look at the total cost of ownership—a figure that wraps up the upfront installation with all the maintenance and repair costs you'll face over the court's entire life.
What you'll quickly find is that the cheapest option today might not be the most cost-effective choice a decade from now.
Breaking Down the Upfront Installation Costs
The initial quote is your biggest single expense, and it’s where concrete and asphalt differ the most. Think of it as the starting point in a long-term value game.
Asphalt generally wins on the upfront cost. You're typically looking at about $2 to $5 per square foot. Concrete, on the other hand, comes with a higher initial price tag, usually falling between $4 and $8 per square foot. While that difference feels significant, remember that concrete's durability, especially here in Atlanta with our weather swings, often translates to lower maintenance bills down the road. For a deeper dive, it's always worth checking out insights from seasoned court installation experts.
Let's put that into perspective for a standard half-court, which is around 42' x 50' (2,100 square feet).
- Asphalt Half-Court: The base installation will likely run you between $4,200 and $10,500. For instance, a simple installation on a flat, pre-cleared yard would be on the lower end, while a sloped yard requiring extensive excavation would push the cost higher.
- Concrete Half-Court: For the same size, expect to pay somewhere in the range of $8,400 to $16,800. A basic 4-inch slab would be at the lower end, whereas a thicker, 6-inch slab with rebar reinforcement for added strength would be at the higher end.
Keep in mind, these are baseline numbers covering site prep, the sub-base, and paving. They don't include extras like acrylic coatings, line striping, or the hoop system itself, which will add to your final project total no matter which surface you choose.
Projecting Long-Term Maintenance Expenses
This is where the financial narrative really takes a turn. While concrete asks for more money upfront, it demands very little from you over the years. Asphalt starts cheaper but requires a steady diet of maintenance—and money—to stay in good playing condition.
Here's the key takeaway: Asphalt’s lower initial price is directly offset by the mandatory cost of sealcoating it every 3-5 years. This isn't an optional upgrade; it's essential to protect the surface from sun oxidation and water damage, which will quickly break down the binder and lead to crumbling and cracks.
Let's project those costs over a 15-year period for our half-court example.
Asphalt Court 15-Year Maintenance Scenario:
Sealcoating is a non-negotiable part of owning an asphalt court. For a half-court, this service can cost anywhere from $500 to $1,200, depending on the contractor and the quality of the sealant. If you plan on sealcoating every four years, you'll need to budget for it at least three times over 15 years.
- Year 4: Sealcoating cost: ~$850
- Year 8: Sealcoating cost (factoring in inflation): ~$950
- Year 12: Sealcoating cost (factoring in inflation): ~$1,050
- Total 15-Year Maintenance: Around $2,850
Concrete Court 15-Year Maintenance Scenario:
Concrete is a different beast entirely—it’s far more self-sufficient. Your main tasks will be keeping it clean and occasionally filling minor surface cracks that might show up from ground movement. You can grab a DIY crack filler kit for $20-$50, or have a pro fix a few small cracks for maybe $200-$400. As an example, a hairline crack that appears after five years can be filled and sealed in under an hour, preventing water from getting in and causing further damage.
- Total 15-Year Maintenance: Realistically, you might spend $300 to $600 on minor crack repairs over the entire 15-year period.
The Total Cost of Ownership Compared
When we put it all together—initial installation plus 15 years of maintenance—the financial picture becomes much clearer, and that initial gap starts to shrink.
| Cost Component | Asphalt Half-Court (Mid-Range) | Concrete Half-Court (Mid-Range) |
|---|---|---|
| Initial Installation | $7,350 | $12,600 |
| 15-Year Maintenance | $2,850 | $450 |
| Total 15-Year Cost | $10,200 | $13,050 |
Even after 15 years, concrete is still a bit more expensive, but the difference is far less dramatic than the upfront quotes suggest. If you extend that timeline to 20 or 25 years—which is well within a concrete court’s lifespan—the recurring costs of asphalt keep piling up. Over the long haul, concrete often emerges as the more economical choice.
Comparing Gameplay Performance and Player Experience
When you're deciding between a concrete or asphalt basketball court, you’re doing more than just picking a building material. You're defining the very feel of the game—every dribble, jump shot, and defensive slide will be shaped by the surface under your feet. It dictates the speed of play, how your body feels after a few hours, and ultimately, how much you enjoy your court long-term.
The choice really boils down to a classic trade-off: are you looking for professional-level performance that mimics an indoor gym, or do you prefer a more forgiving surface for casual, comfortable play?
The True Bounce of Concrete Courts
If skill development is the name of the game, a concrete court is the hands-down winner. Its rock-solid, unyielding surface delivers a playing experience that’s as close as you can get to a professional hardwood floor. Why? Because the extreme hardness of concrete transfers nearly all of the energy right back into the ball.
The result is a fast, true, and incredibly consistent ball bounce. Every single dribble is predictable. This lets players focus purely on their technique without having to second-guess a "dead" spot or an uneven response. For a serious young athlete honing their skills, this kind of consistency is crucial for building the muscle memory that translates directly to competitive indoor games. A perfect example is practicing a crossover dribble; on concrete, the ball will return to the hand at the expected height and speed every time, allowing for faster and more precise moves.
But that rigidity comes at a price. The very same hardness that gives you a perfect bounce also provides zero shock absorption. After long or particularly intense games, the repetitive impact from running and jumping on concrete can be tough on the joints—especially the ankles, knees, and lower back.
The Cushioned Feel of Asphalt Courts
Asphalt, on the other hand, offers a noticeably more forgiving playing surface. As a composite of stone and bitumen, asphalt has a slight natural flexibility that concrete just doesn't. This inherent quality allows it to absorb a little bit of impact with every step and jump.
That extra cushioning makes a real difference in player comfort, particularly for weekend warriors or anyone who’s had joint issues in the past. An afternoon of pickup games on asphalt simply feels less taxing on the body.
The trade-off for that comfort is a slightly softer ball bounce. The same flexibility that cushions your joints also absorbs a tiny bit of the ball's energy. This leads to a bounce that is marginally slower and less consistent than what you get on concrete. For casual play, you'd hardly notice, but a competitive player might pick up on the subtle variations across the court. For example, a bounce pass might lose a bit of its zip on asphalt compared to the crisp, fast rebound it would have on concrete.
For pure, predictable performance and a fast-paced game, concrete is the undisputed champion. But if joint comfort for casual play is the top priority, asphalt offers a more forgiving surface.
How Acrylic Coatings Elevate Both Surfaces
Whether you start with a concrete or asphalt base, the real magic happens when you add a specialized acrylic coating system. This isn't just a layer of paint; it's a multi-layered, engineered surface designed specifically for sports. It unlocks the full potential of your court.
Here’s how an acrylic coating system transforms the raw slab:
- Better Traction and Safety: The textured finish provides a superior grip, significantly reducing the risk of slips and falls during sharp cuts and quick pivots. For instance, the fine silica sand mixed into the top layers of the coating acts like fine-grit sandpaper, giving shoes something to grab onto.
- More Player Comfort: You can opt for cushioned acrylic systems that include rubberized layers. On a concrete court, this adds much-needed shock absorption, closing the comfort gap with asphalt. Some high-end systems can have up to 9 layers of rubber granules, creating a feel similar to a professional tennis court.
- Consistent Ball Bounce: The coating creates a perfectly uniform plane, smoothing over minor imperfections in the base material and guaranteeing a more predictable bounce, whether it's on asphalt or concrete.
- Cooler Surface Temperatures: Lighter-colored acrylics reflect more sunlight than dark asphalt or gray concrete. On a blistering Atlanta summer day, this can make a huge difference in how hot the court gets. A light blue or green court, for example, can be 15-20 degrees cooler than black asphalt.
Ultimately, an acrylic coating elevates the entire gameplay experience. It brings professional-grade function and aesthetics to your court, allowing you to fine-tune the final feel and get the best of both worlds.
Durability and Lifespan: How Your Court Will Age in the Atlanta Climate
A basketball court is a big investment, and you want it to last. Here in the Atlanta area, that means choosing a surface that can stand up to our unique blend of intense summer sun and heavy downpours. How a court material handles these elements is one of the biggest differences between concrete and asphalt.
Concrete is the undisputed champion of longevity. When installed correctly, a concrete court can easily give you more than 20 years of service, with many lasting over 30 years with just basic care. Its rigid, solid structure is built to withstand the abuse of gameplay and weather without breaking a sweat.
But concrete’s Achilles' heel isn't what comes from the sky—it's what’s happening in the ground underneath.
The Challenge for Concrete: Ground Stability
The biggest enemy of a concrete slab is movement. Over the years, subtle ground shifts, soil settlement, or the slow, powerful push of nearby tree roots can create pressure that concrete just can't absorb. The result? Cracks.
While many of these cracks are just on the surface initially, they can't be ignored. Water will find its way in, which can wash out the sub-base and make a small problem much bigger. The good news is that these issues are manageable. You can explore professional options for concrete and masonry repair to see how straightforward fixes can keep your court solid for decades. For example, a technique called slab jacking can lift and level a sunken corner of the court without needing to replace the entire slab.
The Battle for Asphalt: Sun and Rain
Asphalt tells a different story. Its expected lifespan is quite a bit shorter, usually in the 10 to 15-year range before you’ll need a major resurfacing or a complete replacement. This is almost entirely due to its vulnerability to sun and water.
The black binder that holds asphalt together gets broken down by UV radiation. In Georgia, where the sun beats down relentlessly, this process, called oxidation, happens fast.
Oxidation is what turns a fresh, black asphalt court into a faded, gray, and brittle surface. It loses its flexibility, making it far more likely to crack, crumble, and fall apart.
This constant assault from the sun is why regular maintenance is an absolute necessity for asphalt. If you don't apply a protective sealcoat every three to five years, the surface will age prematurely, leading to costly repairs and cutting its useful life short. Think of sealcoat as sunscreen for your court; it provides a sacrificial layer that takes the UV damage instead of the asphalt itself.
Lifespan in Real-World Atlanta Scenarios
Let's put this into practice and see how these materials would perform in a couple of typical Atlanta backyards.
Scenario 1: The Full-Sun Backyard Court
Imagine a court built in an open yard with no shade from trees. It’s getting baked by the sun all day long.
- Asphalt: The surface is going to absorb a ton of heat, and the constant UV exposure will speed up oxidation. Without a strict sealcoating schedule, you could start seeing cracks and loose stones (raveling) in as little as 5-7 years.
- Concrete: It will get hot to the touch, but the sun's rays won't do any structural damage. Its durability won't be compromised by UV exposure at all.
Scenario 2: The Shaded Court Near Trees
Now picture a court tucked away near a line of established oak trees, where the ground stays a bit damp.
- Asphalt: The shade is a plus, as it slows down UV damage. However, poor drainage becomes a major risk. Constant moisture can soften the base underneath, leading to soft spots, depressions, and cracking. A classic example is a "birdbath" depression that holds water long after a storm.
- Concrete: Here, the main threat is from those tree roots. Over a decade or more, they can grow underneath the slab and push it upward, creating large, structural cracks that are much more serious than simple surface-level fissures. You might see one edge of the court lift by an inch or two, creating an uneven playing surface.
When it comes down to it, concrete's core structure is built for the long haul, though you need to keep an eye on what the ground is doing beneath it. Asphalt can certainly work, but you're signing up for a constant fight against the elements to help it reach its shorter maximum lifespan.
Navigating the Court Installation Process
Turning a patch of grass into a professional-looking basketball court can feel like a huge undertaking, but understanding the process clears things up. Whether you lean towards concrete or asphalt, the project starts the same way: with a solid, reliable foundation. A great installation isn't just about the final surface; it's a careful process where every step sets up the next one for success.
It all kicks off with site preparation. This first, critical phase means clearing out all the grass, rocks, and topsoil from the court area. Once the space is clear, a professional crew will excavate down to the right depth, making room for the sub-base and the court material itself.
From there, it's all about grading. This is where we ensure the court has a very slight, almost unnoticeable slope—usually a 1% grade, which means a one-inch drop for every 10 feet of court. You can't skip proper grading. It's what keeps water from pooling on your court after one of those classic Atlanta downpours. For a full court (94 feet long), this would mean one end is almost 10 inches lower than the other, a difference that effectively drains water without being noticeable during play.
Building the Sub-Base Foundation
With the site graded, the crew lays down the sub-base. Think of this as the court's skeleton. It’s a 4 to 6-inch layer of compacted crushed stone or gravel, and it creates the stable, load-bearing platform your court needs.
A properly compacted sub-base is essential for a court that lasts. Here’s why:
- It Prevents Settlement: The sub-base distributes the court's weight evenly, which stops the slab from sinking or shifting over the years.
- It Helps with Drainage: Water that seeps under the surface can drain away through the gravel, preventing sub-base erosion and frost heave during colder spells.
- It Creates a Level Surface: This is what gives you that perfectly flat, stable foundation needed for a high-quality pour or paving job.
Cutting corners here is one of the biggest mistakes you can make. A rushed or poorly prepared sub-base will sabotage even the best concrete or asphalt, leading to cracks and an uneven court in just a few years. For example, using uncompacted dirt as a fill material instead of proper gravel is a recipe for a court that sinks and cracks within the first year.
The real quality of your basketball court is decided long before the concrete or asphalt truck ever shows up. The time spent on careful excavation, precise grading, and solid sub-base compaction is the single best investment you can make in your court's future.
Timelines: From Pour to Play
This is where the installation process for concrete and asphalt really splits, mainly because of one thing: curing time.
Asphalt gets you on the court much faster. Once the hot mix asphalt is laid down and compacted, it just needs to cool and harden. Most of the time, an asphalt court is ready for striping and some light play within just 2 to 3 days. This quick turnaround makes it a great choice if you're trying to get a court ready for a summer party, for example.
Concrete, on the other hand, demands patience. The chemical process of curing—where concrete hardens and gains its incredible strength—can't be rushed. You can usually walk on a new slab within a day or two, but it needs a full 28 days to reach its maximum design strength. Putting it under the stress of a basketball game or installing a heavy hoop system before it's fully cured can seriously damage its structural integrity. You can dive deeper into the specifics of new installations with our experts on residential poured concrete.
That long curing period for concrete is a major factor to plan around. You have to build that multi-week wait into your project timeline before your court is ready for the first tip-off.
Making the Right Choice for Your Family and Budget
When it comes down to it, the concrete vs. asphalt debate isn't about picking the "best" surface—it's about choosing the right surface for you. You need to look beyond the materials and think about how your court will actually be used day-to-day for years to come. The best choice is the one that fits your family's needs, your performance expectations, and your long-term budget.
This is all about matching the court to your life. By asking yourself a few straightforward questions, you can cut through the noise and make a decision you'll feel great about for a long, long time.
Who Are You Building This Court For?
First things first: who will be using this court the most? Is it for a serious young athlete who lives and breathes basketball, or is it going to be a fun, multi-purpose spot for the whole family? Your answer here is the biggest clue.
- For the Serious Athlete: If the goal is high-level training and replicating the feel of an indoor gym, concrete is the clear winner. You just can't beat its hard, uniform surface for a true, fast ball bounce—essential for serious practice. Plus, its durability means the court will be there through a player's entire journey.
- For Family Fun and Versatility: If you're picturing a backyard spot for everything from hoops to foursquare and kids riding scooters, asphalt is an excellent contender. Its lower upfront cost makes it more approachable, and the slightly softer surface can be a bit more forgiving for players of all ages.
- For the Budget-Conscious Planner: For anyone keeping a close eye on the initial price tag, asphalt offers the lowest barrier to entry. Just be sure to budget for the ongoing cost of sealcoating every 3-5 years. It’s a small price to pay to protect your court and avoid much bigger repair bills later.
This decision tree infographic really simplifies the choice by connecting your main priority—be it budget or performance—to the most suitable material.
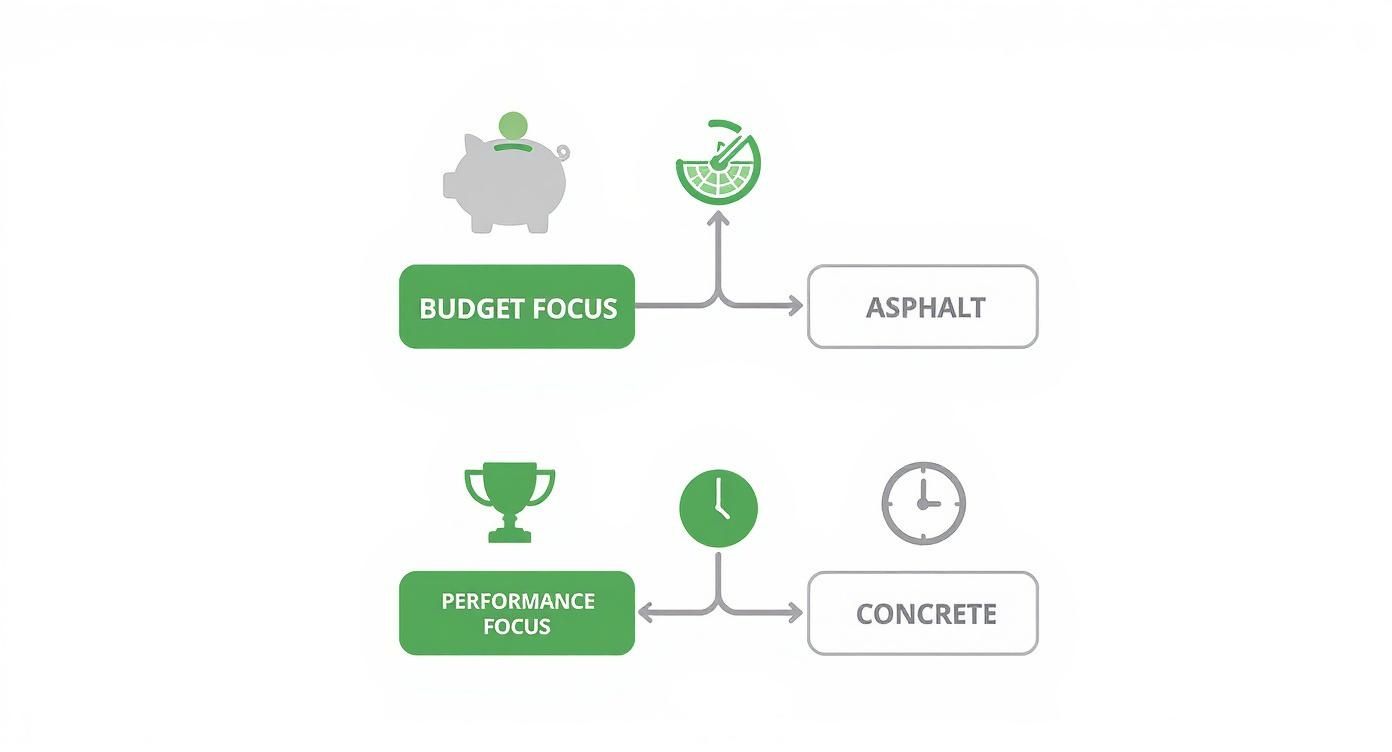
As you can see, a focus on keeping initial costs down points you toward asphalt and its quicker installation. On the other hand, if long-term performance is your top priority, that aligns perfectly with concrete's durable—but slower—construction process.
Finding a Qualified Local Contractor
Once you’ve settled on a material, the next move is finding the right crew to build it. A court is only as good as the team that installs it. Cutting corners here can sabotage even the highest quality materials.
A contractor's local experience is invaluable. They understand the specific soil conditions, weather patterns, and permitting requirements in the Atlanta area, which is crucial for building a court that lasts.
When you start talking to contractors, here are three things you absolutely must do:
- Review Past Projects: Don't just take their word for it—ask to see a portfolio of courts they've built nearby. Look closely at the surface smoothness, the quality of the line painting, and the overall craftsmanship. A great example would be asking for addresses of courts they built 5+ years ago to see how their work holds up over time.
- Verify Their Process: Ask them to walk you through their site preparation steps. A top-notch contractor will stress the importance of a properly graded and compacted sub-base. That's the foundation of your entire court, and it has to be perfect.
- Get a Comprehensive Quote: Make sure any quote you get is itemized. It should clearly break down the costs for excavation, the sub-base, materials, labor, and any extras like acrylic coatings or installing the hoop. This kind of transparency is key to avoiding surprise costs down the road. For example, a good quote will specify the thickness of the sub-base (e.g., "6 inches of compacted #57 stone").
Still Have Questions? We've Got Answers
Even with all the details laid out, you probably still have a few lingering questions. That's completely normal. Let's tackle some of the most common ones we hear from homeowners trying to decide between concrete and asphalt.
These are often the final details that help everything click into place.
Which Surface Is Easier on the Knees and Ankles?
From a purely raw material standpoint, asphalt has a slight edge. It has a bit more natural give, which helps absorb some of the impact from running and jumping. Over thousands of repetitions, that can make a difference for players' joints.
That said, modern court coatings have really leveled the playing field. When we apply a high-quality cushioned acrylic surface over concrete, it introduces a rubberized layer that feels great underfoot. This system provides fantastic shock absorption and grip, making the concrete feel much less punishing than a bare slab. A good example is the type of surface used at the US Open in tennis, which is a cushioned acrylic system over a hard base, providing both performance and comfort.
Can I Just Build the Court Myself?
Tackling a small concrete pad for a portable hoop? Sure, that can be a weekend warrior project. But a proper half-court or full-court? That's a whole different ball game.
Getting it right involves skills and equipment that most homeowners just don't have lying around. You need to get things perfect, like:
- Precise Grading: Nailing the 1% slope for water drainage isn't something you can just eyeball.
- Solid Foundation: Compacting the gravel sub-base correctly is the key to preventing cracks and heaving down the road.
- Flawless Finish: Pouring and finishing a massive slab of concrete or asphalt to a perfectly smooth, level playing surface takes serious machinery and experience. For example, using a power trowel to finish a large concrete slab requires training to avoid leaving waves or burn marks.
For a court that’s built to last and play true for years, you really want a pro handling the job. Fixing mistakes in the foundation is a nightmare you don't want to deal with later.
How Long Until I Can Start Playing?
This is one of the biggest practical differences, and it comes down to patience. Asphalt wins the race here, hands down. Once it's been paved and compacted, you can usually start playing on it within just 2-3 days.
Concrete, on the other hand, demands you wait. You can typically walk on it after a day, but it needs a full 28 days to cure completely and gain its full strength. Don't be tempted to rush it. Playing on it or installing a heavy in-ground hoop system too early can seriously weaken the slab for good. For example, tightening the bolts on a hoop system can create micro-fractures in uncured concrete that will grow into major cracks over time.
Ready to build the perfect court that will last for decades? The team at Atlanta Concrete Solutions has the local expertise to handle your project from foundation to finish. Get your free, no-obligation quote today!