When you see a fresh, dark oil stain spreading across your pristine driveway, the first instinct might be to panic. But don't grab the hose or a scrub brush just yet. Your best first move is to absorb the excess oil immediately before it has a chance to soak in. For example, if you've just noticed a leak from your car's oil pan, acting within the first hour is crucial to prevent a permanent mark.
Your First Move Against Fresh Concrete Oil Stains
A fresh oil spill can feel like a disaster, but a quick response can stop it from becoming a permanent eyesore. Concrete is surprisingly porous—think of it like a hard sponge. Oil will quickly seep deep below the surface, making it much harder to remove later. The goal right now isn't to scrub; it's to stop the oil in its tracks.
This initial containment step is genuinely the most important thing you can do. By soaking up the pooled oil on the surface, you drastically reduce how much can penetrate the concrete's pores. The good news? You don't need fancy chemicals for this. Common household items work wonders. For instance, a simple handful of kitty litter can absorb a surprising amount of motor oil before it has a chance to set.
Why Absorption Is Your Top Priority
Imagine spilling wine on a rug. The longer you wait, the deeper the stain sets. Concrete is no different. That puddle of oil on the surface is a reservoir, constantly feeding the stain deeper into the slab. Acting within the first few minutes to an hour makes all the difference.
An absorbent material essentially pulls the liquid oil up and out of the concrete. This is crucial because once that oil dries and cures within the concrete, it forms a stubborn bond that requires much more aggressive cleaning methods to break. For example, fresh motor oil is a liquid that can be absorbed, but after a week of baking in the sun, it becomes a gummy, semi-solid residue that has chemically bonded with the cement.
Pro Tip: Whatever you do, don't rub or try to wipe a fresh oil spill. You'll just push the oil deeper into the concrete's pores and smear the stain over an even larger area. Always cover it and let the absorbent do the work. A good example of what not to do is trying to spray it with a high-pressure hose, which can drive the oil deeper into the concrete.
This visual guide breaks down the immediate three-step response for tackling a fresh oil stain.
As the infographic shows, your first priority is always absorption. This simple action sets the stage for any scrubbing or cleaning you might need to do later on.
Common Materials for Soaking Up Oil
Chances are, you already have something that will work perfectly sitting in your pantry or garage. When choosing an absorbent, you have a few great options, each with its own small advantages.
Here’s a quick rundown of some of the best materials to use, with specific examples.
Quick Guide to Oil Absorbents
| Absorbent Material | Best For | Application Tip |
|---|---|---|
| Clay Kitty Litter | Heavier oils like motor oil | Use the non-clumping kind. Grind it into the stain with your shoe for better contact. A 10-pound bag can handle a significant spill. |
| Baking Soda | All oil types; good for odor | Very effective and won't harm nearby plants. A great, safe choice. For example, it works well on cooking oil spills near a patio grill. |
| Cornstarch | Thinner oils like transmission fluid | Its fine particles are excellent at wicking up less viscous fluids. A spill of power steering fluid, for example, is a perfect job for cornstarch. |
| Sawdust or Sand | General spills, workshop use | A good, cheap bulk option if you have it on hand. Sawdust from a home project, for instance, can be repurposed for a garage spill. |
No matter which one you choose, the method is the same. Be generous and cover the entire oil stain with a thick layer—at least half an inch. Don't be shy with it. For example, a one-foot-square stain might require two or three cups of kitty litter. Gently pat the material down or press it into the spill with your foot to ensure good contact.
Let it sit for at least a few hours, though leaving it overnight is even better. The next day, just sweep it all up and dispose of it properly. You'll see that the material has darkened, a clear sign it has pulled a significant amount of oil out of the concrete. This quick action is a critical part of maintaining the appearance and longevity of your residential driveway concrete.
Simple Household Solutions for Lighter Oil Stains
So you've soaked up that fresh oil spill, but a pesky, faint mark still stares back at you. Don't worry. For these lighter stains or smaller drips that got away, you don’t need to rush out for heavy-duty chemicals. The solution might be sitting right in your kitchen pantry.
Believe it or not, common household items can be incredibly effective. A simple dish soap like Dawn, for instance, is a surfactant. This just means it helps oil and water play nice, letting you scrub and rinse the grease away. Other pantry staples work by drawing the oil out from deep inside the concrete’s pores.
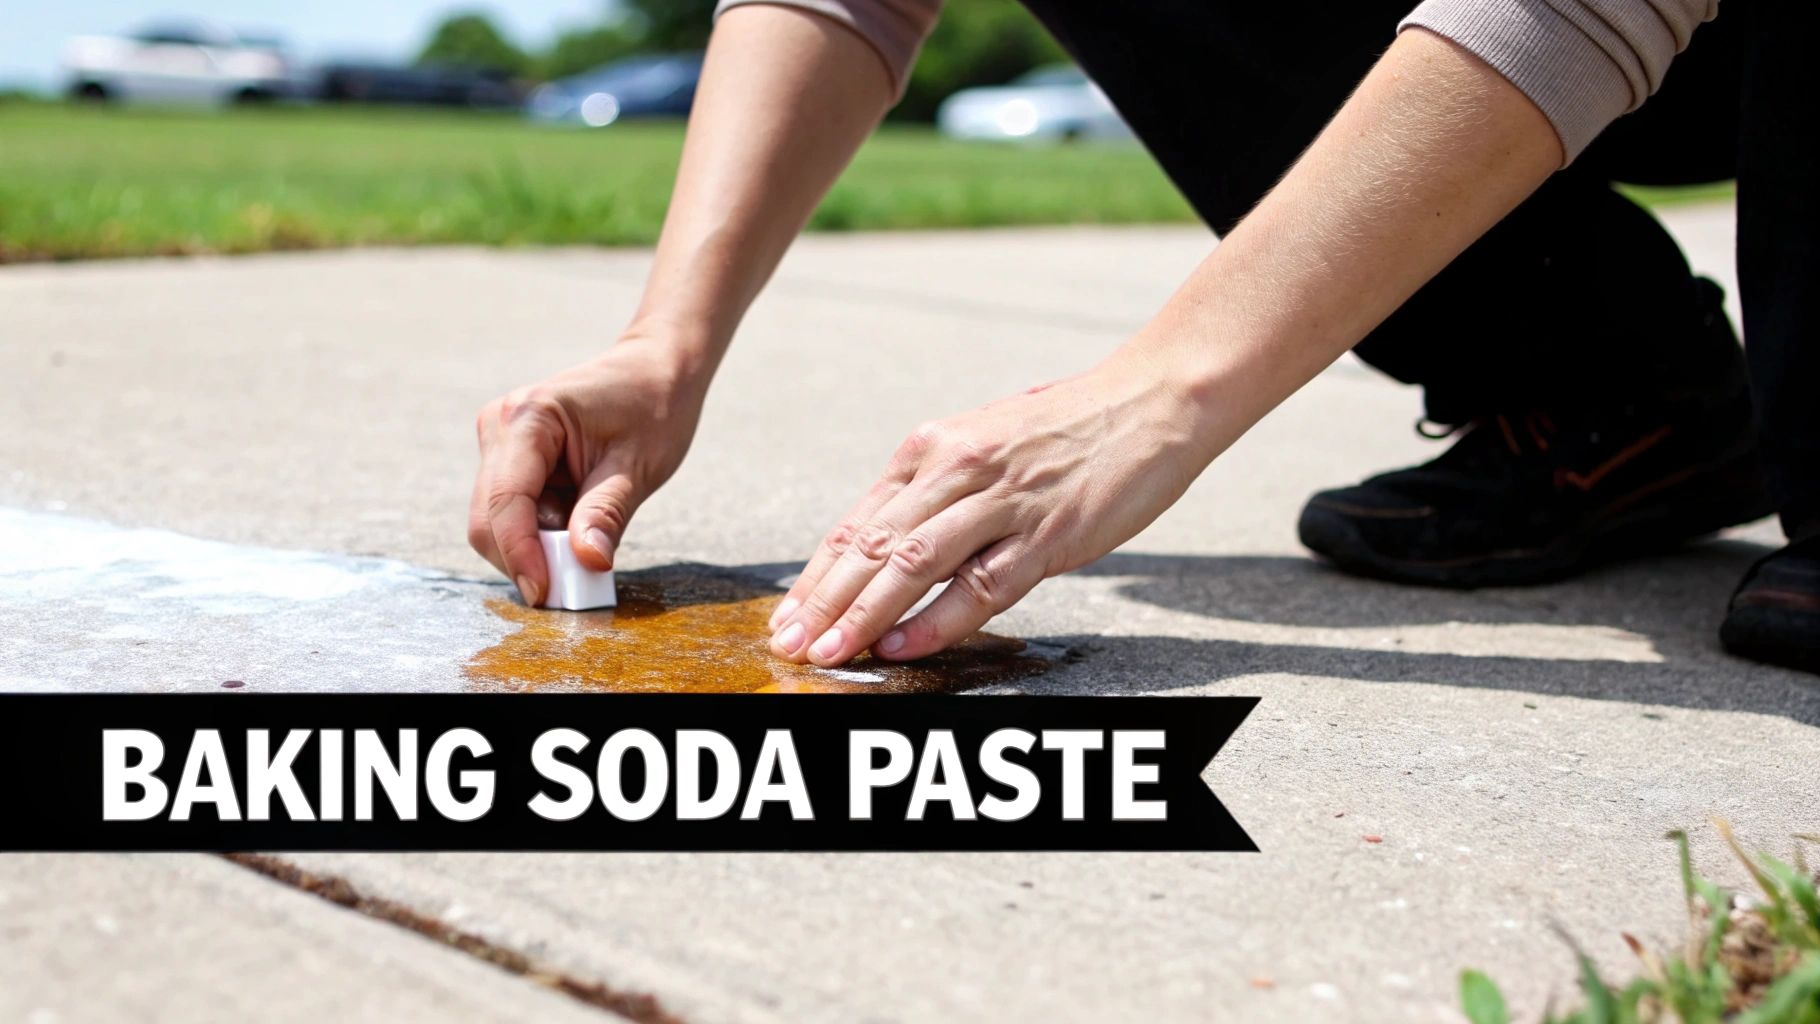
The Go-To Baking Soda Paste
One of my favorite and most reliable methods is a simple baking soda paste. Baking soda is a fantastic absorber and mildly alkaline, which is just what you need to pull oil residue out of a porous surface like concrete. Best of all, it’s gentle and won't damage your driveway or the grass next to it.
Here’s how I get it done:
- Mix a thick paste: Grab a bowl and mix baking soda with a little water. You're aiming for a consistency like peanut butter—thick enough to stay put. For example, start with one cup of baking soda and add water one tablespoon at a time.
- Apply it generously: Slather a thick layer of the paste over the entire oil stain. You want to cover it completely, about a quarter-inch thick.
- Give it time: Let the paste sit and dry completely. This is the magic step. As it dries, it pulls the oil up and out of the concrete. I usually leave it overnight to get the best results.
- Scrub and rinse: Once it’s dry and crusty, grab a stiff nylon brush and give the area a good scrub. A wire brush can scratch your concrete, so stick with nylon. Finish by rinsing everything away with water.
For a little extra kick, you can swap the water for a squirt of dish soap when making your paste. It adds some extra grease-fighting power to the mix.
Other Surprising Fixes from Around the House
Baking soda isn't the only trick up your sleeve. A couple of other products you probably already own can work wonders. They’re designed to dissolve grease, just on different surfaces.
A Quick Word of Caution: Always, always test any cleaning solution on a small, hidden spot first. This quick check ensures you won't end up with a discolored patch on your driveway. For example, try a small spot at the corner of your garage or behind a planter.
Here are a couple of unexpected heroes:
- Oven Cleaner: Think about it—oven cleaner is made to destroy baked-on grease. That makes it a powerhouse against motor oil. Just spray it on, let it sit for about 30 minutes, scrub with your nylon brush, and rinse it all off. For example, a product like Easy-Off Fume Free can be effective.
- WD-40: Fighting oil with oil? It sounds strange, but it works. WD-40 is a solvent that can break down and lift other petroleum stains. Spray it on the spot, let it soak in for 20-30 minutes, then scrub with dish soap and water to clean up the residue from both.
These at-home methods are a great first line of defense against those all-too-common driveway stains. They can save you a trip to the store and get the job done surprisingly well.
Choosing the Right Commercial Concrete Degreaser
Sometimes, baking soda and dish soap just don't cut it. When you're dealing with a stubborn oil stain that's seeped deep into your concrete, it's time to bring in the big guns: a commercial-grade degreaser.
Walking down the cleaner aisle at the hardware store can feel overwhelming, but these products are specifically engineered for porous surfaces like concrete. They pack a much bigger punch than anything you'll find in your kitchen pantry.
Choosing the right one really boils down to the stain you're fighting, the type of oil, and your comfort level with different chemicals. It’s a big market for a reason—the global demand for concrete oil stain removers was valued between $105 million and $121 million in 2025. With construction and industrial work on the rise, oil spills are a common headache, driving the need for effective solutions. You can even check out the data on the concrete cleaner market growth to see how the industry is expanding.
Navigating Different Types of Cleaners
Once you start looking at the labels, you'll see a few main types of degreasers. Each one works a little differently to break down that stubborn oil.
-
Enzyme-Based Cleaners: Think of these as the eco-friendly choice. They use natural microbes and enzymes to literally "eat" the oil, converting it into harmless byproducts like carbon dioxide and water. They're a great option if you have pets or plants nearby and want to avoid harsh chemicals. A product like Ameripolish Oil Ingester is a perfect example. It works slowly but surely—you often have to keep the area damp for a few days or even weeks to let the microbes do their thing.
-
Alkaline Degreasers: These are the heavy hitters of the degreasing world. Their high pH level triggers a process called saponification, which chemically transforms grease into a soapy substance you can easily rinse away. If you're up against an ancient motor oil stain that’s been sitting for years, an alkaline cleaner is your best bet. A common example is a degreaser containing Sodium Hydroxide.
-
Solvent-Based Cleaners: These work fast, dissolving oil and grease almost on contact. The trade-off is that they often come with powerful fumes and require careful handling. Make sure you have plenty of ventilation. A solvent is a solid choice for a really tough stain in your garage where you need immediate results. Xylene and mineral spirits are examples of common solvents used in these cleaners.
How to Select and Use Degreasers Safely
Picking the right product is just the first step. Using it correctly is what will actually get you results. The first thing you should always do is read the manufacturer's instructions—application methods can vary a lot from one bottle to the next.
Before you go all-in, always test the cleaner on a small, hidden spot on your concrete. This simple patch test will tell you if the product might cause any discoloration or damage, saving you from a much bigger problem later.
When you're ready to apply it, be sure to wear the proper personal protective equipment (PPE), like chemical-resistant gloves and safety glasses. Most degreasers are pretty straightforward: you pour them on, scrub them in with a stiff nylon brush, and let them sit for a while. That "dwell time" is non-negotiable; it gives the chemicals the time they need to work their way into the concrete and break down the oil. Follow these steps, and you'll be on your way to a clean, stain-free surface.
Advanced Tactics for Deep and Set-In Oil Stains
Sometimes, a stain has been sitting for so long—weeks, months, or even years—that it feels like it’s become a permanent part of your driveway. When oil has had that much time to bake in the sun and seep deep into the concrete's pores, a simple scrub just won't cut it.
For these incredibly stubborn marks, you have to bring out the heavy hitters. We're talking about methods that either pull the oil out from deep within the concrete or blast it away with sheer force. This is where you move from simple cleaning to serious restoration.
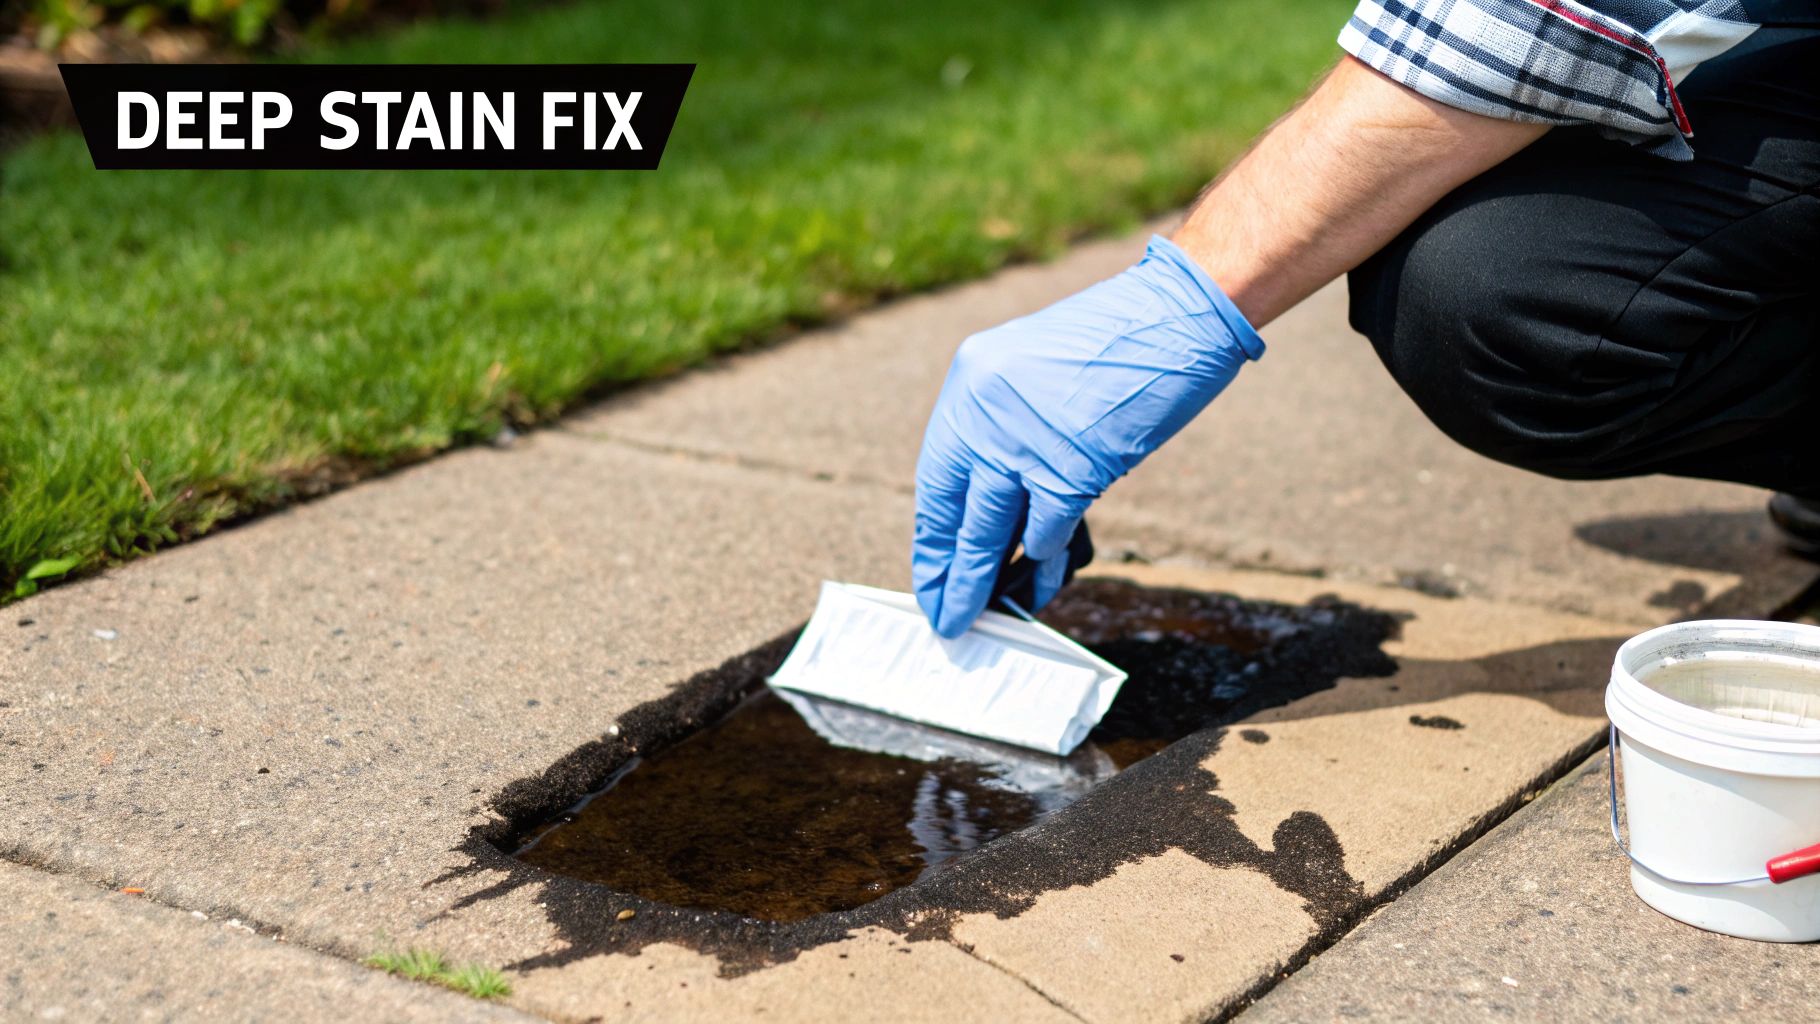
Using a Poultice to Lift Deep Stains
Think of a poultice as a deep-cleaning face mask for your concrete. It’s a thick paste you apply directly to the stain, and as it dries, it literally pulls the embedded oil up to the surface and traps it.
This method works wonders because it doesn't just treat the surface; it addresses the oil that's settled far down into the concrete's porous structure. It’s slow, but it's incredibly thorough.
Making a poultice is easier than it sounds. Here’s a simple but effective approach:
- Gather Your Ingredients: You need two things: an absorbent powder and a solvent. For the absorbent, you can use something as simple as clay kitty litter, sawdust, or even baking soda. For the solvent, acetone works well. The solvent dissolves the trapped oil, and the absorbent material soaks it all up.
- Mix to a Paste: Find a well-ventilated spot and carefully mix your solvent into the absorbent material. You’re aiming for a consistency like thick peanut butter—spreadable but not runny. For example, you might mix one part acetone with two parts kitty litter.
- Apply and Seal: Smear a quarter-inch layer of the paste over the entire stain. To make it work even better, cover it with plastic wrap and tape down the edges. This simple trick keeps the solvent from evaporating too quickly, giving it more time to work its magic.
- Let It Work: Now comes the waiting game. The poultice needs to dry completely, which can take anywhere from 24 to 48 hours. As it dries, you’ll see it change color as it soaks up the oil. Once it's completely dry and crusty, just scrape it off with a plastic putty knife and sweep the area clean.
The Power of Pressure Washing
A pressure washer can be an absolute game-changer for old stains, but it demands respect. Used correctly, the high-pressure water stream can blast oil particles right out of the concrete. Used incorrectly, it can damage the concrete itself.
Expert Tip: Stay away from the zero-degree (red) nozzle. It’s far too aggressive for concrete and can easily etch permanent lines into your driveway. A 15-degree (yellow) or 25-degree (green) nozzle provides the perfect balance of power and safety.
To get the most out of your pressure washer, give it a head start with a good degreaser. Apply the degreaser first, letting it sit for a few minutes to break down the oil. Then, fire up the pressure washer.
Start with a pressure around 3,000 PSI and hold the nozzle about a foot from the surface. Use smooth, even, sweeping motions to wash away the degreaser and the loosened oil. For example, work in a consistent back-and-forth pattern, overlapping each pass by about 30% to avoid creating lines or streaks.
It’s also good to know that the market for these cleaners is getting better and safer. With a growing focus on the environment, sales of eco-friendly removers have been climbing by about 12% annually. You can learn more about the latest trends on the concrete oil stain remover market.
Of course, if cleaning reveals deeper issues like cracks or spalling, the stain might be the least of your worries. In that case, it might be time to consider professional help for your Atlanta concrete and masonry repair.
Preventing Future Oil Stains on Your Concrete
After all that work getting your concrete clean, the last thing you want is another ugly oil stain. As they say, the best defense is a good offense. Taking a few smart, proactive steps now can save you a ton of scrubbing later and keep your driveway or garage floor looking sharp.
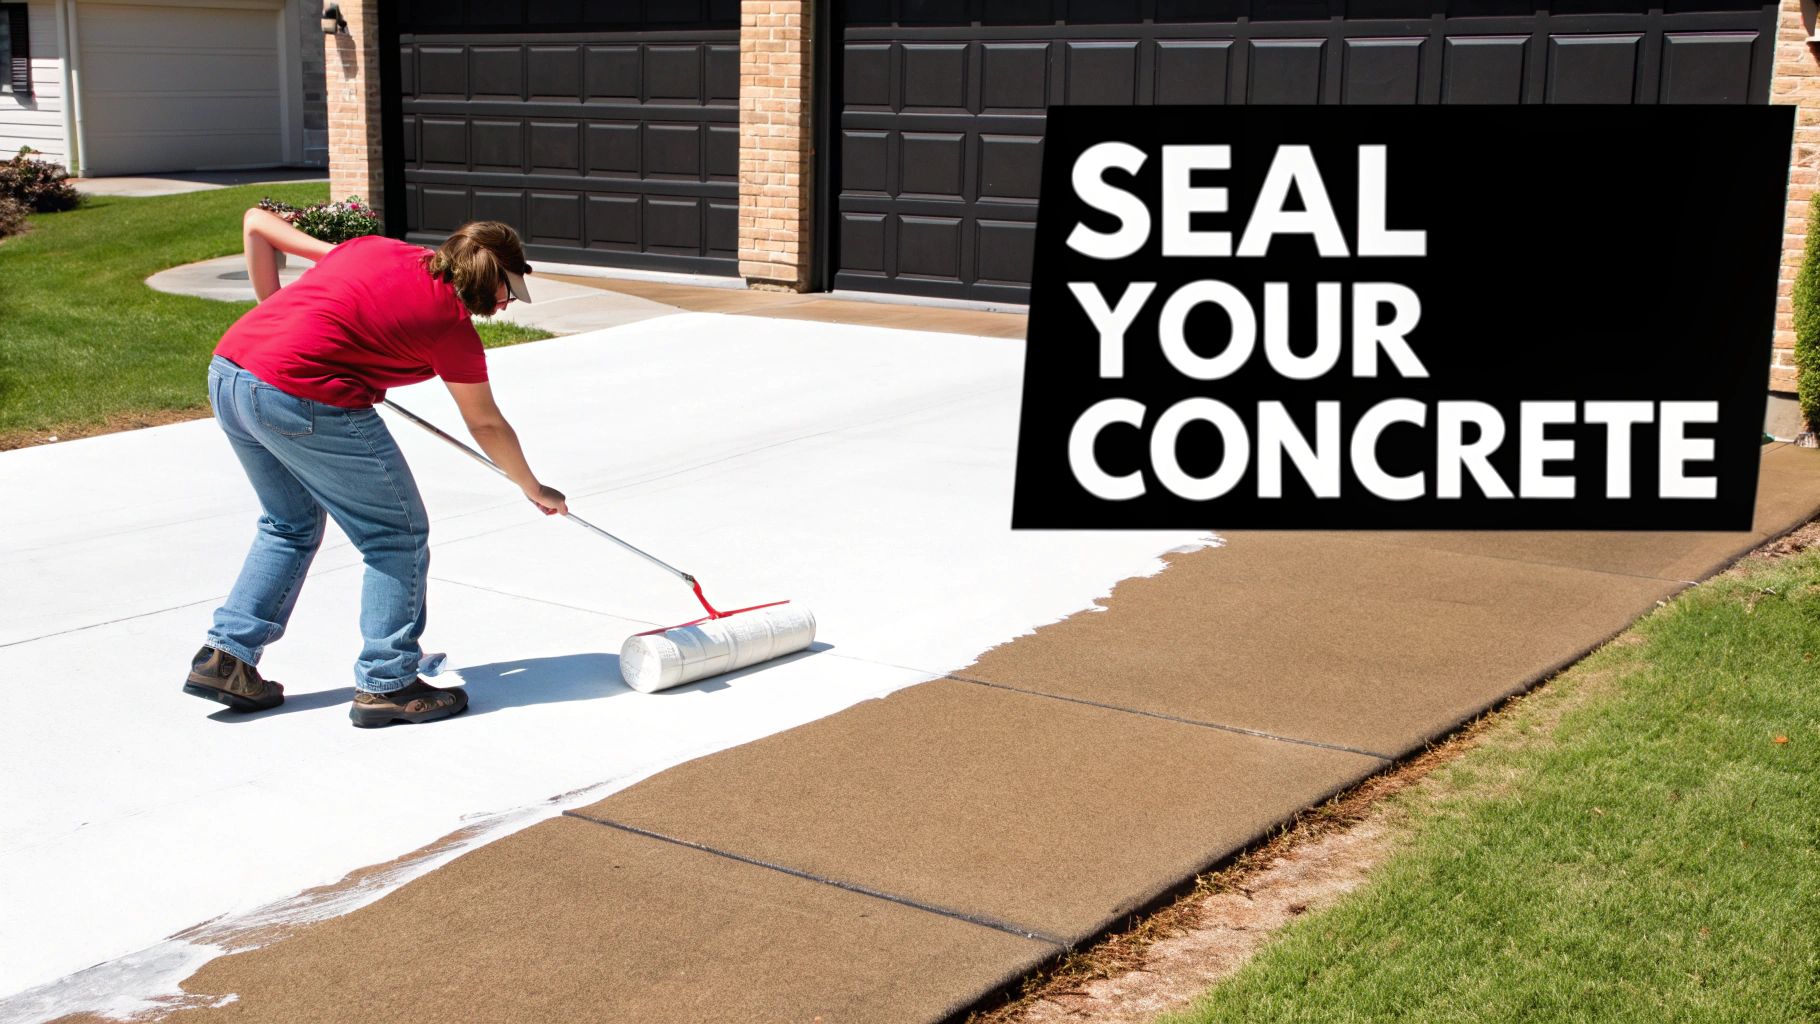
By far, the most effective thing you can do is apply a quality concrete sealer. Think of it as an invisible shield for your concrete. Because concrete is naturally porous—basically a hard sponge—it loves to soak up liquids. A good sealer fills in those microscopic pores, creating a protective barrier right at the surface that stops oil, road grime, and other fluids in their tracks.
Choosing the Right Concrete Sealer
Sealers aren't a one-size-fits-all product. The best one for your project depends on what you're looking for in terms of durability, looks, and how easy it is to apply. Each type brings something different to the table.
- Acrylic Sealers: These are a fantastic, budget-friendly option for most driveways. They offer solid protection against oil and water and are pretty straightforward to apply yourself with a roller. A good example is a solvent-based acrylic that provides a "wet look."
- Epoxy Sealers: If you need maximum, heavy-duty protection for a garage floor, epoxy is your champion. It forms an incredibly thick and durable film that stands up to hot tires, chemical spills, and dropped tools. For instance, a 100% solids epoxy coating is a professional-grade solution.
- Polyurethane Sealers: These hit a sweet spot. They're tougher than acrylics and have excellent UV resistance, which means they won't turn yellow over time from sun exposure. This makes them a great topcoat over an epoxy base.
Applying a sealer is a weekend project that pays dividends for years. A properly sealed driveway not only resists stains but is also easier to clean, repels water, and can even prevent cracking from freeze-thaw cycles.
Simple Habits for a Stain-Free Surface
Sealing is the big one, but a few simple habits can make a huge difference in keeping stains from ever setting. It's all about catching spills before they have a chance to soak in.
A great long-term strategy, especially for indoor spaces like garages, is to start with a high-quality finish from day one. To learn more about how a pro-level surface can make your life easier, you can explore options for residential polished concrete in Atlanta, which creates a naturally dense and highly stain-resistant floor.
Also, get in the habit of sliding a drip pan or even just a large piece of cardboard under your car anytime you’re doing maintenance. It’s a simple trick that catches those inevitable drips. For example, before changing your oil, lay down a large, flattened cardboard box to absorb any potential mess. And if a spill does happen, jump on it immediately. The faster you blot it up, the less time the oil has to penetrate, turning a potential permanent stain into a quick wipe-up.
Answering Your Top Questions About Concrete Oil Stains
Even when you follow the steps perfectly, getting oil out of concrete can throw you a few curveballs. Every single spill has its own personality, depending on the concrete's age, what kind of oil it was, and how long it’s had to settle in. Let's dig into some of the most common questions and roadblocks people face.
A lot of folks ask if there's a point of no return for an old oil stain. The good news is that it’s almost never a lost cause. The real difference is that older, set-in stains demand more elbow grease and stronger tactics. For example, a stain that's five years old might require multiple poultice applications, whereas a five-day-old stain might come out with a single degreaser treatment. You'll likely need to move past simple soap and water and bring out the big guns, like a commercial degreaser or a poultice, to pull that oil up from deep within the pores.
Will the Cleaner Damage My Concrete?
That's a smart question to ask, and the short answer is: some absolutely can. Highly acidic or overly alkaline cleaners can easily etch, bleach, or discolor concrete. This is especially true if you're working with a decorative surface, like stamped or colored concrete. Using something harsh like pure bleach, for example, can permanently ruin the finish.
To keep your concrete safe, just follow a few common-sense rules:
- Always do a spot test. Find a hidden area, apply a small bit of the cleaner, and wait the recommended time. Rinse it off and see what it looks like before you commit to the whole stain.
- Steer clear of aggressive acids. Anything too acidic, like muriatic acid, will literally eat away at the cement paste that binds the concrete together, weakening it over time.
- Choose the right tool for the job. If you have a sensitive surface like polished concrete, stick with pH-neutral cleaners or products made specifically for that finish.
A little bit of caution upfront saves you from creating a much bigger, more permanent problem than the original stain.
What If the Stain Just Won't Budge?
It’s incredibly frustrating when you've tried everything and that faint, shadowy stain—often called "ghosting"—is still there. This happens when oil residue is still hiding deep down in the concrete's microscopic pores. Before you throw in the towel, try coming at it from a different angle. If a degreaser didn't quite finish the job, switch to a poultice. A poultice works by drawing the stain out rather than just dissolving it on the surface.
Have you ever cleaned a stain only to see it reappear a few days later? That’s usually a sign that you only got the surface-level oil. The deeper oil is slowly wicking its way back to the top. A second, more thorough application is often all it takes to knock it out for good.
If you’ve truly given it your all with DIY methods and the stain is still staring back at you, it might be time to call in the pros. They have commercial-grade equipment and specialized cleaners that can often succeed where home remedies simply can't. For example, a professional might use a hot-water pressure washer, which can be far more effective than a standard cold-water unit.
When your best efforts aren't quite enough, you need an expert. Atlanta Concrete Solutions has spent over 10 years tackling the toughest concrete problems across the Atlanta area. For a professional opinion and a free quote to get your concrete looking its best again, check out our work at https://atlantaconcretesolutions.com.