Drilling into concrete sounds like a job for the pros, but with the right gear and a little know-how, it’s surprisingly manageable. The secret isn't brute strength; it's using a tool that does the work for you. In short, you'll need a hammer drill, a carbide-tipped masonry bit sized for your fastener, and the right safety equipment. From there, it's just a matter of following a few simple steps. For example, a common project like installing a basketball hoop on a concrete driveway requires drilling four to six precise holes for the anchor bolts.
What It Takes To Drill Into Concrete
Most people get intimidated by concrete, but countless home projects require it. Think about securely hanging heavy garage shelves capable of holding hundreds of pounds of tools, mounting a permanent handrail on your porch steps for safety, or even installing a security camera on a brick wall to keep an eye on your property. Mastering this skill really opens up what you can do around your property.
The biggest mistake I see people make is trying to use their standard cordless drill. A regular drill just spins, which is perfect for wood but will barely scratch the surface of concrete before the motor overheats. A hammer drill is what you need. It spins and simultaneously delivers a rapid hammering action—often over 30,000 blows per minute (BPM)—pulverizing the concrete and aggregate while the bit’s flutes clear the debris.
Picking The Right Drill For The Project
For the average homeowner, a good hammer drill is the most versatile tool for the job. It's the workhorse you'll use for 90% of your projects, whether you're drilling a 1/4-inch hole for a simple Tapcon screw to secure electrical conduit or a larger 1/2-inch hole for a heavy-duty wedge anchor to bolt down a workbench. But it’s good to know what the other options are for bigger jobs.
The right tool doesn't just make the job easier—it makes it possible. For example, using a standard drill on a 4,000 PSI poured concrete slab will only lead to a burnt-out motor and a barely scratched surface.
The next step up is a rotary hammer. This is the hammer drill's bigger, more powerful cousin. It uses a piston to deliver much heavier blows, making it the go-to for drilling lots of large-diameter holes or tackling seriously tough, old concrete. A pro working on a home’s foundation, for instance, will almost always use a rotary hammer to drill holes for rebar dowels when adding a new section. If you want to dive deeper into the technical side of foundations, we have more information available on https://www.atlantaconcretesolutions.com/residential-foundation-concrete.
Then you have the core drill, which is a highly specialized piece of equipment for cutting perfectly clean, large-diameter holes—for example, a 4-inch hole through a basement wall for a new dryer vent or a 6-inch opening for a plumbing stack. You'll likely never need one for a DIY project. It's also critical to understand how your project affects the structure, especially with things like bolting racks to concrete walls, where specific anchoring techniques are required.
Choosing Your Tools And Drill Bits Like a Pro
The difference between a clean, perfectly sized hole and a day of pure frustration often boils down to having the right gear. Trying to drill into concrete with the wrong tool is a lot like trying to cut a steak with a butter knife—you’ll get nowhere fast and just make a mess.
The most common mistake I see is someone grabbing their standard cordless drill. It’s perfect for wood or drywall, but its purely rotational force is no match for dense concrete. You'll spend ages creating little more than a dimple while the motor screams in protest and eventually burns out. For concrete, you need a tool that doesn't just spin, but also hammers.
Hammer Drill vs. Rotary Hammer
Your two main choices are the hammer drill and its bigger, tougher sibling, the rotary hammer. A hammer drill is the versatile workhorse for most projects around the house. It uses a mechanical clutch to create a high-frequency, lower-impact hammering motion.
This is exactly what you need for drilling holes up to about 1/2-inch in diameter for jobs like:
- Installing heavy-duty shelving brackets in your garage. For instance, securing a 4-foot shelf that needs to hold 200 lbs might require four 3/8-inch sleeve anchors.
- Mounting a new handrail on concrete steps. A standard 3-foot handrail typically needs three or four 1/4-inch anchors.
- Securing a mailbox post to the sidewalk, which often uses 1/2-inch wedge anchors for maximum stability against wind and impact.
A rotary hammer, on the other hand, is a completely different beast. It uses a beefy electro-pneumatic piston to deliver much slower but significantly more powerful blows. This is the tool you bring in for the serious work, like effortlessly drilling holes over 1/2-inch or plowing through old, aggregate-heavy concrete. You'd reach for a rotary hammer to set large anchor bolts for a deck ledger board, a project that might require a dozen 5/8-inch holes, or to bore through a foundation wall for a new pipe.
A hammer drill chatters its way through concrete with thousands of tiny, rapid taps. A rotary hammer punches its way through with deliberate, heavy-hitting blows. For a small job like hanging a hose reel, the chatter is fine; for a big one like installing a car lift, you need the punch.
Understanding Masonry Drill Bits
The drill motor provides the power, but the bit does the real work. A standard wood or metal bit is completely useless here. You absolutely need a carbide-tipped masonry bit designed to pulverize and powder the concrete, not cut it.
These bits have a distinctive hardened tip made from tungsten carbide, one of the toughest materials out there. If you look closely, you’ll also notice deep, wide channels called flutes running up the shaft. These aren't just for looks—their critical job is to clear the pulverized concrete dust out of the hole as you drill. If those flutes get clogged, the bit overheats, binds up, and you're stuck. That’s why it's so important to pull the bit out of the hole every 10-15 seconds to let the debris clear.
With construction and DIY renovations booming, these specialized bits have become a massive industry. In fact, the global market for them reached USD 1.95 billion in 2023 and is on track to hit USD 3.22 billion by 2032. You can dig into the numbers in this concrete drill bits market analysis. This growth just proves how essential these tools are to modern building.
Matching The Bit To The Fastener
Getting the hole size right is non-negotiable if you want a secure hold. Drill a hole that's too big, and your anchor will never grab. Drill one that's too small, and you'll never get the fastener in. You have to match the bit diameter to the specific anchor or screw you're using.
For instance, the incredibly common Tapcon concrete screw requires a pilot hole that is actually smaller than the screw itself. This is by design.
- A 1/4-inch Tapcon screw needs a 3/16-inch pilot hole.
- A 3/16-inch Tapcon screw needs a 5/32-inch pilot hole.
The screw is engineered to cut its own threads directly into the concrete, creating a rock-solid grip. Other fasteners, like wedge or sleeve anchors, often require a hole that’s the exact same diameter as the anchor. For example, a 1/2-inch wedge anchor requires a 1/2-inch hole. The golden rule? Always read the packaging—the manufacturer will tell you exactly what size bit to use.
This table should help you visualize which tool is right for your job.
Drill Selection Guide for Concrete Projects
| Drill Type | Mechanism | Best For | Example Atlanta Project |
|---|---|---|---|
| Standard Drill | Rotation Only | Light-duty drilling in wood, metal, drywall. (Not for concrete) | Assembling wooden patio furniture. |
| Hammer Drill | Rotational + Mechanical Hammering | Small to medium holes (up to 1/2") in brick, block, and concrete. | Installing new house numbers on a brick facade in Marietta. |
| Rotary Hammer | Rotational + Pneumatic Hammering | Large holes (over 1/2"), multiple holes, or very hard concrete. | Anchoring support posts for a new carport in an Alpharetta driveway. |
Remember, for a one-off project, renting a high-quality hammer drill or rotary hammer from a local tool supplier is usually smarter and more cost-effective than buying one. For example, renting a pro-grade rotary hammer for a weekend might cost $50, while buying one could be over $400. You get access to professional-grade power without the long-term investment.
From First Mark to Final Hole: The Drilling Process
Alright, you've got your tools and the right bit for the job. Now for the part that really matters. Drilling a clean hole in concrete isn't about brute force; it's a game of precision and technique. Follow these steps, learned from years on the job, and every hole will be perfectly placed and sized for a rock-solid anchor.
Layout and Inspection: The Most Important Step
Before your drill even touches the wall, you need to do a little reconnaissance. Rushing this part is how simple jobs turn into disasters. Imagine you're mounting a heavy TV in your basement. You just eyeball the spots, start drilling, and suddenly hit a live electrical conduit. That's a bad day.
This is completely avoidable. Grab a stud finder with a deep-scan mode or, even better, a dedicated utility scanner. Sweep the entire area for hidden rebar, pipes, and wiring. For instance, when mounting a shelf, scan a 12-inch square area around each planned hole to be safe. Planning where your holes go is the first and most critical step to getting a professional result.
This is a great visual guide for figuring out which drill to grab for the task at hand.
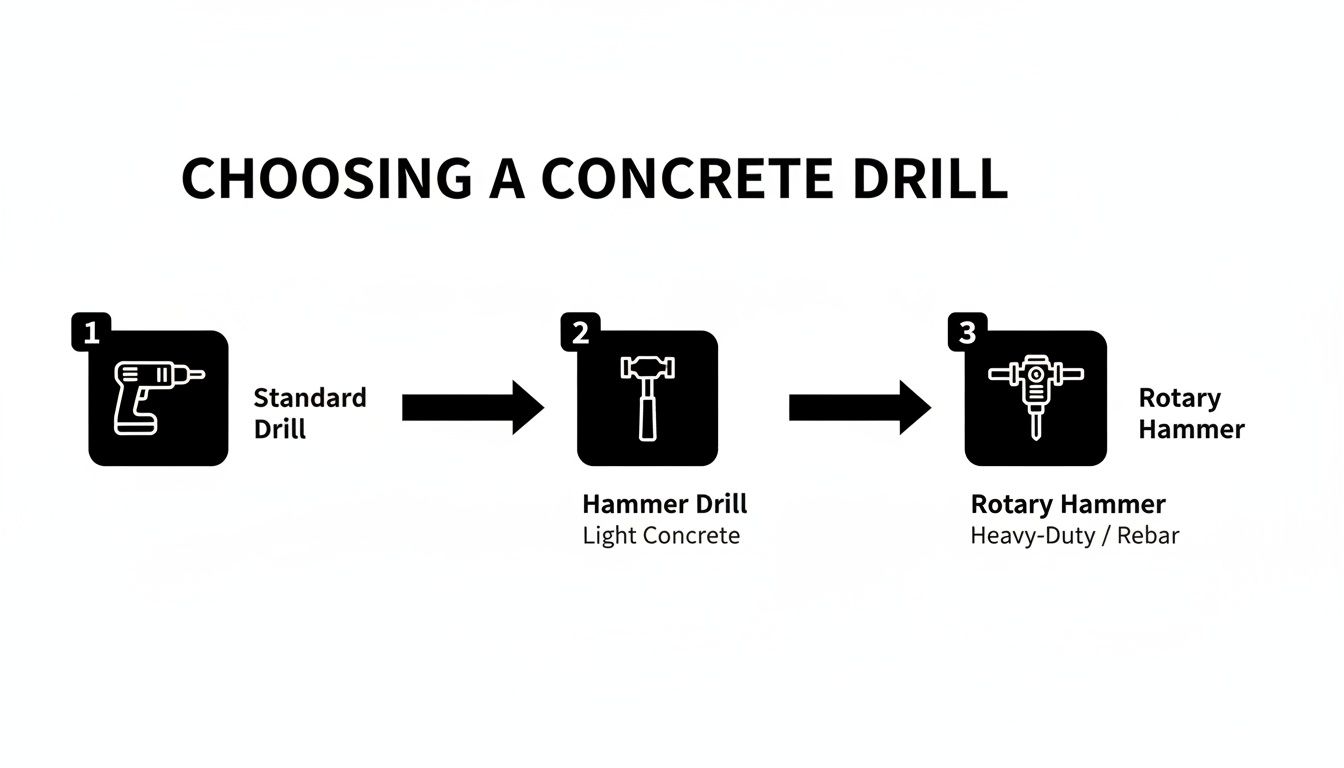
As you can see, the power and mechanism escalate quickly, from a standard drill for light work all the way up to a rotary hammer for serious concrete busting.
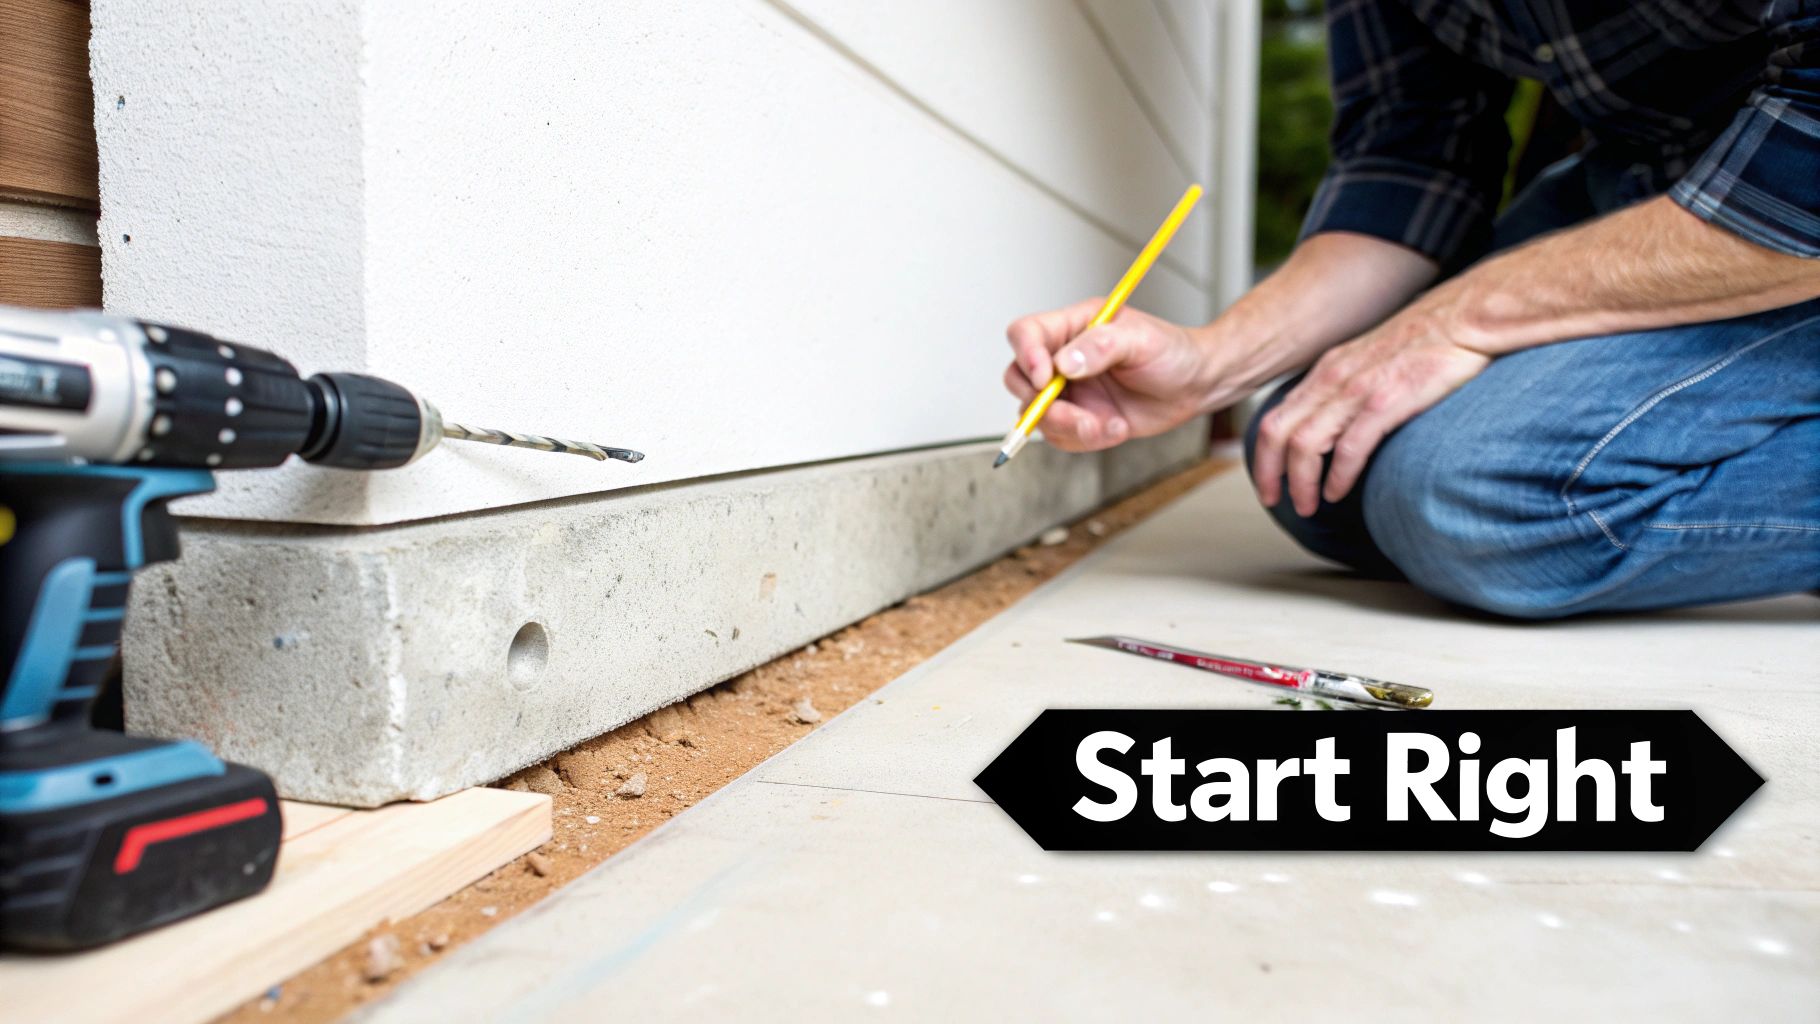
Marking and Starting the Hole
Once you've confirmed the area is clear, it's time for precise marking. Use a pencil or a sharpie to draw a clear "X" right where you need to drill. This is important because concrete, especially a smooth surface, loves to make drill bits "walk" or wander off the mark as soon as you start.
To stop this from happening, you need to give the bit a little home to start in. Take a nail set or even a tough nail, place the tip dead center on your "X," and give it a solid tap with a hammer. This creates a small divot that will cradle your masonry bit and keep it from skittering away.
A single tap with a nail set is the difference between a perfectly placed hole and a frustrating mess. This one-second trick saves minutes of aggravation and ensures your anchor goes exactly where you planned.
Getting Your Stance and Technique Right
How you stand and hold the drill is just as important as the tool itself. Plant your feet shoulder-width apart for a solid, stable base. Always use a two-handed grip—one hand on the trigger, the other on the auxiliary handle. This gives you maximum control.
Settle the bit into the divot you made and make sure the drill is perfectly perpendicular (90 degrees) to the wall. If you drill at an angle, you'll seriously compromise the holding power of your anchor and risk snapping the bit.
Start drilling slowly. Let the bit find its groove. Once it starts to bite, you can ramp up the speed. The key here is to apply firm, steady, straight-on pressure—about 20 to 30 pounds of force is a good starting point. Don't try to force it by leaning your whole body into the drill; let the tool's hammering action do the work. Your job is to keep it straight and stable.
The Rhythm of Drilling: In and Out
Here’s a pro tip that makes a world of difference in your speed and the lifespan of your bits: drill in intervals. Push the bit into the concrete for about 10-15 seconds, then pull it almost all the way back out while it's still spinning.
This simple rhythm does two crucial things:
- Clears Dust: This action lets the bit's flutes fling out all the pulverized concrete dust. A hole clogged with dust creates massive friction and heat.
- Cools the Bit: Pulling the bit out, even for a second, gives it a chance to cool down. An overheated bit loses its temper, which dulls the carbide tip and makes it useless fast.
This in-and-out motion is the secret to how pros drill clean holes so quickly without burning through a pile of expensive bits.
Hitting the Perfect Depth Every Time
Drilling to the right depth is non-negotiable if you want your anchors to work. Too shallow, and the anchor won't embed deep enough to hold the load. Too deep, and you might push a flush-mount anchor right through into a cavity. For example, a 1/4-inch Tapcon screw that is 1 3/4 inches long requires a hole at least 1 inch deep.
Most decent hammer drills and rotary hammers have an adjustable depth stop. It's a simple metal rod you set to your target depth, and it physically stops you from drilling any further. It's foolproof.
No depth stop? No problem. Here’s the classic job-site solution:
- Measure from the tip of your drill bit to the required depth. For instance, if you need a 2-inch deep hole, measure 2 inches up the bit from the tip.
- Wrap a piece of brightly colored electrical or painter's tape around the bit at that mark.
- Drill until the edge of the tape is flush with the surface of the concrete.
This little tape flag is a dead-simple visual guide that guarantees every hole is the perfect depth for a secure, reliable installation.
Don't Skip the Safety Gear—Seriously
Drilling into concrete is no joke. The noise is intense, and the dust it kicks up is nasty stuff. This isn't like drilling into drywall; you're pulverizing rock, and that creates hazards you have to take seriously. A little prep work goes a long way in keeping you safe.
Before your drill even touches the concrete, you need to gear up. Think of your Personal Protective Equipment (PPE) as your uniform for the job. It's not optional.
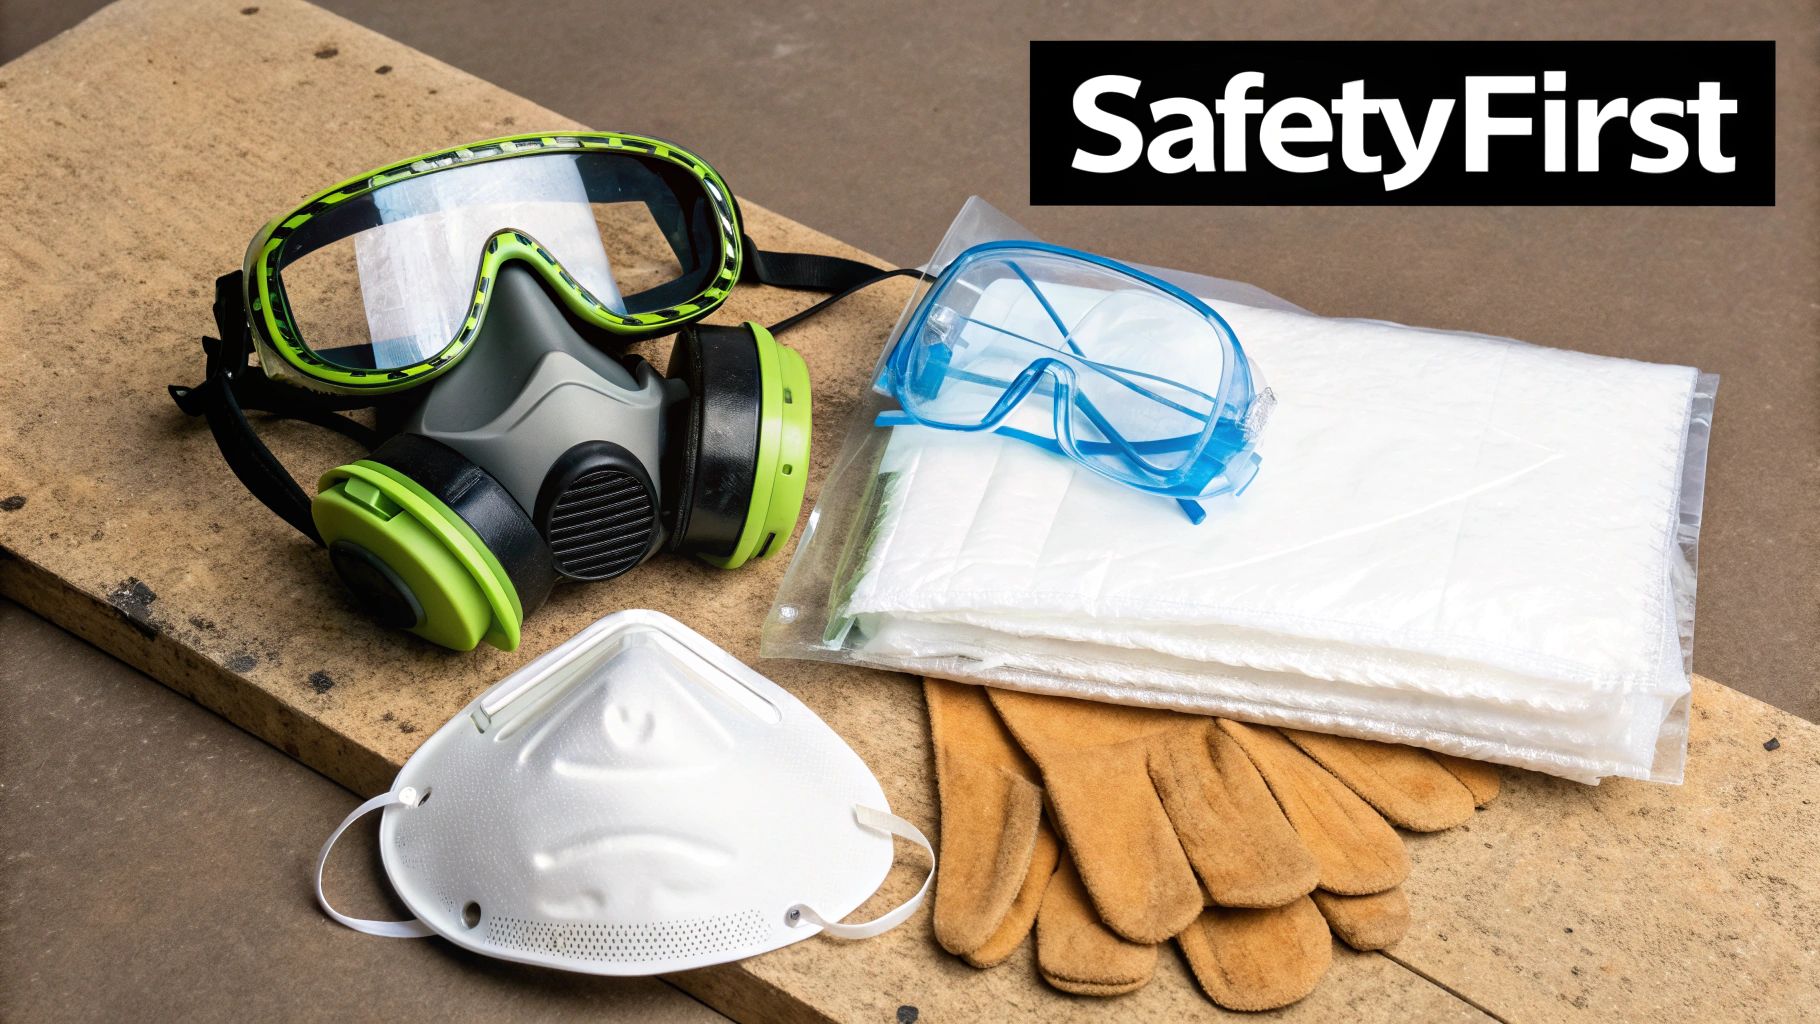
The Non-Negotiable PPE Checklist
This is your personal defense system. Each piece has a critical job, and skipping one exposes you to real, preventable risks.
- Eye Protection: Flying concrete chips are a genuine danger. You absolutely need ANSI-rated safety glasses or, even better, a pair of sealed goggles. A tiny fragment in your eye can do permanent damage.
- Respiratory Protection: This is the big one people often ignore. Concrete dust contains crystalline silica, which is a known carcinogen. A simple paper mask won't cut it—you need a properly fitted N95-rated respirator to filter out those microscopic particles before they get into your lungs.
- Hearing Protection: A hammer drill pounding on concrete can scream past 100 decibels. That's loud enough to cause permanent hearing loss over time. Grab a good pair of over-ear muffs or foam earplugs.
Don't just take my word for it. Professional job sites operate under strict personal protective equipment requirements for a reason. Follow their lead.
Prep Your Workspace to Contain the Chaos
What you do before you start drilling is just as important as how you drill, especially when you're indoors. A few minutes of prep will save you hours of cleanup.
Lay down some plastic sheeting or a canvas drop cloth to cover the floor and anything else you don't want coated in a layer of fine grey dust. If you're working inside, taping plastic over doorways is a great trick to stop that dust from migrating through the rest of the house.
Pro Tip: Safety isn't just about avoiding injury; it’s about professionalism. Taking five minutes to gear up and protect the surrounding area is the difference between a clean, successful job and a hazardous mess.
As construction continues to grow—the global concrete market hit USD 1.82 billion in 2024 and is expected to reach USD 2.28 billion by 2030—so does the need for safe practices. Here's a trick from the pros: a light mist of water from a spray bottle as you drill can knock down airborne dust by as much as 80%. It also helps keep your drill bit from overheating.
How to Manage Dust and Airflow
Controlling the dust you make is all about managing airflow, and your approach will depend entirely on where you're working.
If you're outside drilling a patio or foundation, the open air is your best friend. Just make sure you position yourself upwind of the hole so the dust cloud blows away from you, not into your face. For example, if the wind is blowing from the west, stand on the west side of your drilling spot.
Indoors, you have to create your own ventilation. Open up any nearby windows and doors to get a cross-breeze going. Better yet, stick a box fan in a window facing out. This creates negative pressure and actively pulls the dust-filled air out of the room, keeping what you breathe much cleaner.
Troubleshooting Common Concrete Drilling Problems
Even when you've done everything right, concrete has a way of throwing you a curveball. You're drilling along, and suddenly, you hit a snag. The drill stops dead, the bit gets stuck, or the hole just isn't right. It happens to everyone. The good news is that for every common problem, there's a field-tested solution to get you back on track.
The most common—and jarring—issue is when your drill suddenly stops making progress. You're applying steady pressure, the motor is whining, but the bit isn't going any deeper. Nine times out of ten, this means you've hit steel rebar.
What to Do When You Hit Steel Rebar
You'll know it when it happens. The deep, grinding crunch of drilling concrete abruptly changes to a high-pitched metallic scream. Stop drilling immediately. If you look closely at the dust coming out of the hole, you might even see tiny, shiny metal shavings mixed in. That's your confirmation.
Trying to power through rebar with a standard masonry bit is a great way to destroy the bit’s carbide tip and get absolutely nowhere. You've got two solid options here:
- Move the Hole: This is the path of least resistance and usually the best choice. For most projects, like installing shelving, moving the hole 1 to 2 inches in any direction is acceptable and bypasses the steel.
- Use a Rebar-Cutting Bit: If the anchor location is non-negotiable, for example when mounting a heavy piece of machinery with a fixed bolt pattern, you'll need a specialized rebar-cutting bit. These have a different head geometry that can chew through both concrete and rebar, but they're pricier and really need the power of a true rotary hammer to work effectively.
Dealing With a Jammed Drill Bit
Another classic headache is getting your drill bit stuck solid in the hole. This "binding" almost always happens when the flutes on the bit get completely clogged with concrete dust, which creates a massive amount of friction. It’s a sure sign you haven't been pulling the bit out often enough to clear the debris.
If your bit gets jammed, whatever you do, don't just try to yank it out. You'll just wedge it in tighter. Instead, switch your drill to reverse. Gently pulse the trigger to rock the bit back and forth; this motion helps break up the compacted dust and will usually allow you to slowly back it out.
A bit binding in the hole isn't a power problem—it's a dust problem. The fix is clearing the flutes. Get into a rhythm: drill for about 10-15 seconds, then pull the bit all the way out to let the dust fly.
Common Concrete Drilling Issues and Solutions
Beyond hitting rebar or getting stuck, a few other issues can pop up. Knowing how to diagnose and fix them on the fly will save you a ton of frustration and keep your project moving.
This table covers the most frequent problems you're likely to face.
| Problem | Likely Cause | How to Fix It |
|---|---|---|
| Bit is smoking or glowing red | Too much friction from either drilling too fast, not clearing dust, or insufficient pressure. | Slow down the drill speed. Pull the bit out of the hole every 15-20 seconds to clear dust. A light mist of water can also cool it down. |
| Drill is "walking" at the start | The bit is slipping on the smooth concrete surface before it can bite in. | Start with a small pilot hole using a smaller bit. For example, use a 1/8-inch bit to start a 1/4-inch hole. Alternatively, use a nail set or punch to create a small divot for the bit to sit in. |
| Hole is now too big | Drilled with the wrong size bit, or the hole "wallowed out" due to bit wobble. | For slightly oversized holes, use a larger diameter anchor. For significantly larger holes, use a two-part epoxy anchoring adhesive to set the fastener. |
| Drill suddenly stops and kicks | The bit has bound up aggressively, often due to hitting a large piece of aggregate or rebar at an angle. | Immediately release the trigger. Switch to reverse and carefully pulse the drill to back the bit out. Always use the drill's side handle for better control. |
Recognizing these issues early is key. For more complex problems, like cracking or spalling around the hole, you might find answers in our guide to residential concrete and masonry repair. Knowing these simple fixes for how to drill a hole in concrete can be the difference between a minor hiccup and a major project setback.
When to Call in the Pros
Knowing how to drill a hole in concrete is a great skill to have in your back pocket. But, part of being a smart DIYer is knowing when to hang up your tool belt and call in a professional.
While a good hammer drill can handle most jobs around the house, some projects just demand the heavy-duty gear and deep expertise a professional contractor brings. Pushing your luck—or your tools—too far can lead to expensive structural damage or, even worse, serious injury.
Think about the sheer scale and complexity of what you're trying to do. If you need to drill a few holes for some simple anchors, you've got this. But if you're looking at drilling dozens of holes for a long fence run or anchoring a heavy-duty ledger board, a pro will knock it out in a fraction of the time. They have powerful rotary hammers and ground-penetrating radar to locate rebar and utilities, which saves a massive amount of guesswork and prevents disastrous mistakes.
Jobs That Are Best Left to a Professional
Some situations are just non-starters for a DIY project. These are the times when the risks are simply too high and you absolutely should hire a licensed and insured contractor.
- Drilling Big Holes: Need to run a 4-inch plumbing line, 2-inch electrical conduit, or a 6-inch HVAC line through a concrete wall or slab? Your hammer drill isn't going to cut it. This is core drill territory, a specialized piece of equipment that carves out a perfectly clean, large-diameter plug.
- Working with Structural Slabs: Drilling into post-tensioned or pre-stressed concrete is incredibly dangerous. These slabs are common in large garages and multi-story buildings. If you accidentally hit and sever one of the tensioned steel cables inside, it can release its stored energy with explosive force. This can cause the concrete to fail catastrophically and lead to severe injury. Professionals are trained to identify these high-risk slabs and have the protocols to work on them safely.
Hiring a pro isn't admitting defeat. It's making a smart, strategic decision to protect your property and your own safety. For the tough jobs, their expertise is an investment, not an expense.
The Value of Professional Gear and Know-How
Let's be honest: pros have tools that most of us don't have sitting in the garage. The global market for core drill rentals alone is expected to grow from USD 850 million in 2025 to over USD 1.1 billion by 2035. That number tells you just how essential this kind of specialized gear is for serious projects. You can explore the core drill rental market report to see the data for yourself.
And sure, you could rent one. But without proper training, these are powerful and potentially dangerous machines. A core drill can bind and kick with enough force to break an arm.
Ultimately, a good contractor gives you peace of mind. They know the local building codes, they're insured, and they guarantee their work. If you're looking at a project that feels out of your league, check out our professional concrete and masonry services to make sure the job gets done right, safely, and on time.
Your Top Questions About Drilling Concrete, Answered
Even with a solid plan, you're bound to run into questions once the dust starts flying. It happens to everyone. Here are some of the most common things people ask when they're figuring out how to drill into concrete.
Can I Just Use My Regular Drill on Concrete?
I get this question all the time, and the answer is a hard no. A regular drill just spins. While that’s perfect for wood or drywall, it won't do much more than scratch the surface of concrete and will probably burn out your drill's motor in the process. For example, trying to drill a 1/4-inch hole with a standard drill might take 10 minutes to go 1/8-inch deep before the motor overheats, while a hammer drill would do it in 15 seconds.
To get through concrete, you need a tool that hammers as it spins. This pulverizing action is what actually breaks up the material, allowing the bit to move forward. Without it, you're just not going to get anywhere.
Uh Oh… I Think I Hit Rebar. What Now?
You'll know it the second it happens. The forward progress will stop cold, and you'll hear a high-pitched, metallic screeching sound instead of the usual grinding. You might even see a few metal shavings mixed in with the concrete dust.
Stop drilling immediately. Don't try to power through it—you'll only destroy your bit and get absolutely nowhere. The best and simplest fix is to just abandon that hole. Move over an inch or two in any direction and start a new one. It's the only practical way to bypass the steel.
What's the Right Way to Clean Out the Hole for an Anchor?
This is a step people often overlook, but it's absolutely critical for a secure hold. If you leave concrete dust in the hole, it acts like a lubricant and can slash an anchor's holding power by more than 50%.
For a truly solid connection, you have to get that debris out. Here's the professional way to do it:
- Scrub it out: Get a small wire brush (they make them specifically for this, often sold right next to the anchors) and scrub the inside of the hole. This breaks loose all the dust that gets compacted against the sides.
- Blow it clean: Use compressed air from a compressor or even a can of compressed air for electronics to blast all the loose dust and debris out of the hole. A simple hand blower bulb also works.
I always repeat this brush-and-blow process two or three times, until no more dust comes out. This ensures the anchor gets a direct, powerful grip on the solid concrete, not on a layer of leftover grit.
When a project gets tricky or you're just not comfortable tackling it, bringing in a pro is always the smartest move. At Atlanta Concrete Solutions, we handle everything from precise anchor installations to major structural drilling. If you want to make sure the job's done right, visit us at https://atlantaconcretesolutions.com to get your free quote.