Acid stain isn't a paint or a coating. It’s a chemical reaction. A solution of hydrochloric acid and metallic salts actually becomes part of the concrete by reacting with the lime inside, creating deep, marbled colors that are completely permanent. For example, a common stain color like "walnut" is made from metallic salts of iron and manganese. When this solution meets the calcium hydroxide in the concrete, it creates permanent, variegated brown tones. Because it's a reaction, not a layer on top, it will never chip, flake, or peel away. This makes it an incredibly durable and beautiful choice for just about any concrete surface, from your basement floor to an outdoor patio.
Mastering Your Concrete Prep and Assessment
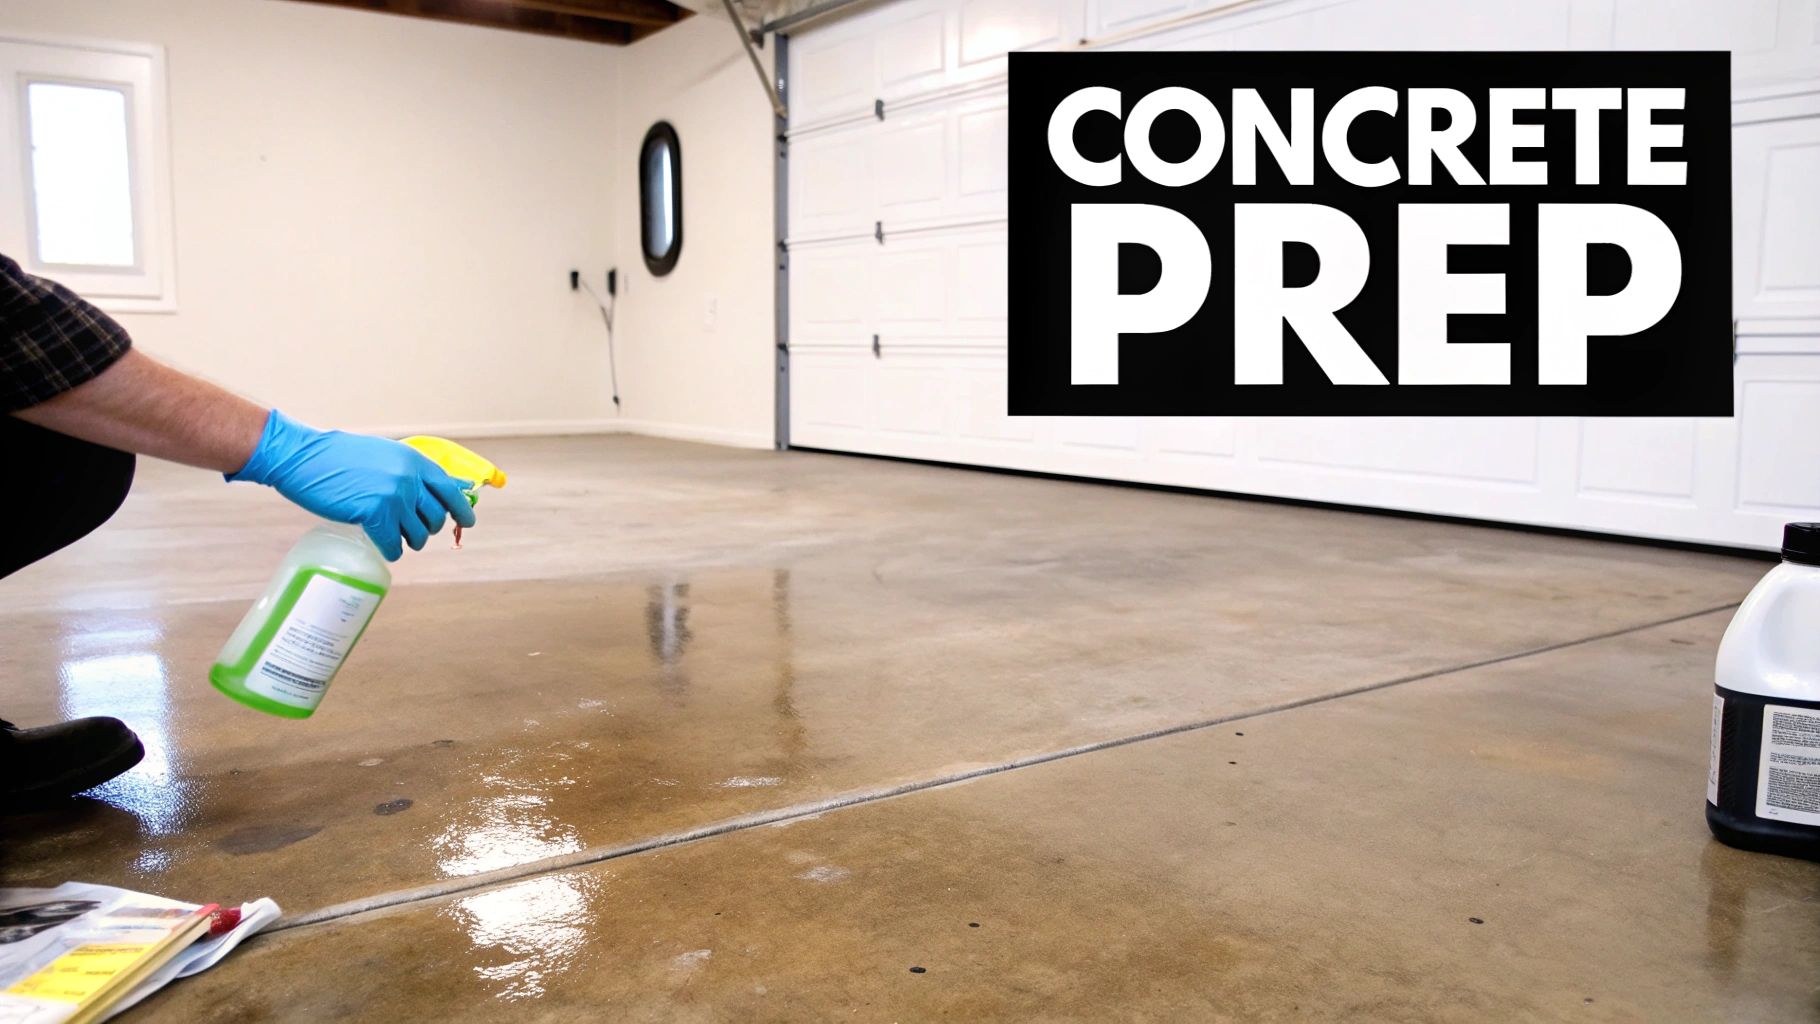
Let me share a secret from years in this business: the final look of your acid-stained floor has almost nothing to do with how you spray the stain. Seriously. A stunning, professional-grade finish is 90% about the prep work you do beforehand.
Think of it as the foundation for your entire project. If you rush this part or skip a step, you're setting yourself up for failure. This isn't just busywork; it's the most critical phase that dictates whether you get a beautiful, marbled floor or a blotchy, disappointing mess. For example, failing to remove a nearly invisible curing compound from a new slab will result in a floor where the stain takes beautifully in some areas and does absolutely nothing in others, creating a permanent, map-like pattern of failure.
Identifying Potential Deal-Breakers
Before you even think about buying a gallon of stain, you need to play detective with your concrete slab. The acid has to physically touch and react with the minerals in the concrete. Anything—and I mean anything—that gets in the way will stop that reaction cold.
Keep an eye out for these common culprits:
- Old Sealers or Coatings: Many concrete floors, especially in garages, have a clear sealer you might not even notice. If a previous owner painted the floor, even tiny, invisible remnants of that paint will block the stain. For example, a floor paint that has worn away from foot traffic might still exist in the concrete's pores, which will be enough to prevent the stain from reacting.
- Deep-Set Stains: Nasty oil or grease stains that have been soaking into the concrete for years will create "dead spots" where the stain simply won't take. For instance, a dark motor oil stain in a garage might resist cleaning and will appear as a light, unstained patch on your finished floor.
- Adhesive Residue: This is a big one. If old carpet or vinyl tile was pulled up, the glue left behind is a major barrier that has to be completely removed. The sticky, amber-colored residue from old linoleum, for example, is notoriously difficult to remove and will completely block the stain.
Decorative concrete is a booming industry, growing from USD 17.77 billion and on track to hit USD 23 billion by 2029. With acid stains making up over 58% of the residential market, homeowners expect a high-end look. Proper prep is the only way to achieve it.
The Non-Negotiable Water Drop Test
So, how can you tell if your concrete is ready to drink in that beautiful stain? There's a foolproof method that takes all of 30 seconds. Do not skip this test.
Just pour a little bit of water onto a few different spots on the floor. Now, watch what happens.
If the water soaks in right away and darkens the concrete, you’re in business. That means the surface is porous and ready for staining. This is exactly what you want to see. An example of a perfect result is the water disappearing into the concrete within about 60 seconds.
If the water beads up and just sits there, you have a problem. This tells you there's a sealer, curing compound, or some other contaminant blocking the pores. The acid stain will fail until that barrier is completely gone, which usually means a chemical stripper or grinding the surface. You can see what perfectly prepped and finished floors look like in our project gallery.
Your Practical Cleaning and Masking Guide
Once you've confirmed your concrete is absorbent, it's time for a deep clean. Your goal here is a surgically clean surface, free of every last bit of dirt, grime, and grease.
If you're tackling a garage floor with old oil spots, you’ll need a heavy-duty concrete degreaser. Get a stiff-bristle brush and really scrub it in, let it work its magic, and then rinse it off completely. For a cleaner basement or patio, a good concrete cleaner and etcher will do the job. Just be sure to avoid any soap-based cleaners, as they leave behind a residue that can interfere with the stain. For example, using a common household floor soap can leave a thin, invisible film that will cause the stain to look blotchy.
Rinsing is absolutely critical. After cleaning, you need to rinse the floor at least two or three times with fresh, clean water. Use a shop-vac or a floor squeegee to get all the dirty water up. Any residue left to dry on the surface will show up in your final finish.
Finally, it’s time to protect everything you don't want stained. Acid stain is permanent and unforgiving.
- Use high-quality painter's tape and heavy plastic sheeting to mask off every baseboard, wall, and door frame nearby. For example, use a tape-and-drape product that combines tape and plastic in one roll for efficiency.
- Don't just cover the bottom of the walls—run the plastic at least a few feet up.
- A tiny splash can travel farther than you think, so being meticulous with your masking is what separates a sharp, professional job from a sloppy one. For instance, even a small drop of stain on drywall will create a permanent brown spot that is very difficult to cover with paint later.
Gearing Up: Your Toolkit for a Flawless, Safe Finish
Before a single drop of acid stain touches your concrete, we need to talk about gear. This is the part people often rush, but from my experience, getting your tools and safety equipment lined up first is what separates a stunning, professional-looking floor from a trip to the ER or a ruined slab.
Think of it this way: the acid is powerful enough to permanently change the color of rock. You absolutely must respect what it can do to you and your property. For example, a single misplaced drop can permanently etch glass or discolor aluminum door frames.
Your Non-Negotiable Safety Gear
First things first: personal protection. The fumes from acid stain are no joke, and a direct splash on your skin can cause a nasty chemical burn. This isn't the time to make do with what's lying around in the garage.
Here's the essential safety lineup you need before you even open the stain:
- Splash-Proof Goggles: Not safety glasses. You need the kind that seal completely around your eyes to protect from every angle. A good example is the type used in chemistry labs that have a soft rubber seal against your face.
- Acid-Resistant Gloves: Standard latex or leather gloves will get eaten right through. Go for thick nitrile or neoprene gloves made for handling chemicals.
- Respirator with Acid Gas Cartridges: A simple dust mask is completely useless against acid fumes. Get a proper half-face respirator and make sure the cartridges are rated for acid vapors. For example, look for P100 cartridges that are also rated for chlorine/hydrogen chloride.
- Full Coverage: Long sleeves, pants, and closed-toe, waterproof boots are mandatory. You want zero exposed skin.
The chemical reaction that makes your concrete beautiful is permanent. Trust me, you don't want to find out what it can permanently do to your health. Good PPE is the most critical investment you'll make in this entire project.
Tools for Application, Cleanup, and Everything In-Between
Once you’re protected, it's time to gather the tools for the job itself. The right equipment doesn't just make the work easier; it directly influences the final look of your floor.
Let's break down exactly what you'll need. To make it simple, I've put together a checklist of the gear I rely on for every staining job.
Essential Safety and Application Tool Checklist
| Category | Item | Key Feature and Purpose |
|---|---|---|
| Safety (PPE) | Splash-Proof Goggles | Full-seal design to prevent eye contact with acid splashes. |
| Safety (PPE) | Acid-Resistant Gloves | Thick nitrile or neoprene material to protect hands from chemical burns. |
| Safety (PPE) | Respirator | Half-face mask with acid gas cartridges to filter harmful fumes. |
| Safety (PPE) | Protective Clothing | Long sleeves, pants, and waterproof boots to cover all skin. |
| Application | All-Plastic Pump Sprayer | Must have no metal parts to avoid corrosion. A fan-tip nozzle gives the best coverage. For example, the wand and tip must be plastic, not brass. |
| Application | All-Plastic Buckets | Used for mixing stain (if diluting) and the neutralizing solution. For example, standard 5-gallon buckets from a hardware store. |
| Application | Acid-Resistant Brushes | For touch-ups, edges, and creating custom, artistic effects. For example, a nylon/polyester brush is a good choice. |
| Neutralization | Baking Soda or Ammonia | The key ingredient to mix with water to stop the acid's chemical reaction. |
| Cleanup | Stiff-Bristled Brush | A non-metal brush for scrubbing the concrete during cleaning and neutralizing. For example, a deck scrub brush with synthetic bristles. |
| Cleanup | Wet-Dry Shop Vacuum | The most efficient tool for removing residue after neutralizing, ensuring a clean surface for sealing. |
Having every item on this list ready to go before you start means you can focus entirely on the creative process without any last-minute scrambles. It's the key to a smooth, safe, and ultimately successful project.
Applying the Stain: Where the Real Artistry Happens
This is the moment where science and art truly collide. Applying acid stain isn't like painting a wall; it's more like guiding a chemical reaction to create a unique, marbled masterpiece. The final look is born from your technique, and knowing how to handle the tools gives you incredible control over the final product.
The process hinges on a mix of acid-based solutions and metallic salts that react with the lime (calcium hydroxide) in your concrete. This reaction creates those beautiful, variegated colors. First making waves back in the 1970s, this method completely changed the game for concrete finishing. It provides a durable, stunning alternative that penetrates up to 2 mm deep for color that simply won't chip or fade away.
Test Your Stain—This Is Non-Negotiable
Before you even think about staining the main floor, you have to run a test. I can't stress this enough. Every single slab of concrete is different—its age, how porous it is, its mineral makeup—all of this means the same stain can look completely different from one floor to the next. For instance, a "Coffee" colored stain might look like a rich, dark brown on one slab but a much lighter tan on another due to differences in the concrete's lime content.
Find a small, hidden spot, like the back of a closet or under where the fridge will go. Apply a bit of your stain mixture. Let it react for the full recommended time, neutralize it, and rinse it off. Only then will you see the true color. This little preview lets you tweak your dilution or application method before you're committed to the whole floor.
The biggest rookie mistake is assuming the color in the bottle is what you'll get on the floor. An acid stain's true color only comes to life after the reaction. A test spot is the only way to see what your concrete's unique chemistry has in store.
This simple graphic breaks down the essential workflow at a glance.
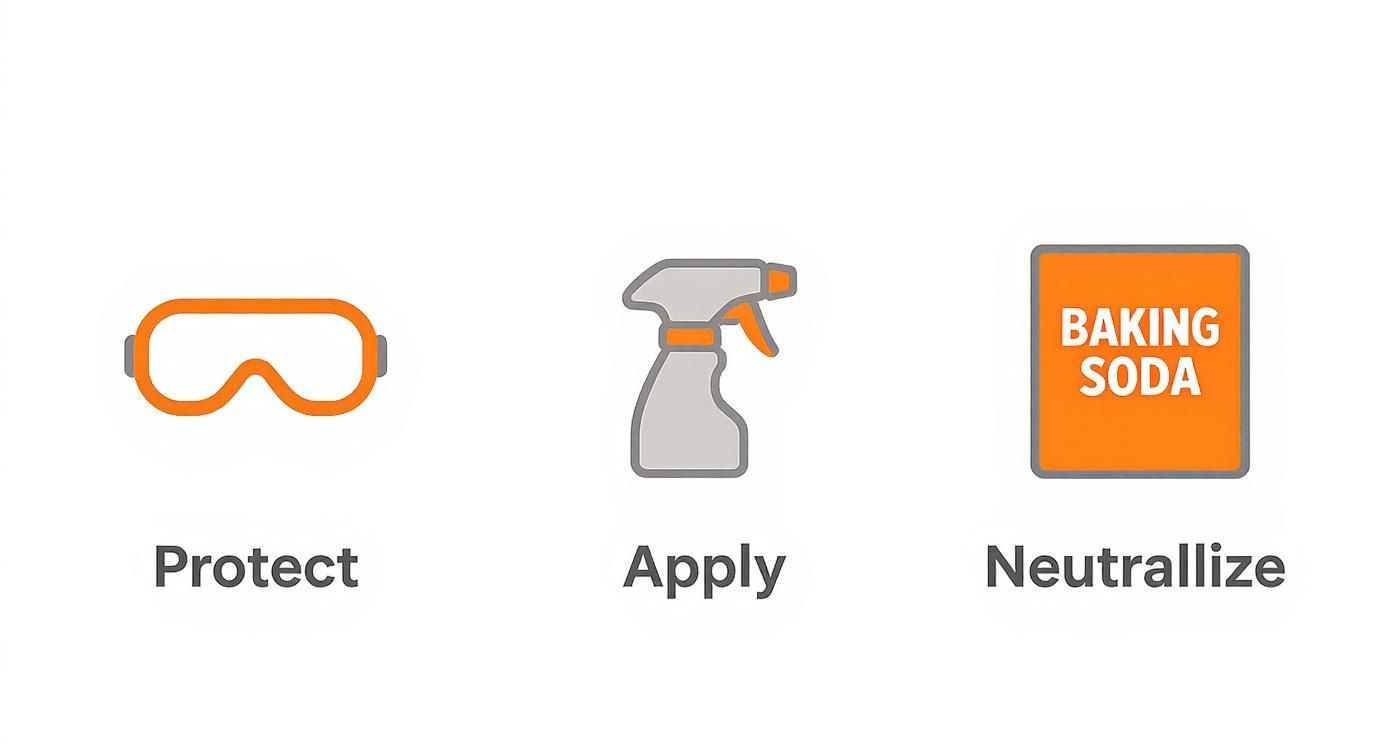
It’s a great reminder of the core process: protect yourself first, then apply the stain, and finally, neutralize the reaction to lock in that beautiful color.
Choosing Your Application Method
The tool you use has a massive impact on the final pattern and texture. There's no single "right" way to do it; it all comes down to the look you're trying to achieve.
- Plastic Pump-Up Sprayer: This is the go-to for a reason. Using an all-plastic sprayer with a fan-tip nozzle lets you lay down a light, even coat. When you apply it in a random, circular motion, you get a soft, consistent color with subtle, cloud-like variations.
- Sponges and Rags: If you want a more dramatic, mottled finish, try dabbing or blotting the stain on with a sea sponge. This technique creates a more intense, marbled look by concentrating the color in certain spots. It's perfect for mimicking the look of natural stone.
- Brushes: An acid-resistant brush is your best friend for cutting in along edges or for adding artistic highlights and lowlights. You can use it to feather the stain into tight corners or even to intentionally create darker "veins" across the floor for a high-end look.
For example, if you want a subtle ‘aged leather’ look for a basement floor, the sprayer is your best bet. But for a bold, variegated entryway that looks like polished granite, you'll want to combine a sprayer with some strategic sponge work to get that high-contrast, artistic finish. Our gallery of residential decorative concrete shows just how different these techniques can look.
Pro Tips for a Flawless Application
Applying the stain is a fluid process that really rewards careful planning and a steady hand. The secret is to work methodically and avoid common mistakes like lap marks or blotchy patches.
Always work in small, manageable sections—I usually stick to a 4×4 foot area at a time. This gives you total control and allows you to maintain what we call a wet edge. A wet edge just means you're always overlapping the new section of stain onto the previous section before it starts to dry. Blending the edges this way is what prevents those ugly, hard lines from forming between sections.
And don't be afraid to layer the stain to build depth and character. After your first coat is down and has started reacting, you can go back and lightly spray or sponge a little more onto certain areas. This is a fantastic trick for creating natural-looking variations in color and adding a real sense of dimension to the floor. Just let the initial reaction begin before adding more—dumping on too much at once will just create puddles and ruin the effect. With the right tools and technique, you're not just staining a floor anymore. You're designing a one-of-a-kind surface.
Neutralizing the Stain and Managing the Cleanup
You’ve applied the acid stain, and things are looking good. But your job is far from over. Right now, that acid is still actively working on the concrete. If you don't stop the chemical reaction at the right moment, you could end up with a color you didn't want—or worse, a sealer that peels right off.
This neutralization step is what locks in that beautiful, marbled finish you’ve worked so hard for. Think of it like a darkroom process: the acid is the developer, and the neutralizer is the "fixer" that makes the image permanent. It’s a non-negotiable step that bridges the gap between staining and sealing.
Knowing When to Stop the Reaction
The million-dollar question is always, "How long do I let it sit?" There's no single answer—it really depends on the color depth you're aiming for and how your specific slab is behaving. This waiting period is where the art comes into play.
As a general rule, give the stain a minimum of four to six hours to react. For deeper, richer tones, I often let a project sit overnight. The best guide you have is that test spot you did earlier. What you saw there is what you should expect on the main floor. For example, if your test spot for a 'Jade' color looked perfect after 5 hours, stick to that timing for the entire floor.
Pro Tip: Don't panic if the wet, active stain looks dark, muddy, or not quite right. The true color only reveals itself after you neutralize and rinse it. Trust the process and the timeline you established with your test patch.
Once the time is up and you’re happy with the development, it’s time to stop the acid in its tracks.
Mixing and Applying the Neutralizing Solution
You don’t need anything fancy here. A simple, alkaline solution is all it takes to bring the concrete's pH back to a neutral state, creating a surface the sealer can actually bond to.
You likely have what you need in your pantry. Your two best options are:
- Baking Soda: My go-to for its safety and effectiveness. Just mix one pound of baking soda into a gallon of clean water until it dissolves. A standard box of baking soda from the grocery store is typically one pound.
- Ammonia: Also a solid choice. A mix of one cup of ammonia per gallon of water will do the trick, but be ready for the strong smell. Make sure you’ve got plenty of fresh air moving through the space.
Once mixed, you can pour the solution from a bucket and spread it with a broom or, for more even coverage, use your all-plastic pump sprayer. As you apply it, you’ll see some light fizzing—that’s the sign that the alkaline solution is working its magic and neutralizing the last of the acid.
A Step-by-Step Cleanup Plan
With the acid neutralized, you have to get every bit of residue off the floor. This slurry of spent acid, metallic salts, and neutralizer is the number one enemy of a good sealer coat. If you leave any of it behind, your sealer will fail. It’s that simple.
First, grab a stiff, non-metal bristle brush and scrub the entire floor while it's still wet with the neutralizing solution. You have to physically dislodge all the fine, powdery residue from the concrete’s pores.
Next, a wet-vac is your best friend. A squeegee is okay, but a shop vacuum truly pulls the slurry out of the concrete's texture instead of just moving it around. Work methodically in sections, vacuuming up all the liquid until the floor is clear.
Finally, this isn't a one-and-done job. Rinse the entire floor with clean water, give it another quick scrub, and vacuum it all up again. I almost always repeat this rinse cycle two or three times to be absolutely certain the surface is pristine. For example, on the final rinse, the water you vacuum up should look almost perfectly clear. If it's still colored, you need to rinse again.
The Final pH Test: A Step You Should Not Skip
So, how do you know for sure that the concrete is ready for sealer? You test it. This is a quick step many people skip, but it’s the only way to be 100% confident that your sealer will adhere properly and last for years.
Pick up some inexpensive pH test strips from any hardware or pool supply store. Drip a little distilled water onto a clean, dry spot on the floor and press a test strip into the puddle.
You’re looking for a pH reading between 6.5 and 7.5—that’s the neutral sweet spot. If it’s still acidic (below 6.0), you need to repeat the neutralization and rinsing process. Once your pH is balanced, you're officially ready for the final topcoat.
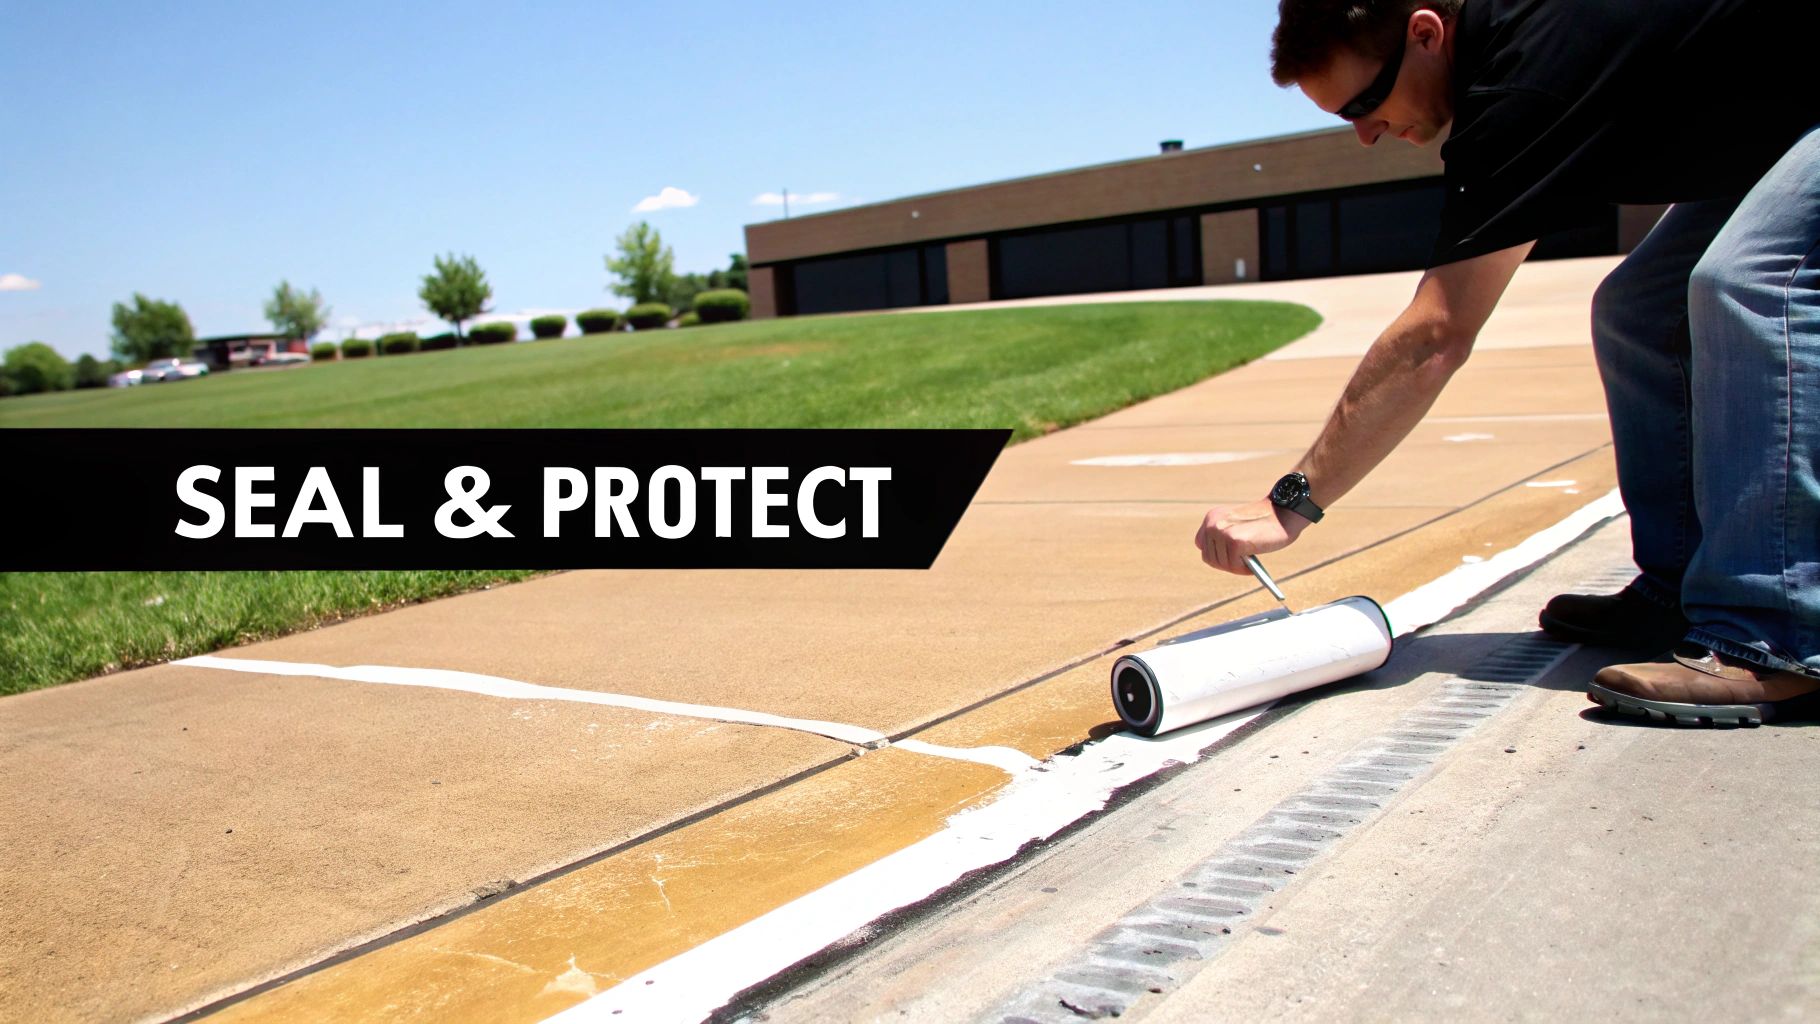
Sealing and Protecting Your Stained Concrete Floor
Once the acid has done its work and you’ve neutralized the surface, you’ll finally see the true, vibrant colors of your floor. But don’t celebrate just yet. The final step—sealing—is what really brings the project home. It transforms that raw, stained concrete into a finished masterpiece, making the colors pop with incredible depth while protecting your hard work for years to come.
Without a good sealer, the concrete remains porous and is a sitting duck for spills, stains, and scuffs. A high-quality topcoat not only acts as a durable shield but also dramatically enhances the color. It gives the floor that rich, "wet" look that brings out all the subtle marbling and unique variations you worked so hard to create.
Choosing the Right Sealer for Your Project
The sealer you pick will define the floor's final look and how well it holds up over time. The three most common players are acrylics, epoxies, and urethanes, and each one offers different benefits depending on where the floor is. A living room floor, for example, has completely different needs than a high-traffic garage workshop.
Making the right choice is a big deal. The global market for concrete floor coatings, which includes these essential sealers, was valued at over USD 5.5 billion and is expected to climb to USD 9.25 billion. The unique look and durability of acid stain are huge reasons for this growth, especially in North America and the Asia Pacific region. You can dig into these market trends and the impact of quality coatings in this detailed industry report.
To help you decide, let's break down the top sealer options.
Comparing Concrete Sealers for Stained Floors
Choosing the right topcoat is all about balancing aesthetics with performance. This table gives you a quick rundown of the most popular choices to help you match a sealer to your specific project needs.
| Sealer Type | Typical Finish | Durability Level | Best For |
|---|---|---|---|
| Acrylic Sealer | Satin to high-gloss | Good | Interior/Exterior residential spaces: Patios, basements, living rooms. Offers good protection and excellent UV resistance. For example, a water-based acrylic is perfect for a basement den. |
| Epoxy Coating | High-gloss, thick build | Excellent | High-traffic indoor areas: Garages, workshops, commercial kitchens. Extremely durable and chemical-resistant. For example, a 100% solids epoxy will withstand hot tires and oil spills in a garage. |
| Urethane Sealer | Satin to high-gloss | Superior | Ultimate protection: Often used as a topcoat over epoxy in commercial settings for maximum scratch resistance. For example, a restaurant floor might get an epoxy base with a urethane topcoat. |
Each type has its place. For most residential projects, an acrylic sealer hits the sweet spot of protection and appearance. But for a garage floor that sees cars, tools, and chemicals, stepping up to an epoxy is a wise investment.
Best Practices for a Flawless Sealer Application
Whether you go with a solvent-based or water-based product, your application technique is what will make or break the final look.
Solvent-based acrylics are a favorite for acid-stained floors because they do the best job of deepening and enhancing the color. The downside? They have strong fumes, so you'll need plenty of ventilation. Water-based sealers, on the other hand, are low-odor and much easier to clean up, though they might not make the colors pop quite as dramatically.
No matter which you choose, the most reliable tool for a DIY job is a high-quality, 3/8-inch nap roller.
Here are a few tips I've learned over the years to get it right:
- Work in Thin Coats: This is the golden rule. The biggest mistake people make is applying sealer too heavily. This traps air and solvent, which leads to ugly bubbles and a cloudy, hazy finish. Two thin, even coats are always better than one thick one. For example, your first coat should look almost like a thin film of water rather than a thick layer of paint.
- Maintain a Wet Edge: Just like when you applied the stain, work in small, manageable sections. Always roll back into the wet edge of the sealer you just put down. This is how you avoid those dreaded lap marks.
- Don't Over-Roll: Get the sealer on the floor and move on. If you keep rolling back and forth over an area that’s already starting to dry, you’ll pull the sealer up and create a rough, uneven texture.
Pro Tip: Pour the sealer into a paint tray and work from there. Never, ever pour it directly onto the floor. This creates puddles that are impossible to spread evenly and almost guarantees a blotchy, amateur-looking finish.
Long-Term Care and Maintenance
Your beautiful new floor is tough, but it's not invincible. A simple maintenance routine is all it takes to keep it looking brand new for decades.
For day-to-day cleaning, a quick pass with a microfiber dust mop is perfect. For deeper cleans, stick to a pH-neutral cleaner. Stay away from harsh chemicals like bleach or ammonia—they can eat away at the sealer and dull the finish. For example, a cleaner specifically designed for sealed concrete or even just warm water with a drop of mild dish soap is ideal.
For floors in high-traffic areas, I highly recommend applying a sacrificial wax coat over the sealer. Think of it as a screen protector for your floor. This clear finish takes the abuse of daily foot traffic, scuffs, and spills. When it starts looking dull, you simply strip the old wax and apply a fresh coat. The permanent sealer underneath remains completely untouched. An example would be applying a coat of floor finish or wax every 6-12 months in a busy kitchen or entryway.
This simple step can add years to the life of your floor. It's this combination of a durable sealer and proper maintenance that makes decorative finishes like polished concrete such a fantastic long-term solution, which we cover more in our guide to residential polished concrete.
A Few Common Questions About Acid Staining Concrete
Even with a perfect plan, you're bound to run into a few head-scratchers when acid-staining. It's just the nature of the beast—part chemistry, part art. Sometimes, the concrete just decides to do its own thing. Let's walk through some of the most common issues that come up and figure out how to handle them.
"Why Isn't My Concrete Taking the Stain?"
This is the big one. I get this call all the time, and 99% of the time, it boils down to one simple thing: the concrete wasn't prepped right. The acid has to physically react with the free lime in the concrete to create color. If something is blocking that connection, you get nothing.
Most often, the culprit is an old sealer you can't even see. Remember that water drop test we talked about? If the water beads up instead of soaking in, you've got a barrier. Other things that can get in the way include:
- Hidden Contaminants: Lingering grease, oil, or even a film of soap residue can block the stain, leaving frustrating "dead spots." For example, if someone previously washed the floor with a soap like Pine-Sol, the residue it leaves can prevent the stain from working.
- Concrete That's Too New: A new slab needs a solid 28 days to cure. If you jump the gun, there isn't enough available lime for the acid to react with, and the color will be weak or nonexistent.
- Low Lime Content: It's not common, but some concrete mixes are just low in lime. This leads to a very faint reaction and a much lighter color than you expected. For instance, concrete with a high fly ash content may react poorly.
The fix usually involves stripping the surface or even lightly grinding it to expose fresh, porous concrete. Whatever you do, make sure you do another water test on a small area before you try to stain the whole floor again.
"Can I Use Acid Stain on My Outdoor Patio?"
You sure can. Acid stain is fantastic for outdoor concrete like patios, pool decks, and walkways. Because the color is chemically etched into the surface, it's completely UV stable. It won't peel or flake off like paint, no matter how much sun and rain it gets.
The real make-or-break step for an outdoor project is the sealer. You absolutely must use a high-quality, exterior-grade sealer designed to stand up to UV exposure. This will prevent it from yellowing and breaking down over time. For example, look for a solvent-based acrylic sealer that specifically states it is non-yellowing and UV-resistant.
A quick but crucial tip for any outdoor surface that gets wet: add a slip-resistant additive to your final coat of sealer. This stuff is a very fine grit that gives you essential traction underfoot, especially around a pool. You can barely see it, but you'll be glad it's there. An example of this is a product like "SharkGrip" that you mix directly into the sealer before application.
"How Can I Fix Blotchy Spots or Other Mistakes?"
Alright, so you've got a spot that's too dark or an area that looks patchy. With acid stain, you can't just wipe it off and start fresh like you would with paint. It’s a permanent chemical reaction. But that doesn't mean you're stuck with it.
If the color is too light or you simply missed a spot, you can often deepen the color by applying another, more diluted coat of stain. I like to use a small sponge to dab the stain onto the lighter areas, which helps it blend in and enhances the mottled, natural look. For example, if a 4-inch spot didn't take the stain well, you can use a small artist's brush to carefully apply a bit more stain just to that area.
What if a spot is too dark? This is trickier. You can try to dilute the area with water while the stain is still wet and reacting, but the results can be unpredictable. My advice? Lean into it.
Often, the best fix is to embrace the "mistake" and make it look intentional. Add a few more dark spots in other areas of the floor. Suddenly, that one blotch that was driving you crazy becomes part of a more complex, marbled pattern. The real beauty of acid stain is in its perfectly imperfect, one-of-a-kind character, not in a perfectly uniform color.
Ready to transform your concrete from drab to dramatic but prefer to leave it to the professionals? Atlanta Concrete Solutions has over a decade of experience creating stunning decorative concrete floors for homes and businesses. We handle every detail, from meticulous prep to flawless sealing, ensuring a beautiful, durable finish. Visit us at https://atlantaconcretesolutions.com to get your free quote today.