Thinking about turning an empty patch of your yard into a personal basketball court? It’s a fantastic project that adds a ton of value and endless opportunities for fun. The whole process really breaks down into four main stages: smart planning and picking the right spot, serious ground prep, pouring a rock-solid concrete slab, and finally, adding all the finishing touches like the hoop and court lines. For example, a well-planned court considers sun orientation to avoid glare during afternoon games, while a poorly planned one might end up unusable at peak hours.
If you get these steps right, you'll end up with a high-performance court that's built to last for years of pickup games and shooting practice.
Your Guide to Building a Backyard Basketball Court
Building a pro-level basketball court in your backyard is more realistic than you might think, especially when you have experienced pros handling the foundation—the most critical part. Let's walk through the entire process, from sketching out your initial ideas on a notepad to hearing that first satisfying swish of the net. This is your game plan.
This isn't just about putting up a hoop; it's about creating a dedicated spot for fitness, friendly competition, and family time. We've seen a huge surge in demand for quality home sports courts. In fact, the global sports flooring market, which includes basketball courts, hit $1.89 billion back in 2020 and is on track to hit $3.73 billion by 2028. You can dig into this trend over on Treendly.com. This data shows that homeowners are increasingly investing in home amenities that promote an active lifestyle.
The Construction Playbook
Now, a regulation full-size court is a massive 94 feet by 50 feet, needing a hefty 4,700 square feet of concrete. That's a lot of space, roughly the size of a small house. Most homeowners find that a half-court (for example, 50 feet by 47 feet) or a custom-sized court (like a 30-by-30-foot square for shooting practice) is a much more practical fit for their yard. But no matter the size, the core construction process is the same. It all comes down to creating a stable, perfectly level, and incredibly durable playing surface.
This visual gives you a great snapshot of the three-stage journey from an empty yard to a game-ready court.
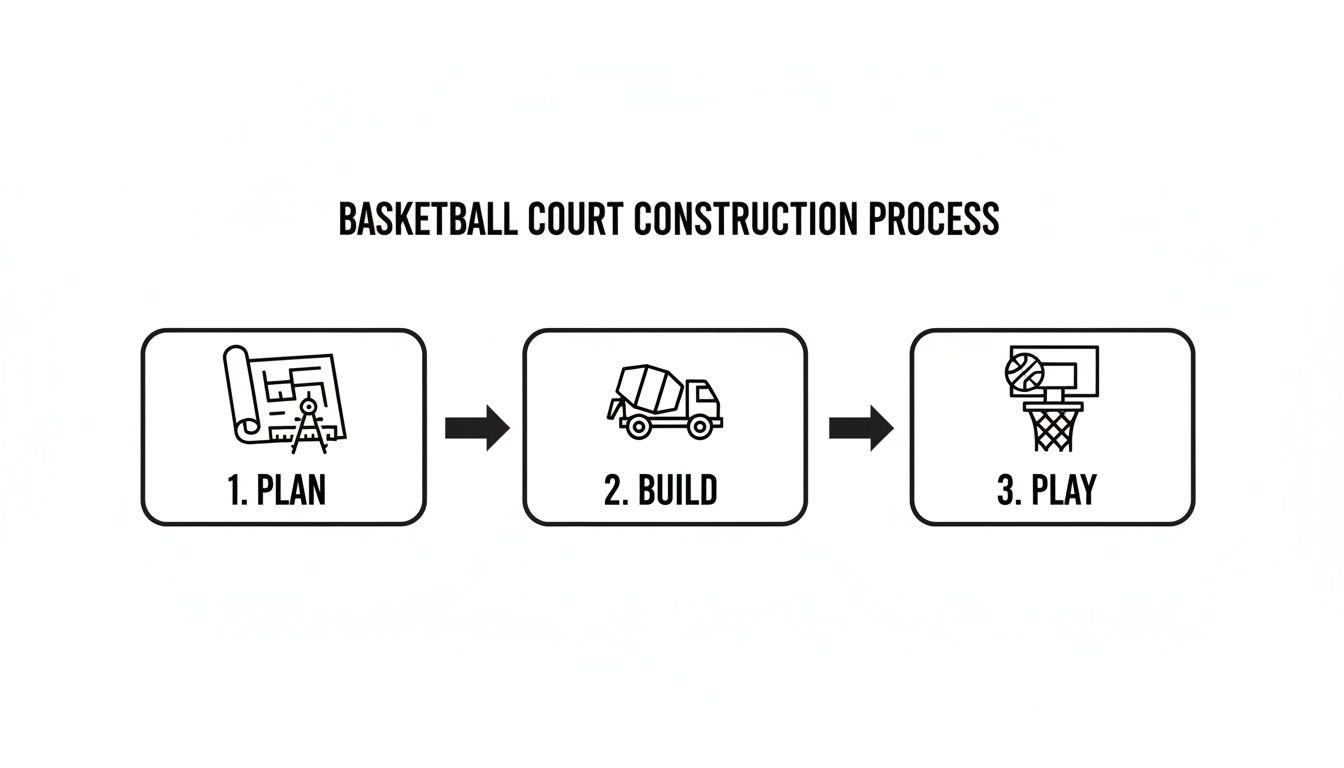
As the graphic shows, every great court starts with a solid plan, moves into professional construction, and results in years and years of enjoyment.
Key Phases of the Build
We're going to get into the details of choosing the perfect location, explain why a concrete foundation is absolutely non-negotiable, and touch on navigating local building codes here in the Atlanta area. The main phases include:
- Site Preparation: This is everything from the initial excavation to making sure you have proper drainage—a must for longevity, especially with Georgia's unpredictable weather. A great example of proper drainage is installing a French drain along the uphill side of the court to intercept runoff water.
- Material Selection: We'll talk about picking the right concrete mix and reinforcement to protect your investment from cracking and premature wear. For instance, choosing a 5,000 PSI mix over a standard 3,000 PSI mix can significantly extend the court's lifespan in a region with freeze-thaw cycles.
- Hoop & Accessory Installation: This is the final, exciting step that officially turns a concrete slab into a real, functional basketball court, from bolting down the hoop to painting the three-point line.
A successful basketball court is built from the ground up. The quality of the sub-base and concrete slab directly determines the court's playability, safety, and lifespan for years to come.
For homeowners in communities all over the Atlanta area, from Alpharetta to Marietta, this guide will set you up for a successful project that stands up to the elements. You can see how a professionally poured foundation can completely transform a space by looking at our previous residential concrete projects. Let's get you on the path to creating a safe, high-performance court you'll love.
Laying the Foundation for a Court That Lasts
The real secret to a basketball court that performs well and stands the test of time isn't the fancy hoop or the sharp court lines—it's what's buried underneath. The hard work we do before any concrete shows up is what makes the difference between a court that's a joy for decades and one that's a cracked, uneven mess in a few years. It's all about building an unshakable foundation.
It really begins with just walking your property. Before a shovel ever hits the dirt, you need to find the right spot. I always tell clients to look for the flattest area possible; it just saves a ton of time and money on earthmoving. You also have to think about water. For example, find a spot where rainwater from your roof's downspouts will naturally flow away from your court, not pool up around it. And don't forget the sun—consider where it will be during your usual game time to avoid playing with a constant glare. An east-west court orientation, for instance, often results in one team staring directly into the setting sun.
The Nitty-Gritty of Excavation and Grading
Once you’ve settled on the perfect location, the real work starts. For a court that’s built to last, you can't skimp here. We need to excavate the entire area down 6 to 8 inches. This might seem like a lot, but it’s essential to make room for a solid sub-base that can support the immense weight of the concrete slab. To give you an idea, a 30×30 foot slab weighs around 13,500 pounds.
With the area cleared out, the next move is to grade and compact the subgrade—that's just the native soil at the bottom of the pit. This is, without a doubt, the most critical part of the whole project, especially with the dense clay we have all over Georgia. Our target is a compaction level of 95% Proctor density. It’s a technical term, but it basically means we're packing the soil so tightly with a machine called a plate compactor that it won't sink or shift later on.
A poorly compacted subgrade is the number one killer of basketball courts. Any soft spots or voids in the soil will inevitably cause the court to sink, creating an uneven playing surface and, eventually, major cracks in the concrete.
Grading has to be just as precise. Professional courts have almost zero room for error. While FIBA standards from the 1950s set a 28m x 15m court size, NBA courts are even bigger. For a regulation court over 4,700 square feet, the entire surface can't vary by more than a 1/4-inch. A perfectly flat surface is what gives you that true, reliable ball bounce. We achieve this with laser-guided grading equipment. Here at Atlanta Concrete Solutions, our deep experience with Georgia's unique clay soil allows us to guarantee perfect compaction before we pour our high-strength 5,000 PSI concrete.
Building a Bulletproof Gravel Base
After the subgrade is perfectly graded and compacted, we lay down the next line of defense: the gravel base. This layer, usually 4 to 6 inches of crushed stone (like #57 stone), does a few incredibly important jobs. It creates a stable, even platform for the concrete, spreading its weight and preventing it from cracking or heaving when the ground freezes and thaws.
That gravel base is also your court's drainage system. It forms a porous layer that lets any water seeping under the slab drain away harmlessly. This is absolutely critical for protecting the concrete from water damage from below. For anyone living in places like Johns Creek where we get those heavy downpours, this step is non-negotiable.
Here’s a simple breakdown of how these layers work in concert:
- Excavation: Makes room for the entire foundation system, clearing out organic topsoil.
- Subgrade Compaction: Stabilizes the native soil to prevent future settling and sinking.
- Gravel Base: Provides a solid platform and, crucially, allows for drainage away from the concrete.
Think of it like building a house. You'd never dream of putting up walls on a weak or lopsided foundation. The exact same logic applies to a basketball court. Investing the time and effort to get this groundwork right is what guarantees your court will stay level, safe, and ready for a game for years and years to come. This is the behind-the-scenes work that truly defines a pro-quality court.
Pouring a Professional-Grade Concrete Slab
With all the groundwork perfectly prepped, we get to the most satisfying part of the job: pouring the concrete. This is where your vision for a basketball court really starts to take shape. It’s far more than just mixing up some cement and water; this step is about creating a high-performance, rock-solid surface that will be the heart of your court for decades to come.
Getting the concrete slab right means it will stand up to fast breaks, intense games, and Atlanta’s wild weather with equal resilience. For example, a properly poured slab won't develop bird baths (low spots that collect water) after a rainstorm.
The Right Concrete Mix and Reinforcement
The first major decision is the concrete itself. For an outdoor court here in Georgia, a standard mix just won't cut it. The brutal summer heat and the occasional hard freeze demand concrete with a serious compressive strength, which we measure in pounds per square inch (PSI).
We always recommend a mix rated for at least 4,000 PSI, but honestly, going for 5,000 PSI is even better for maximum durability. A stronger mix like this is built to resist the stress from constant temperature swings, which helps prevent surface spalling and flaking down the road. For context, most residential driveways use 3,000 PSI concrete, so this is a significant step up in strength.

Concrete is a beast when it comes to compression (squeezing), but it's not great with tension (pulling forces that cause cracks). That's where steel reinforcement becomes non-negotiable.
A grid of steel rebar is absolutely essential. For a court slab, we lay #4 rebar (that’s a 1/2-inch diameter) in a grid pattern, spacing the bars roughly 18 to 24 inches apart. This steel skeleton acts like a backbone, holding the concrete together as it naturally expands and contracts. Without it, you’re just inviting big, ugly cracks to ruin your court.
Accurately estimating materials is key to keeping the project on track and on budget. Before ordering your concrete, it's wise to double-check your Quikrete calculations to ensure you have exactly the right amount. For example, a 30×30 foot court at 4 inches thick requires exactly 11.1 cubic yards of concrete.
Specifications at a Glance
For those who like the technical details, here’s a quick-reference table breaking down our professional recommendations for a court slab that’s built to last in the Atlanta area.
| Basketball Court Concrete Slab Specifications |
| :— | :— | :— |
| Specification | Professional Recommendation | Reasoning |
| Compressive Strength | 4,000 – 5,000 PSI | Resists damage from freeze-thaw cycles and heavy use, preventing surface degradation. |
| Slab Thickness | 4 inches minimum | Provides the necessary structural integrity for a stable, long-lasting playing surface. |
| Reinforcement | #4 Rebar in an 18-24 inch grid | Manages tensional stress, dramatically reducing the risk of large, uncontrolled cracking. |
| Control Joints | Spaced 10-12 feet apart | Creates predictable weak points for concrete to crack in clean lines, preserving aesthetics. |
Following these specs is the difference between a court that lasts a few years and one that hosts games for generations.
Mastering Control Joints and the Curing Process
It sounds strange, but every well-built slab is designed to crack. The trick is telling it where to crack. We do this with control joints—shallow grooves saw-cut into the slab just after it’s been finished.
These joints create deliberate weak points, encouraging the inevitable cracks to follow these nice, straight lines instead of spiderwebbing all over your court. We typically place them in a grid, about 10 to 12 feet apart. It’s a simple step that makes a huge difference in the court's appearance and long-term health. A great example is a 30×30 foot court, which would have four 10×10 foot squares marked by control joints.
A professional concrete slab isn’t about preventing cracks entirely; it’s about managing them intelligently. Control joints are the secret to a court that looks great and stays structurally sound for its entire lifespan.
This is the kind of detail that separates a professional job from a DIY attempt. You can read more about how we handle the technical side of our projects in our guide to residential poured concrete.
Finally, the work isn't over once the concrete is poured. The curing process is what gives the slab its ultimate strength. Curing isn't just "drying"—it's a chemical reaction called hydration, where water and cement particles bond. If the slab dries out too fast, especially in an Atlanta summer, that reaction stops, and you end up with weaker concrete.
That’s why you have to keep the slab moist for the first 7 days. Here are the best ways to do it, with examples:
- Consistent Misting: A light spray of water from a garden hose a few times a day is a simple and effective method.
- Plastic Sheeting: Covering the slab with 6-mil plastic sheeting traps moisture against the surface, creating a perfect humid environment for curing.
- Curing Compound: A spray-on liquid, often white-pigmented to reflect sunlight, forms a membrane over the concrete, locking moisture in.
Patience here is key. The slab will be hard enough for light foot traffic after about a week, but you need to wait at least 28 days before installing a heavy basketball hoop system. This gives the concrete time to reach its full design strength, ensuring your court’s foundation is as solid as possible.
Adding the Hoops, Lines, and Lighting
The concrete is cured, the heavy lifting is done, and now it's time for the fun part. This is where a plain slab of concrete transforms into a real basketball court—the place where games will be won and memories made. Getting the surface, lines, hoop, and lighting right is what makes all the difference in the final look and feel of your court.
First up is the playing surface. Sure, you can play on the broom-finished concrete. It has great grip. But applying a professional acrylic coating system is a true game-changer. These aren't just paint; they're multi-layered systems that add UV protection to shield the slab from the brutal Georgia sun, create a perfectly consistent ball bounce, and even provide a little cushioning for your joints. A great example of a popular system is the SportMaster ProCushion System, which uses layers of rubber granules for added comfort.
A good acrylic resurfacer will fill in tiny imperfections in the concrete, giving you that smooth, uniform texture you see on professional courts. It’s a detail that elevates the entire project.
Painting the Lines for Authentic Play
With your surface prepped and ready, it's time to lay down the lines. This is where precision is everything. Grab your painter's tape, a measuring tape, and a chalk line to mark out the boundaries, free-throw line, and that all-important three-point arc.
The dimensions you use are up to you, but if you want an authentic feel, here are the standards:
- High School: The three-point line sits 19 feet, 9 inches from the center of the hoop.
- NCAA (College): That arc extends out to 20 feet, 9 inches.
- NBA (Professional): The line is 23 feet, 9 inches from the basket at its furthest point.
Always use a high-quality acrylic line paint made specifically for outdoor sports courts, for example, from brands like Sherwin-Williams or SealMaster. It’s built to last. Take your time taping—crisp, clean edges make the whole court look sharp and professional.
Selecting the Right Hoop System
Choosing your basketball hoop is one of the biggest decisions you'll make. While portable hoops have their place, for a permanent concrete court, an in-ground system is the only way to go. They're anchored into their own concrete footing (typically a 4-foot deep pier), which makes them incredibly stable and rigid. No shaking, no rattling—just pure performance.
Here’s what to look for when picking an in-ground hoop, with examples:
- Backboard Material: Tempered glass gives you that authentic, gym-quality rebound (e.g., Goalrilla CV72). Acrylic is a very durable and shatter-resistant alternative, perfect for a family court (e.g., Spalding 888 series). Polycarbonate is the most budget-friendly, but you'll sacrifice some performance.
- Adjustability: If kids are going to be playing, an adjustable-height hoop is a must-have. You can easily lower the rim for them and then raise it back to the regulation 10 feet for the adults.
- Pole and Overhang: Look for a thick, one-piece steel pole (e.g., 6×6 inch square pole) to minimize vibration. Pay attention to the "overhang"—the distance from the pole to the backboard. More overhang means more room to play under the basket without crashing into the pole.
The stability of an in-ground hoop is unmatched. By anchoring it properly in concrete next to the slab—not directly in it—you get a gym-quality playing experience without compromising the integrity of your court's surface.
Illuminating Your Court for Night Games
Why should the game stop just because the sun goes down? Adding proper lighting extends your playing time into the evening and makes the whole area safer. You’ve got a few options here.
You could mount some basic floodlights on a nearby garage or tree, but that often creates weird shadows and blinding glare. For a much better experience, dedicated court lighting is the answer. Modern LED systems are incredibly bright, energy-efficient, and cast a nice, even light across the entire court. To ensure your court is well-lit for evening games, exploring options for efficient and aesthetically pleasing outdoor illumination, such as professional-grade LED and dedicated security solutions, like garden lighting, can be highly beneficial. A good example is using two 20-foot poles, each with a 300-watt LED fixture.
Positioning is everything. We find that placing one or two tall poles off to the sides of the court, away from the action, works best. This setup illuminates the surface evenly and keeps the light out of players' eyes. With the right lighting, your court becomes a 24/7 destination for practice and fun.
Sorting Out Permits, Costs, and Long-Term Care
Building a basketball court is exciting, but the work doesn't start and end with pouring concrete. Two areas that can trip people up are the initial paperwork and the ongoing upkeep. Getting your permits and budget straight from the beginning prevents major headaches, and a simple maintenance routine ensures your court stays in game-ready shape for years.
Think of it this way: managing the administrative side is just as crucial as the construction itself. Before you even think about breaking ground, you need a firm grasp on the real costs and the green lights you’ll need from local authorities.
Navigating Permits and Regulations in Atlanta
In the Atlanta metro, you can bet that a permanent structure like a concrete court will require a building permit. The specifics can shift from one jurisdiction to another—Marietta might have slightly different rules than Alpharetta—but the intent is always the same: ensuring the project is safe and compliant with local zoning codes. For example, many counties have a "setback" rule requiring the court to be at least 10 feet from any property line.
Your first call should be to your local city or county planning department. They’ll hand you the applications and a checklist of what they need, which almost always includes a site plan showing the court’s location, its dimensions, and how far it sits from your property lines.
And here’s a pro tip: don’t forget your Homeowners Association (HOA). If you have one, they often have their own set of strict rules on everything from impervious surfaces (like your concrete slab) to court lighting and colors. Get their approval in writing before you even file for a city permit. It will save you a world of trouble.
Breaking Down the Costs
A realistic budget for a basketball court goes way beyond the price of concrete and a hoop. To avoid sticker shock, you need to account for every single step of the process. While the final number depends heavily on your court’s size and features, here’s a ballpark breakdown of what to expect.
- Excavation and Site Prep: This can run anywhere from $5 to $15 per square foot. The cost climbs if your yard has a significant slope requiring extensive grading or a retaining wall. For example, a simple flat yard might cost $5/sq ft, while a sloped yard needing a 3-foot retaining wall could push it to $15/sq ft.
- Concrete Slab: This is the heart of your court and typically the biggest line item. For a professionally installed, reinforced 4-inch slab, you're looking at $8 to $18 per square foot.
- Surface Finishing: Adding an acrylic coating system will tack on $2 to $5 per square foot, but it's worth it for the improved playability and long-term durability.
- Hoop and Accessories: A solid in-ground hoop system starts around $1,000 (e.g., a basic Silverback hoop) but can easily hit $5,000+ for professional-grade models (e.g., a top-tier Goalrilla). If you want lights for night games, plan on another $1,000 to $3,000.
A good rule of thumb for a typical half-court (roughly 45' x 50') is to budget between $20,000 and $45,000. This range usually covers a full professional build, from the initial dirt work to hanging the net.
A Simple Long-Term Maintenance Plan
Once the construction crews leave, the court is all yours—and so is the upkeep. Thankfully, a little routine care is all it takes to protect your investment and keep the surface playing great.
Your main job is just keeping it clean. A quick once-over with a leaf blower or soft-bristle broom to clear away leaves, pine straw, and dirt does wonders. This simple step prevents stains and stops slippery spots from forming. For tougher stains, like from berries or mildew, a light pressure wash (under 1500 PSI) once a year is a good idea.
Give the court a good visual inspection every season. You're looking for any small cracks that might be starting to form, particularly in the control joints. Knowing a bit about residential concrete and masonry repair helps you catch these minor issues before they turn into bigger problems. A simple example is filling a small crack with a flexible concrete sealant to prevent water from getting in and freezing.
Lastly, if you invested in an acrylic surface, plan on having it professionally reapplied every 5 to 7 years. This brings back the vibrant color, restores the grippy texture, and adds a fresh layer of protection, making your court feel brand new again.
Common Questions About Building a Basketball Court
Thinking about adding a basketball court to your property is exciting, but it almost always brings up a ton of questions. We get it. From figuring out space to dealing with Atlanta’s hilly terrain, you want to be sure you’re making the right calls from the start.
Let's walk through some of the most common questions we hear from homeowners. Getting these details sorted out now can save a lot of headaches later and ensure the court you end up with is the one you’ve been dreaming of.
How Much Space Do I Really Need for a Backyard Court?
First things first: you don't need an NBA-sized court. While a regulation court is a massive 94 by 50 feet, that’s just not realistic for most backyards. The good news is, you can get a fantastic playing experience with a fraction of that space.
A half-court is easily the most popular choice for a reason. At around 50 by 47 feet, you have more than enough room for intense three-on-three games and serious shooting practice. But you can go even smaller. If your main goal is working on free throws and layups, a court built around the key and a three-point arc might only need a 30-by-30 foot slab. A very common "driveway court" size, for example, is just the free-throw lane and key, which can fit in a 20×24 foot space. The trick is to measure the flattest, most usable area you have and then decide what’s most important to you.
The beauty of a custom-built court is its flexibility. We can design and pour a concrete slab that perfectly fits your yard's unique dimensions, your family's needs, and your budget.
What Is the Best Surface for an Outdoor Court in Georgia?
When it comes to the foundation, nothing beats reinforced concrete. It's the only way to get a durable, stable base that can handle decades of play and stand up to Georgia's weather. Once that solid base is in, you have a couple of great options for the actual playing surface.
A standard broom-finished concrete gives you excellent grip and is a tough, budget-friendly choice. But if you want a pro-level look and feel, we always point people toward an acrylic coating system.
These specialized coatings are a game-changer for a few key reasons, with examples:
- Enhanced Durability: They add a tough, protective layer that shields the concrete from the harsh Georgia sun, so your court colors won't fade like regular paint.
- Improved Playability: The texture creates a much more consistent and true ball bounce. Some systems even add a bit of cushion, which your knees will thank you for after a long game of one-on-one.
- Aesthetics: This is where your court really comes to life. You can choose vibrant, professional colors—like the iconic blue and orange of a professional court—and the painted lines come out incredibly crisp and last for years.
Can I Build a Basketball Court on a Sloped Yard?
Yes, you absolutely can. It just means the site prep phase is much more involved. Building on a slope is a challenge we tackle all the time in the rolling hills around Atlanta, and with the right approach, it's completely manageable.
The solution involves some serious excavation and grading. We essentially perform a "cut and fill," where we dig out soil from the high side and use it to build up the low side, creating a perfectly level pad for the court. To make this work, a retaining wall is almost always needed to hold back the earth on the uphill side. For example, on a yard with a 4-foot drop over 50 feet, you might need a 4-foot-high concrete block retaining wall along one entire side of the court. It adds to the project’s complexity and cost, no doubt, but it’s a bulletproof method for turning an unusable slope into a prime-time playing space.
How Long Does It Take to Build a Basketball Court?
The timeline can shift depending on things like weather, how much site work is needed, and how quickly the local permits get approved. Still, I can give you a pretty standard breakdown.
The actual hands-on construction usually takes about one to two weeks. This covers:
- Excavation and Base Prep: 2-3 days
- Forming and Pouring Concrete: 1-2 days
- Initial Curing: 7-10 days
After the pour, the concrete needs to cure properly. You can typically walk on it after a week, but we strongly recommend waiting the full 28 days for the concrete to reach its maximum strength before installing a heavy, in-ground basketball hoop. If you're adding surface coatings and lines, that'll tack on another two to four days at the end. All told, from our first chat to your first game, most projects wrap up in three to six weeks, assuming no major delays with permits or weather, like a week of heavy rain.
Ready to turn your backyard dream into a reality? The team at Atlanta Concrete Solutions has the expertise to handle every step of your basketball court construction, from a perfectly graded foundation to a flawless finish. Get your free, no-obligation quote today!