Getting your concrete calculation right is all about a simple formula: Length x Width x Thickness. That's it. But the real trick, where folks often go wrong, is in making sure all your units match up and then converting the final number into cubic yards, which is how every supplier on the planet sells it.
Nailing this calculation is the single most important thing you can do to prevent a major headache on pour day. Trust me, you don't want to be that person scrambling to order more concrete while the first batch is already starting to set. For example, if you're short just half a cubic yard on a 5-yard pour, that emergency second delivery could cost you a "short load" fee of over $150, not to mention risking a weak "cold joint" in your new slab.
Why You Can't Afford to "Guesstimate" Your Concrete
Pouring a concrete slab isn't like painting a wall where you can just run out and grab another can. A miscalculation here can throw your entire project into chaos.
Imagine the concrete truck leaves, and you realize you're short. That emergency second delivery isn't just expensive; it creates a "cold joint." This is a weak seam where the new, wet concrete meets the already hardening stuff, and it's a structural flaw waiting to happen. On the flip side, order too much, and you're literally paying to throw money away—both for the extra material and its disposal. For instance, over-ordering by just one cubic yard can cost you $150-$200 for the material, plus potential disposal fees.
This is why mastering that basic formula is your best defense against blowing your budget and schedule.
The Building Blocks of the Formula
At its heart, calculating concrete is just finding the total cubic feet of your project space. From there, you convert it to cubic yards. Here's a quick look at why each part of that equation is so critical.
Before you can even think about ordering, you need to lock down a few key numbers. These variables are the foundation of your calculation, and getting them right from the start is non-negotiable.
Here’s a quick-reference table to keep these essential factors straight.
Key Variables in Concrete Slab Calculation
| Variable | What It Means | Why It's Important |
|---|---|---|
| Length & Width | The two dimensions that define the footprint of your slab. | These measurements determine your total surface area. Even being off by a few inches can make a big difference on a larger pour like a driveway. For example, being 3 inches short on the width of a 40-foot driveway means you'll be short by 10 square feet of concrete. |
| Thickness (Depth) | How deep your concrete pour will be. | This dictates the slab's load-bearing capacity and overall durability. A common error is not converting this from inches to feet. A 4-inch slab is 0.333 ft, but a 6-inch slab is 0.5 ft—a 50% increase in concrete volume. |
| Waste Factor | An extra percentage (usually 5-10%) added to the total. | This covers real-world variables like uneven ground, form bowing, or spillage. It’s your project’s safety net. For a 10-cubic-yard order, a 10% waste factor means ordering an extra yard to prevent coming up short. |
Getting these three things right is 90% of the battle. It turns a potential disaster into a smooth, predictable pour.
-
Length and Width: These two numbers give you the surface area. Be precise. A few inches here or there really adds up, especially on a big project like a new driveway or foundation. For instance, on a 20'x20' patio, being off by 6 inches on each side means miscalculating by over 20 square feet.
-
Thickness (or Depth): This is just as crucial as the area because it determines the slab's strength. The classic mistake is measuring thickness in inches but forgetting to convert it to feet to match your other measurements. Always convert inches to feet by dividing by 12. For example, a 4-inch slab is 4 ÷ 12 = 0.333 feet.
The Pro's Secret: Planning for Waste
Even with perfect on-paper calculations, the real world is messy. The ground underneath your forms (the subgrade) is never perfectly level, your wooden forms might bow out a tiny bit under the pressure, and a little bit always gets spilled. This is why you always add a buffer.
We call it a "waste factor," and the standard rule ofthumb is to add an extra 5-10% to your final number. This little bit of overage is cheap insurance against coming up short.
This isn't some new-fangled trick. Back in the 1920s, engineers at the Portland Cement Association figured out that accurate calculations could cut material waste by up to 15% on big jobs. Today, the American Concrete Institute's standard (ACI 318-19) recommends that 5-10% contingency, based on an analysis of over a thousand projects that found an average waste of 7.2%. To get more details on how slab thickness impacts your project, you can find some great information about concrete slab thickness on Civilistix.com.
It just goes to show that a little bit of smart math has been saving projects for nearly a century.
From Measurements to Cubic Yards: A Practical Walkthrough
Turning a backyard dream into a solid concrete slab all comes down to the numbers. Let's walk through the practical, real-world process of calculating the exact volume you'll need for your concrete order. Getting these initial measurements right is absolutely critical—everything else hinges on this first step.
Grab your tape measure. The first thing you need is the length and width of your planned slab. For a simple square or rectangular patio, this is easy. Just measure the two sides and jot them down in feet. For example, a planned 10' x 12' patio gives you a surface area of 120 square feet.
This first measurement sets the stage for the entire project. If you're working from blueprints, a solid grasp of accurate CAD dimensioning principles is a huge help in making sure the numbers on the screen match what you need on the ground.
Handling Non-Standard Shapes
Of course, not every project is a perfect rectangle. What about an L-shaped patio or a winding path? The trick is to break down any complex shape into smaller, simple rectangles.
Think of that L-shaped patio as two separate rectangles joined at the hip. Measure the length and width of each one, find their individual areas, and then simply add them together. For example, if one rectangle is 10'x6' (60 sq ft) and the other is 8'x8' (64 sq ft), your total area is 124 square feet. This simple "divide and conquer" method works for almost any layout you can dream up.
Determining the Right Slab Thickness
With your total area calculated, the next big decision is thickness. This isn't a place to guess; the slab's purpose directly determines how thick it needs to be for long-term strength and durability.
- Walkways & Small Patios: For light foot traffic, 4 inches is the industry standard. It's plenty strong for people without the extra cost of over-pouring.
- Driveways & Garage Floors: If you're parking a car or truck on it, you need to bump that up to a minimum of 5 to 6 inches. That extra depth is crucial for distributing the weight and preventing cracks.
- Heavy-Duty Slabs (Workshops, RV Pads): For anything holding serious weight like an RV or heavy shop equipment, you'll likely need 6 inches or more, depending on the specific load.
Here's a key detail: your thickness is in inches, but your other measurements are in feet. You have to convert them to the same unit. To do this, just divide the thickness in inches by 12. A 4-inch slab becomes 0.333 feet.
This flowchart breaks down how all three measurements come together.
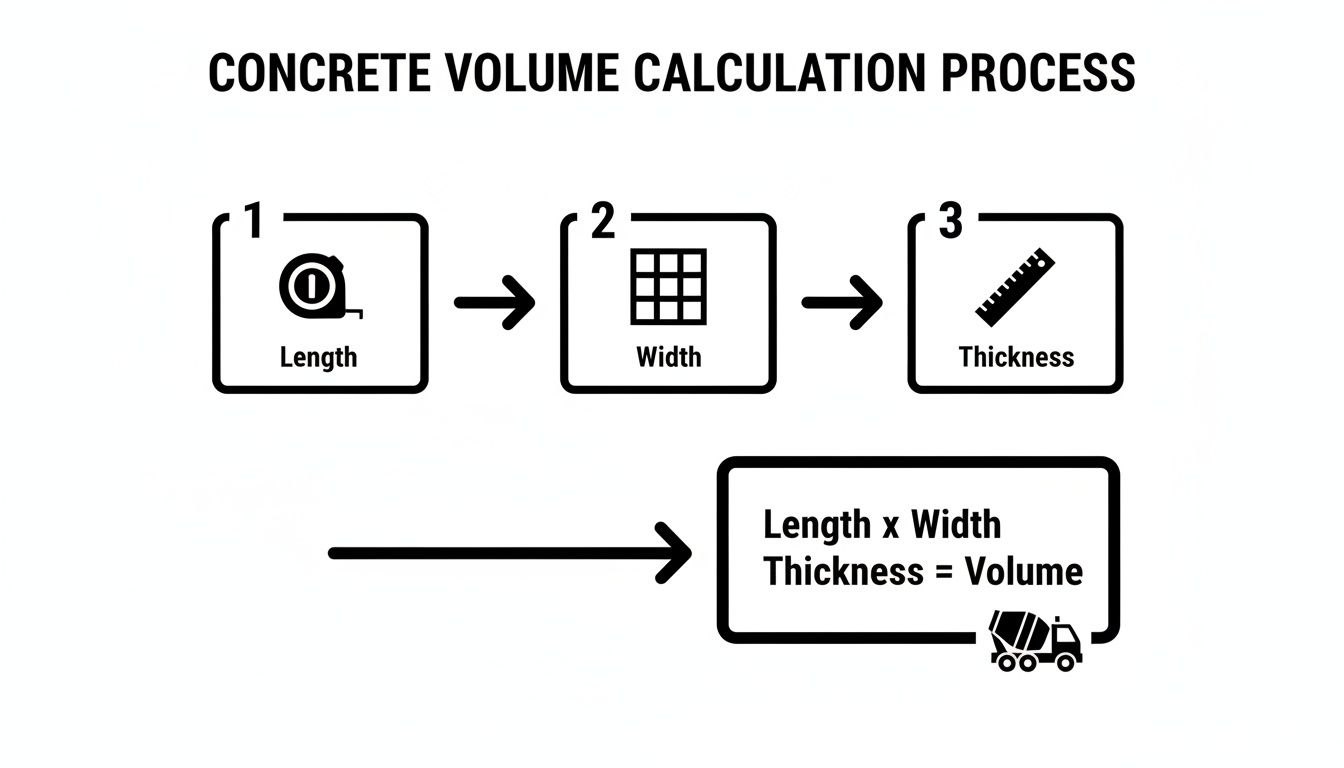
It’s a simple visual reminder: once all your units are in feet, you just multiply them together to get the total volume.
The All-Important Conversion to Cubic Yards
Okay, you have all your dimensions in feet. Now you can find the total volume in cubic feet by multiplying them all together.
Length (ft) x Width (ft) x Thickness (ft) = Volume in Cubic Feet
But here’s a rookie mistake to avoid: you don't order concrete in cubic feet. The industry standard for ready-mix is the cubic yard.
To get the number your supplier needs, you must divide your cubic feet total by 27. Why? Because there are 27 cubic feet in one cubic yard (3 feet x 3 feet x 3 feet). This is the final, non-negotiable step in your calculation.
Let's run through a quick example for a 10-foot by 10-foot patio that's 4 inches thick.
- Convert Thickness: 4 inches ÷ 12 = 0.333 feet
- Calculate Cubic Feet: 10 ft x 10 ft x 0.333 ft = 33.3 cubic feet
- Convert to Cubic Yards: 33.3 cubic feet ÷ 27 = 1.23 cubic yards
That number—1.23 cubic yards—is your base volume. But we're not quite ready to call the supplier just yet.
Adding the Professional's "Waste Factor"
That calculation works in a perfect world. In the real world, your subgrade isn't perfectly level, the wooden forms might bow out a bit from the heavy concrete, and there's always a little spillage. This is where experience comes in.
Seasoned pros always add a "waste factor," or a buffer, of 5% to 10% to the final number. Think of it as an insurance policy. Running short on concrete mid-pour is a messy, expensive, and stressful disaster you want to avoid at all costs.
To build in your safety net, just multiply your cubic yard volume by 1.10 (for a 10% buffer). Using our patio example:
1.23 cubic yards x 1.10 = 1.35 cubic yards
Concrete plants typically sell in quarter-yard increments, so you’d round up and order 1.5 cubic yards. Now you can be confident you'll have enough to get the job done right, without any last-minute panic.
How to Choose the Right Slab Thickness and Reinforcement
Once you’ve got your area measured, the next big decision is thickness. This single number is the backbone of your project, dictating its strength, lifespan, and, of course, the final cost. Choose wrong, and you could end up with a patio that cracks under the weight of a grill or a driveway that cost you way more than it should have.
The thickness you need all comes down to what the slab is for. It’s a simple question of load. A simple garden path just needs to handle foot traffic, while a foundation for a workshop has to support thousands of pounds. Getting this right is what separates a slab that lasts a decade from one that lasts a lifetime. For example, increasing a driveway's thickness from 4 inches to 5 inches can increase its load-carrying capacity by nearly 50%.
Matching Thickness to the Project
The old rule of thumb is a good one: the heavier the load, the thicker the slab. Luckily, for most home projects, the standards are well-established. Overbuilding can be just as wasteful as under-building, so let's dial in the right depth for the job.
Here are the numbers we use in the field every day:
- Patios and Walkways: For areas that will only see foot traffic, 4 inches is the gold standard. It provides plenty of strength for garden paths, outdoor seating spots, and other light-duty uses.
- Residential Driveways: When you start parking cars, SUVs, and light trucks on it, you need more beef. A 5- to 6-inch slab is what you need to spread that weight out and prevent ugly cracks from forming down the line.
- Garage Foundations and Workshops: For a garage floor, an RV pad, or a workshop housing heavy equipment, 6 inches is the absolute minimum. The final thickness really depends on the specific weight it’ll have to bear.
Making this call is a real engineering decision. Getting it wrong has major consequences; after WWII, some reconstructions saw a 22% failure rate because slabs were poured too thin. Today's formulas are much better, with certain methods guiding up to 70% of modern industrial designs. For some heavy-duty commercial slabs, the required thickness can jump from 6 inches to over 10 inches just based on traffic loads, demanding nearly 67% more concrete to handle the stress safely.
Recommended Slab Thickness for Common Projects
To make it even clearer, here’s a quick-reference table that breaks down the typical thickness and reinforcement needed for various projects you might be tackling.
| Project Type | Recommended Thickness (Inches) | Typical Reinforcement | Primary Consideration |
|---|---|---|---|
| Sidewalk/Patio | 4" | Welded Wire Mesh | Foot traffic and light furniture |
| Residential Driveway | 5" – 6" | Rebar Grid (#3 or #4) | Cars, SUVs, light trucks |
| Garage Floor | 6" | Rebar Grid (#4) | Vehicle weight, tool chests, equipment |
| Shed Foundation | 4" – 5" | Welded Wire Mesh or Rebar | Weight of the structure and contents |
| Hot Tub Pad | 6" | Rebar Grid (#4) | Concentrated weight of water and tub |
| RV/Boat Pad | 6" – 8" | Rebar Grid (#4 or #5) | Heavy vehicle and long-term load |
This table serves as a solid starting point. Always consider your specific needs—a driveway for a heavy-duty work truck might need a thicker pour than one for a compact car.
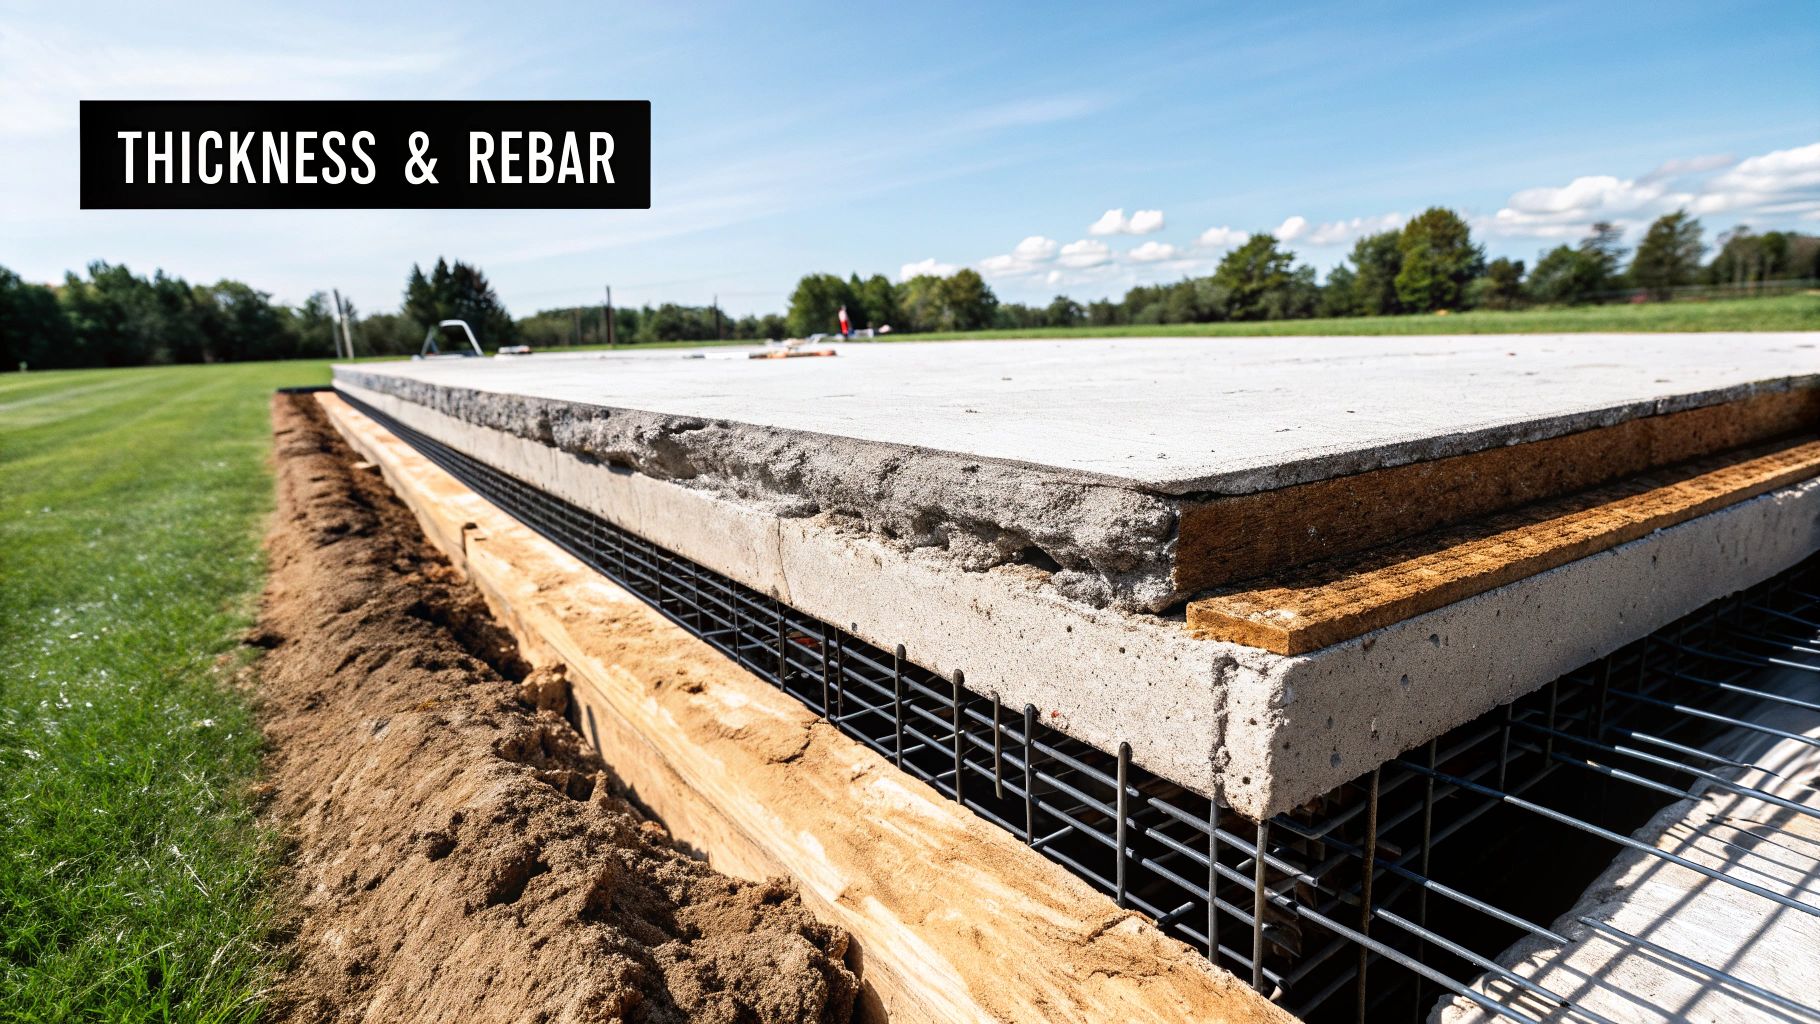
The Role of Reinforcement in Your Slab
Here’s a fact every pro knows: concrete is a beast under compression (squeezing forces) but a wimp under tension (pulling forces). That's where steel reinforcement comes into play. Adding a steel grid gives the slab the tensile muscle it needs to fight back against forces trying to pull it apart, like shifting ground or heavy loads that cause it to bend.
Reinforcement isn't always mandatory for every single project, but it's cheap insurance against cracks. For any slab supporting more than people—like a driveway or foundation—it's an absolute must.
For residential slabs, you'll mainly see two types of reinforcement:
- Welded Wire Mesh: This is a grid of steel wires that comes in rolls or flat sheets. It’s perfect for lighter-duty slabs like patios and walkways, where its main job is to control the tiny shrinkage cracks that form as concrete cures. For example, a common specification is 6×6-W1.4xW1.4 mesh for a 4-inch patio slab.
- Rebar (Reinforcing Bar): These are the thick, ribbed steel rods that provide serious structural strength. When you're talking about driveways, garage floors, and foundations, a grid of rebar is non-negotiable for carrying heavy loads. A typical driveway might use #4 rebar (1/2" diameter) spaced 18 inches on center.
Just throwing steel in isn't enough; placement is everything. The reinforcement grid has to sit in the middle or upper third of the slab's depth to do its job. It should be propped up on "chairs" or small blocks to keep it elevated during the pour. We've all seen crews lay it on the ground and try to "hook" it up as they pour—that's a sloppy, unreliable method that you should avoid.
For more complex projects, exploring professional options for poured concrete in Atlanta ensures every detail, especially reinforcement, is handled by the book.
Adjusting Your Calculation for Reinforcement
So, does adding a steel grid change your concrete math?
The short answer is no, not really—but with a small catch. The steel itself does displace a tiny bit of concrete, but for a typical home project, that amount is so small it gets completely absorbed by the 5-10% extra you order for waste. For example, in a 10'x10'x4" slab, the rebar grid would displace less than 0.02 cubic yards of concrete, which is insignificant compared to the 1.23 cubic yards total.
The real impact of reinforcement is making sure you have proper coverage. The steel needs to be fully encased in concrete to protect it from rusting. This means your forms have to be set to the full, specified depth. If you planned for a 4-inch slab but the rebar sits too high or low, you might end up with only 3.5 inches of effective thickness, which significantly weakens the final product. Always base your volume calculation on the full, finished thickness your project requires.
Let's Do the Math: Real-World Examples for Your Home Project
Theory is great, but seeing the numbers work in a real-world scenario is where the confidence really comes from. Let's walk through three of the most common projects we see: a backyard patio, a standard driveway, and a garage foundation.
Think of these as your roadmap. Just plug in your own measurements, and you can follow these exact same steps to get a solid number for your concrete supplier.
Example 1: The Classic Backyard Patio Slab
First up, the quintessential DIY project—a simple square patio. We're picturing something perfect for a grill, a table, and some chairs, so we'll use a standard thickness designed for foot traffic.
- Project Dimensions: 12 feet long x 12 feet wide
- Slab Thickness: 4 inches (the go-to for patios)
The first thing we have to do is get all our measurements speaking the same language. Right now, we have feet and inches, so let's convert the thickness into feet.
Thickness in Feet: 4 inches ÷ 12 = 0.333 feet
Now we can run our main calculation to figure out the total volume in cubic feet.
Volume in Cubic Feet: 12 ft (Length) x 12 ft (Width) x 0.333 ft (Thickness) = 47.95 cubic feet
Finally, we convert that number into the one your supplier actually cares about: cubic yards. Just divide by 27.
Volume in Cubic Yards: 47.95 cubic feet ÷ 27 = 1.78 cubic yards
Now, here's a pro tip: never order the exact amount. You need a buffer for spillage, an uneven subgrade, or form boards that bow out slightly. A 10% overage is the professional standard.
Final Order with Overage: 1.78 cubic yards x 1.10 = 1.96 cubic yards
Since most ready-mix companies sell concrete in quarter-yard increments, you'll round this up. For this patio, you'd confidently order 2.0 cubic yards.
Example 2: The Hardworking Driveway Slab
A residential driveway needs to be much tougher than a patio. It's bigger and, more importantly, has to support thousands of pounds of vehicle weight every single day. The math is the same, but the scale is different.
- Project Dimensions: 20 feet wide x 40 feet long
- Slab Thickness: 6 inches (a good, robust depth for cars and SUVs)
Again, we start by converting our thickness to feet.
Thickness in Feet: 6 inches ÷ 12 = 0.5 feet
Now, let's calculate the total volume. You'll see the numbers get big pretty fast.
Volume in Cubic Feet: 20 ft (Width) x 40 ft (Length) x 0.5 ft (Thickness) = 400 cubic feet
And now, into cubic yards.
Volume in Cubic Yards: 400 cubic feet ÷ 27 = 14.81 cubic yards
Running short on a pour this size would be a disaster. That 10% waste factor isn't just a good idea—it's essential. For a project of this scope, it also helps to understand the local requirements and best practices for pouring a residential driveway with concrete in Atlanta.
Final Order with Overage: 14.81 cubic yards x 1.10 = 16.29 cubic yards
You’d round up to the nearest quarter-yard and tell your supplier you need 16.5 cubic yards.
Example 3: The Garage Foundation with Footings
This is where things get a little more complex. A garage foundation isn't just a simple slab; it has thickened edges called footings (or grade beams) that sit below the main floor to support the weight of the walls. The trick is to calculate the slab and the footings as two separate pieces and then add them together.
Slab Dimensions:
- Size: 24 feet long x 24 feet wide
- Thickness: 4 inches
Footing Dimensions:
- Location: Running the entire perimeter (24' + 24' + 24' + 24' = 96 feet total length)
- Size: 12 inches wide x 12 inches deep (below the slab)
Let's tackle the main slab area first.
- Slab Thickness in Feet: 4 inches ÷ 12 = 0.333 feet
- Slab Volume (Cubic Feet): 24 ft x 24 ft x 0.333 ft = 191.81 cubic feet
Easy enough. Now, let's figure out the volume for that long, continuous footing around the edge.
- Footing Dimensions in Feet: 12 inches wide is 1 ft; 12 inches deep is 1 ft.
- Footing Volume (Cubic Feet): 96 ft (Length) x 1 ft (Width) x 1 ft (Depth) = 96 cubic feet
With both parts calculated, just add them up.
Total Volume (Cubic Feet): 191.81 cubic feet (Slab) + 96 cubic feet (Footing) = 287.81 cubic feet
Now, convert that total into cubic yards.
Total Volume (Cubic Yards): 287.81 cubic feet ÷ 27 = 10.66 cubic yards
And for our last step, we add that critical safety buffer.
Final Order with Overage: 10.66 cubic yards x 1.10 = 11.73 cubic yards
For a garage foundation this size, you'd round up and order 11.75 cubic yards. By breaking a complex job into simple, manageable shapes, you can calculate the concrete for any project with confidence.
Getting Ready for Pour Day: Ordering and Site Prep
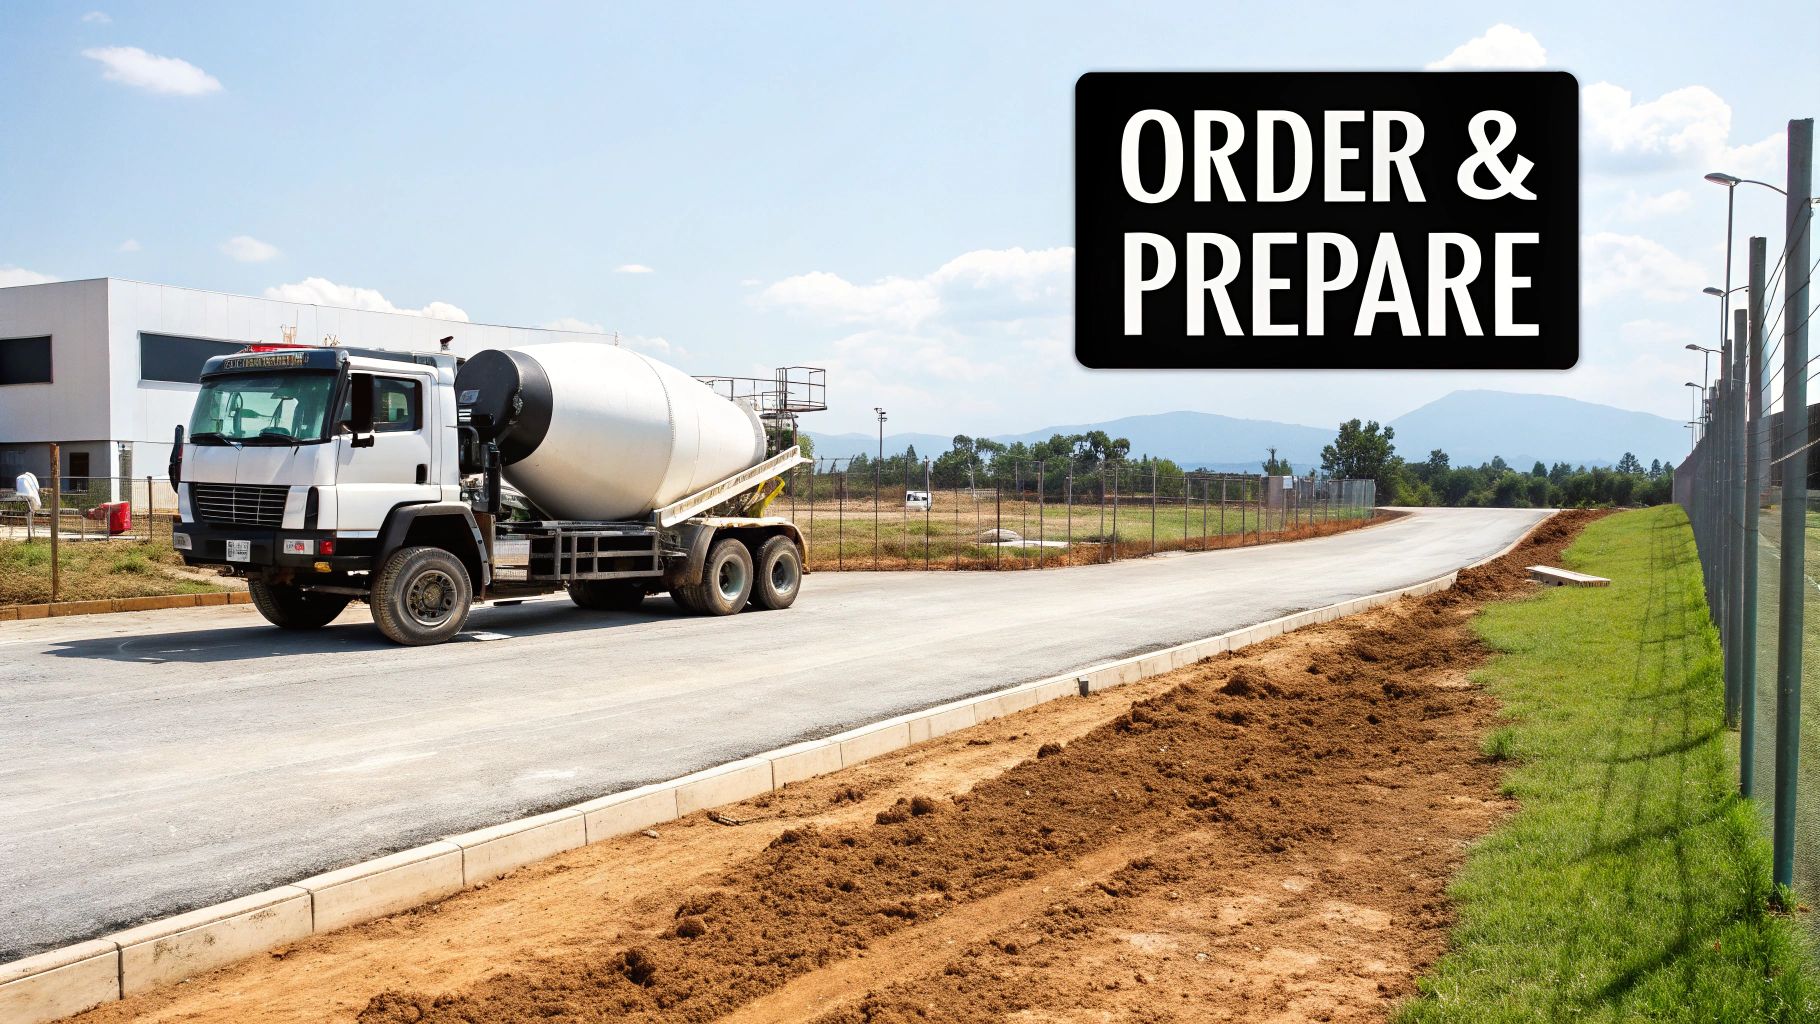
You’ve done the math and have your final volume, waste factor included. Now comes the moment that turns all that planning into reality: placing the order. Getting this right is about more than just quoting a number over the phone; it’s about clear communication to ensure you get exactly what your project needs.
When you call your local ready-mix supplier, they’ll ask for more than just the cubic yards. You’ll need to specify the concrete’s strength, measured in PSI (pounds per square inch). For most residential work like a driveway or patio slab, a 3,000 to 4,000 PSI mix is the sweet spot. Also, let them know if you need any special additives, such as air entrainment for better freeze-thaw protection or water reducers to make the mix easier to work with. For example, if your slab will be exposed to freezing temperatures, requesting a 5-7% air entrainment is a standard protective measure.
Dealing with "Short Loads" and Prepping the Site
One of the first questions you should ask your supplier is about their "short load" policy. A standard ready-mix truck typically holds around 8 to 11 cubic yards. If your order is much smaller than that, you'll likely face a short load fee to compensate the company for sending out a partially empty truck.
This fee can be surprisingly steep, so it's a cost you want to be aware of from the start. For example, if a plant's minimum truckload is 4 cubic yards and you only need 2, you might pay an extra $50 per yard you are short. For a tiny project, like a small generator pad, it might make more sense to mix bagged concrete yourself. But for anything bigger, ready-mix is the only way to go for consistency and efficiency.
When delivery day arrives, your preparation is what will make or break the pour.
- Clear the Way: That concrete truck is a beast. Make sure you have a solid, clear path from the road right to your forms. The truck can weigh over 60,000 lbs, so the ground must be firm.
- Secure Your Forms: Double-check that your forms are sturdy and well-braced. Wet concrete exerts a massive amount of pressure and will exploit any weak spot.
- Have People and Tools Ready: Once that chute opens, it’s go-time. Have your crew, wheelbarrows, shovels, and finishing tools on standby.
Your prep work should also include a solid understanding of fundamentals like concrete slab shuttering, which is crucial for ensuring the slab holds its shape perfectly.
Pro Tip: Remember, the supplier’s responsibility ends at the back of the truck. Getting the concrete from the chute into your forms is on you. A solid game plan here is absolutely essential for a smooth pour.
Placing Your Order with Confidence
The more specific you are with your supplier, the fewer surprises you'll have. Thanks to modern mix design methods, suppliers can now predict the final properties of a mix with 95% confidence, which helps cut down on trial batch costs by 25-35%. For a 1,500 sq ft slab at 4 inches thick, an optimized mix of around 25 cubic yards could save you 10% on materials compared to older methods that often resulted in 20% waste.
For homeowners here in Atlanta, teaming up with a local pro who knows the regional climate and has good relationships with suppliers is a huge advantage. They navigate these details daily. Exploring professional concrete services in Atlanta can remove all the guesswork, making sure your project is handled perfectly from the first measurement to the final finish.
Frequently Asked Questions About Concrete Math
Even with a solid plan, a few questions always seem to pop up right before the truck arrives. Getting these details sorted out can be the difference between a smooth pour and a very stressful day. Let's walk through some of the practical issues that often come up once you've moved past the basic math.
Think of this as the real-world stuff that formulas don't always cover.
How Do I Figure Out Concrete for Odd Shapes?
Life isn't always lived in perfect squares and rectangles, and neither are patios. If you're working with a circular slab or custom curves, your best bet is to break it down into shapes you can measure. A little high school geometry goes a long way here.
- For Circles: Remember the formula for a circle's area? It's πr² (Pi times the radius squared). Just measure the radius (which is half the total width), square that number, and multiply it by 3.14159. Once you have the square footage, multiply it by your slab's thickness in feet to get the cubic feet. For example, a circular slab 10 feet wide has a 5-foot radius. The area is 3.14159 x (5 x 5) = 78.5 sq ft.
- For Weird Curves: Don't get overwhelmed by a custom shape. The trick is to slice it up into smaller, manageable sections. You can usually map out a few rectangles and triangles that cover most of the area. Calculate the volume for each piece individually, then just add them all up. For a triangle, the area is (base x height) / 2.
What Happens If I Run Out of Concrete Mid-Pour?
This is the nightmare scenario for any concrete project. Running out creates a "cold joint," which is a weak seam where new, wet concrete is poured against concrete that has already started to harden. It's a serious structural flaw you want to avoid at all costs.
If you see the truck's chute running empty and your forms aren't full, you have two choices, neither of them great:
- Make a Clean Stop. The best you can do is quickly create a straight, vertical edge using a piece of lumber. This forms a planned "bulkhead" or construction joint that you can properly prepare before pouring the rest later.
- Order More, FAST. Call your supplier immediately and beg for an emergency load. This is a very expensive option, and it's only viable if you realize your mistake early on, well before the first batch has had any time to set.
This is precisely why that 10% overage isn't just a suggestion—it's your project's insurance policy.
The most reliable way to handle an oddly shaped slab is to break it down into the simplest geometric forms you can. Calculate the volume for each square, rectangle, triangle, and circle, then add everything together for your grand total. It’s a bit more work, but accuracy is everything.
Should I Mix My Own Concrete or Order a Truck?
This question really comes down to one thing: scale. Mixing concrete from 80-pound bags is perfect for small jobs, but you'll hit a wall pretty quickly where it just stops making sense.
- Bagged Concrete: This is your go-to for anything under 1 cubic yard. We're talking about setting a few fence posts, pouring a small stoop, or creating a little pad for your grill. It takes about forty-five 80-lb bags to make one cubic yard, which is a lot of manual labor.
- Ready-Mix Delivery: For any project bigger than that, ordering from a concrete plant is the only way to go. The quality control is far superior, and the sheer amount of back-breaking labor you save is incredible. Even with a "short load" fee for smaller deliveries, it's often still a better deal than mixing dozens of bags by hand.
Trust me, trying to hand-mix a 2-cubic-yard patio is a brutal workout that usually ends with an inconsistent, poorly finished slab.
Answering these last-minute questions helps ensure your project is built on confidence, not just concrete. If you're tackling a complex job in the Atlanta area, or just want the peace of mind that comes with professional experience, the team at Atlanta Concrete Solutions is here to help. You can get a free, no-obligation quote for your Atlanta-area project right on our website.