When it comes to preventing cracks in concrete, a few core principles make all the difference. It really boils down to giving the concrete a rock-solid base to sit on, using a high-quality mix with just the right amount of water, and then telling the concrete where to crack with well-placed joints. Of all the steps, I’d argue that proper curing—keeping that new slab moist while it gains its strength—is the single most important factor for long-term durability and a beautiful finish. For example, a properly cured slab can be up to 50% stronger than one left to dry out in the open air, significantly reducing the risk of shrinkage cracks.
Why Concrete Cracks and How to Prevent It
Seeing a crack in new concrete can be frustrating, but it's almost never the fault of the material itself. Instead, most cracks are just visible symptoms of powerful forces at play. If you can get a handle on what those forces are, you're halfway to preventing the problem.
Think of it this way: concrete is incredibly strong when you try to squeeze it (compression), but it's surprisingly weak when you try to pull it apart (tension). A typical residential concrete mix might have a compressive strength of 3,000-4,000 psi (pounds per square inch), but its tensile strength is only around 300-500 psi. A crack is just the result of the tensile forces winning that tug-of-war.
Fortunately, the vast majority of these issues come from a handful of common culprits. If you can get ahead of them during the planning and pouring stages, you can turn a potential headache into a slab that will last for decades.
The Three Main Causes of Concrete Cracks
-
Shrinkage: As fresh concrete cures, the water in the mix starts to evaporate. This causes the entire slab to shrink, creating a massive amount of internal tension. For instance, a 10-foot long slab can shrink by about 1/16 of an inch. If the slab is held in place by the ground or anything embedded in it, that tension has nowhere to go but to pull the slab apart, forming what we call shrinkage cracks.
-
An Unstable Base: The ground underneath your slab is always on the move. Soil that wasn't compacted correctly, poor drainage that causes erosion, or the constant freeze-thaw cycles we see here in the Atlanta area can make the subgrade shift or settle unevenly. When the ground moves, even by a fraction of an inch, the rigid concrete slab above it gets bent, leading to serious structural cracks. For example, a downspout discharging water next to a patio can wash away the subgrade, leaving a void that causes the unsupported corner of the concrete to crack under its own weight.
-
Improper Curing and Finishing: The first 24 to 48 hours after a pour are absolutely crucial. If the surface dries out too fast from the sun and wind, it shrinks more rapidly than the concrete beneath it, which causes a web of shallow but ugly surface cracks called crazing. Another common mistake is overworking the surface during finishing—for example, troweling it too much while bleed water is still present. This can trap water and create a weak top layer that's prone to damage like scaling or spalling.
Here's the secret the pros know: you don't actually stop concrete from cracking. You control it. By preparing the site correctly, using the right mix, and cutting planned control joints, you’re giving the slab a clean, straight line to crack along when the pressure builds. An example of this is seeing a perfectly straight "crack" running down the groove of a sidewalk square—that's a controlled crack doing exactly what it was designed to do.
This guide is your roadmap to getting it right. We'll walk through every stage of the process, from compacting the ground to applying the final sealer. Follow these steps, and your driveway, patio, or foundation will stay solid and look great for years to come.
Before we dive into the step-by-step process, this table gives you a quick overview of the most common issues and how we'll address them in this guide.
Common Causes of Concrete Cracks and Their Solutions
| Common Cause | Primary Prevention Method | Where to Learn More |
|---|---|---|
| Drying Shrinkage | Proper Curing & Control Joint Placement | Sections on Joints & Curing |
| Unstable Subgrade/Settling | Thorough Site & Subgrade Preparation | Section on Building Your Base |
| Freeze-Thaw Cycles | Air-Entrained Mix & Proper Sealing | Sections on Mix Design & Long-Term Care |
| Excessive Water in Mix | Specifying a Low Water-to-Cement Ratio | Section on Choosing the Right Mix |
Think of this as your cheat sheet. As we go through the next sections, you'll see how each of these solutions plays a critical role in creating a crack-resistant slab.
Building Your Base for a Crack-Free Surface
You wouldn’t build a house on a shaky foundation, and the same exact principle applies to concrete. The long-term success of your slab—whether it's a new patio, a walkway, or a whole driveway—is pretty much decided long before the concrete truck ever backs into your yard. The ground underneath it, what we call the subgrade, is the single most important factor in preventing the big, ugly structural cracks that come from settling and shifting.

Think of it like this: the subgrade is the mattress, and the concrete is the person sleeping on it. A lumpy mattress with soft spots means a terrible night's sleep. In the same way, an uneven or unstable subgrade forces the rigid concrete slab to bend under stress until it finally just cracks. A prime example is a driveway slab that cracks in half because one side was poured over well-compacted soil while the other was over a poorly filled-in utility trench that settled over time.
Here in the Atlanta area, we're constantly battling heavy clay soils. This stuff swells up like a sponge when it's wet and then shrinks and hardens when it dries out. That movement puts a massive amount of pressure on any concrete poured on top of it. A properly prepared base is your only real defense against these forces.
Preparing the Subgrade for Maximum Stability
The whole point of prepping the subgrade is to create a foundation that's both rock-solid and completely uniform. Every soft spot, every chunk of organic material, every poorly compacted area is just a future crack waiting to happen. Getting this right involves a few key stages.
First, you have to excavate the site down to the right depth. This isn't just about scraping the surface; it means getting rid of all the topsoil, grass, roots, and any big rocks. For a typical 4-inch driveway slab, this means excavating about 8-10 inches deep to allow for the gravel base. Topsoil is full of organic stuff that rots away over time, leaving empty pockets under your slab that lead directly to sinking and cracking.
Once the organic material is out, the focus turns to the soil itself. You need to get the native soil firm and evenly compacted. A plate compactor is non-negotiable for this job. It hammers the ground into a dense, stable layer that won't give way later. You should make multiple passes in different directions until the machine no longer leaves a significant indentation.
A huge mistake I see people make is just leveling the dirt and calling it a day. Without mechanical compaction, the soil will absolutely compress under the thousands of pounds of wet concrete, creating uneven support that guarantees stress fractures. Spending an extra hour with a plate compactor is probably the best investment you can make in the entire project. For example, a single footprint in uncompacted soil can create a weak spot that eventually leads to a crack.
After compacting the native soil, it's time to add a granular sub-base. This is just a fancy term for a layer of crushed stone or gravel, usually about 4 to 6 inches deep for a typical residential driveway. This layer does two critical things:
- Load Distribution: It spreads the weight of the slab (and your car) over a much wider area of the soil beneath.
- Drainage: It gives water a place to go, preventing it from pooling under the slab. This is crucial for stopping frost heave and minimizing soil erosion.
This gravel base also needs to be compacted thoroughly, ideally in layers (we call them "lifts"). For a 6-inch base, you might add 3 inches of gravel, compact it, and then add the final 3 inches and compact that as well. This process gives your concrete a solid, unyielding platform to sit on for decades. If you're planning a new project and want to see how the pros tackle this, checking out how a residential driveway concrete installation is done can give you a great blueprint for success.
The Critical Role of Strong Formwork
With the ground prepped and perfect, your attention now shifts to the forms. The formwork is the wooden mold that holds the wet concrete and defines the final shape of your slab. Flimsy or poorly built forms are a direct ticket to future problems.
Imagine pouring thousands of pounds of wet concrete into a weak frame. A cubic yard of concrete weighs about 4,000 pounds. If those forms bow outward from the pressure, you end up with a slab that's thinner on top and bulges out at the bottom. That bulge creates a major weak point along the edge that’s just begging to crack.
Make sure your forms are:
- Sturdy: Use straight, solid lumber, like 2x4s or 2x6s, that aren't warped or split.
- Well-Staked: Pound stakes into the ground every 2-3 feet and secure them to the form boards with screws, not just nails that can pull out. For example, on a 10-foot form board, you should have at least 4 stakes holding it in place.
- Leak-Proof: Keep the joints between boards tight. If water and cement paste leak out, it weakens the mix right at the edges, making them brittle.
A driveway form that bows out by just half an inch can compromise the integrity of that entire edge. The second a car tire rolls over that spot, it can easily fracture. Taking the time to build strong, square, and well-braced forms is a non-negotiable step for a crack-free finish.
Choosing the Right Concrete Mix and Reinforcement
Alright, so you’ve got your site prepped and a solid base ready to go. Now we get to the heart of the matter: the concrete itself. This is where a lot of projects go wrong before the first wheelbarrow is even dumped.
Think of concrete like baking a cake. You can have the best oven and the perfect pan, but if your ingredients are off, you’re not getting a great cake. The same exact principle applies here. The recipe for your concrete—the mix design—and the "backbone" you give it with steel reinforcement are what will make or break your project in the long run.
At its core, wet concrete is just a blend of four things: cement, sand, gravel (aggregate), and water. The real magic happens when the cement and water start to react, creating a paste that glues all the sand and gravel together into a rock-hard mass. The final strength of that rock is almost entirely dictated by one crucial factor: the water-to-cement ratio.
Mastering the Water-to-Cement Ratio
This ratio is exactly what it sounds like—a comparison of how much water is in the mix versus how much cement. A lower number means less water, which is almost always a good thing. Less water gives you a stronger, denser concrete that’s far more resistant to problems down the road.
It’s tempting to add more water. It makes the concrete flow easier and it’s certainly less work to spread and finish. But that convenience comes at a steep price. Every extra gallon of water added on-site can reduce the final compressive strength by 150-200 psi and increase shrinkage potential.
All that extra water has to go somewhere, and it eventually evaporates, leaving behind a network of tiny voids and capillaries. This does two very bad things:
- It supercharges shrinkage. More water evaporating means the slab shrinks more as it dries. As we’ve already covered, that shrinkage is a leading cause of ugly cracks.
- It tanks the final strength. Those leftover voids create a weaker internal structure, making the concrete far more susceptible to the pulling forces that want to tear it apart.
For most projects around the home, like a patio or a standard driveway, you should be aiming for a water-to-cement ratio between 0.45 and 0.50. Push it much higher than that, and you’re just asking for trouble.
A Pro Tip: When you're ordering from a ready-mix supplier, be very clear. Ask for a mix designed for exterior flatwork with a low water-to-cement ratio. The absolute worst thing I see on job sites is a crew adding water from a garden hose to a ready-mix truck to make the pour easier. That single act can ruin the integrity of the entire slab. Don't do it.
Tailoring Your Mix for the Atlanta Climate
Beyond just water, you can also specify admixtures—special ingredients that enhance the concrete's properties. Here in the Atlanta area, with our sweltering summers and the potential for a few hard freezes in the winter, there's one that is absolutely non-negotiable: air entrainment.
An air-entraining admixture creates billions of microscopic air bubbles inside the concrete. Think of them as tiny relief valves. When water trapped inside the slab inevitably freezes and expands (by about 9%), these little pockets give the ice a place to expand into. This relieves the incredible internal pressure that would otherwise shatter the concrete from the inside out. For any concrete that will live outdoors in our climate, air entrainment is a must.
Adding Strength from Within with Reinforcement
A top-notch concrete mix gives you incredible compressive strength (it can handle being crushed), but it's terrible at resisting tensile forces (being pulled apart). That's where steel reinforcement comes in.
Let’s be clear: steel doesn't stop concrete from developing tiny cracks. What it does is hold the slab together when a crack forms, keeping it from separating, widening, and turning into a real structural problem. It's the critical element that keeps a minor hairline crack from becoming a major failure. For example, an unreinforced slab might crack and one side might sink, creating a trip hazard. A reinforced slab with the same crack will be held tightly together, remaining level.
You've got three main options here:
- Welded Wire Mesh (WWM): This is a grid of steel wires that you roll out before pouring. It's a decent choice for controlling shrinkage cracks in things like sidewalks or patios, but its placement is absolutely critical.
- Rebar (Reinforcing Bar): These are the thick steel bars you see on bigger construction sites. Arranged in a grid, they provide serious structural muscle, making them essential for any slab that needs to support heavy loads, like a driveway for a boat or RV. A common example for a heavy-duty driveway would be a grid of #4 rebar spaced 18 inches apart.
- Fiber Reinforcement: These are tiny synthetic or steel fibers mixed right in at the plant. They’re fantastic for preventing those little web-like "plastic shrinkage" cracks that can pop up on the surface just hours after you finish pouring.
Now, here’s the most common and costly mistake people make with mesh and rebar: they lay it flat on the ground and pour the concrete right over it. This does absolutely nothing. The steel ends up at the bottom of the slab, where it provides zero benefit against the forces trying to pull the top surface apart.
Reinforcement has to be in the middle to upper-third of the slab's thickness to do its job. This is where the real tensile stress happens. Use plastic supports, which we call "chairs" or "dobies," to lift the mesh or rebar off the subgrade. This guarantees it ends up embedded in the right spot. For a standard 4-inch slab, you want that steel sitting about 1.5 to 2 inches from the top.
By being meticulous about your mix and getting your reinforcement in the right place, you’re building a slab that's engineered to fight back against cracking from day one. It’s this internal fortitude that ensures your concrete work will stand the test of time.
Tell Your Concrete Where to Crack With Control Joints
Here’s a little secret from the pros: you can't actually stop concrete from cracking. It's in its nature to shrink as it cures, and that creates immense internal stress. The real trick isn't to fight this force but to manage it. You have to tell the concrete exactly where you want it to crack.
This is where control joints come in. Think of a control joint as a planned, straight line of weakness that you create on the surface. When those powerful shrinkage forces start pulling the slab apart, the concrete naturally gives way along that pre-weakened line, creating a neat, clean crack at the bottom of the groove where no one will ever see it.
Without these joints, that stress would build up until the slab cracks wherever it feels like it—leaving you with a jagged, ugly mess running right through the middle of your beautiful new patio or driveway. By strategically placing control joints, you’re the one in charge.
The image below shows the basic components that go into creating strong, crack-resistant concrete, from the water and rebar to the final application. It all works together.
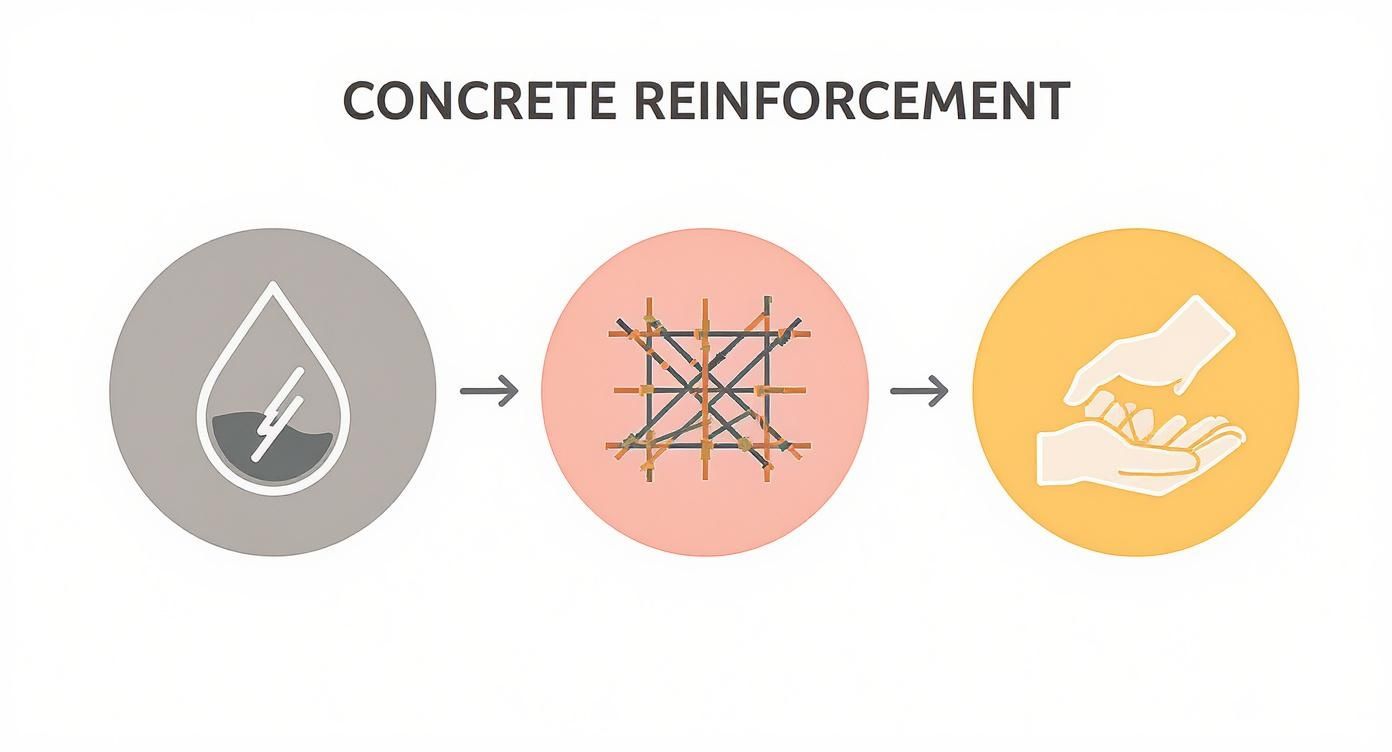
As you can see, reinforcement is a key part of the process, but it's the total package—a good mix, proper placement, and smart jointing—that ultimately gives you a durable, long-lasting surface.
Different Joints for Different Jobs
Control joints are your primary weapon against shrinkage cracks, but they're part of a team. In any decent-sized concrete project, you'll likely work with three distinct types of joints.
- Control Joints (Contraction Joints): These are the ones we've been talking about. Their sole purpose is to create those weakened planes to direct shrinkage cracks. A perfect example is the grid pattern you see on sidewalks.
- Isolation Joints (Expansion Joints): These create a complete separation between a new slab and another unmoving structure, like your home's foundation, a brick column, or even an old sidewalk. They're typically filled with a flexible material that acts as a cushion, allowing for independent movement so the two structures don't push against each other and cause cracking. For instance, you must have an isolation joint where your new driveway meets your garage floor.
- Construction Joints: These are simply the stopping points in a large pour. If you can only pour half of a huge driveway today and the other half tomorrow, the line where the two pours meet is a construction joint. These need to be planned thoughtfully so they can double as control joints and look intentional.
Rules of Thumb for Perfect Placement
Knowing where and how deep to put your control joints is everything. Get it wrong, and they might as well not even be there.
A great guideline to remember is the 2-3x rule. This simply means the space between your joints (in feet) should be two to three times the slab's thickness (in inches). For a standard 4-inch thick driveway, that means you'll want to space your joints every 8 to 12 feet. For a 10×20 foot patio, this means you'd need at least one joint cutting it into two 10×10 foot squares.
Don't forget about depth. A shallow line won't do the job. The joint must be cut to a depth of at least one-quarter (25%) of the slab's total thickness. For that same 4-inch slab, your cuts need to be a minimum of 1 inch deep.
This isn't just hearsay; it's backed by years of experience and research. Properly installing control joints at 10 to 12-foot intervals has been shown to slash random cracking by as much as 70%. When you also follow the 25% depth rule, the odds of an ugly, uncontrolled crack showing up plummet. You can dig deeper into the professional take on how control joints prevent cracking to see just how critical they are.
How to Create Control Joints
You have two main ways to get the job done, and the one you choose often depends on the project size and the tools you have.
-
Hand-Tooling: This is the old-school method, done while the concrete is still wet but firm enough to work on. Using a special tool called a "groover," you press the joint directly into the surface. It’s effective for smaller jobs but takes a steady hand to get those lines perfectly straight. A common example is creating the joints in a small sidewalk pour.
-
Saw Cutting: This is the go-to method for most professional jobs today. After the concrete has set up enough not to tear, you come back with a concrete saw and cut the joints. Timing is key here—you usually have a window of 4 to 12 hours after finishing. An early-entry saw is a great tool for this, especially on hot Atlanta days, as it lets you cut sooner before the slab gets too stressed. An example would be a contractor returning the morning after a large driveway pour to cut the control joints.
Mastering the art of jointing gives you the power to dictate the terms, ensuring your concrete work stays strong, functional, and looking sharp for years.
Pouring, Finishing, and Curing: Where the Real Work Begins
Once the prep work is done, the next few hours are the most critical in your concrete's entire life. This is when the slab is at its most vulnerable, and even small mistakes can lock in permanent weaknesses. Getting the pour, the finish, and especially the cure right is your final—and most important—step in preventing cracks.
Think of wet concrete as a temporary liquid. Your goal is to get it into the forms and leveled out as efficiently as possible without messing up that carefully balanced mix. If you handle it too aggressively, you risk causing segregation—where the heavier gravel sinks and the lighter sand and cement paste rise.
This leaves you with a slab that's strong on the bottom but has a weak, brittle surface just begging to crack. The best practice is to place the concrete as close to its final position as possible. For example, use a wheelbarrow to dump it directly into the far corners instead of piling it all in one spot and raking it across the entire area.
Finishing the Surface the Right Way
After the concrete is placed and screeded level, it's time to finish it. This is where a lot of well-intentioned DIYers and even some pros get it wrong. The single biggest mistake? Over-finishing the surface or adding water to make it smoother.
Sprinkling water on top while you're troweling might give you a slick, glassy finish, but it cripples the top layer by messing up the water-to-cement ratio right where you need the most strength. This is a direct cause of "crazing," that web of fine surface cracks, and it also leads to scaling and spalling later on.
The rule is simple: never add water to the surface of hardening concrete. If the surface is drying out too fast on a hot, windy Atlanta day, use an evaporation retarder. It’s a chemical film that holds the moisture in without compromising the mix. A good example of when to use this is on a sunny, 90-degree day with a steady breeze—perfect conditions for surface cracking.
Work the surface just enough to smooth it and push the large aggregate down. Troweling too much can trap bleed water just below the surface, creating a weak, delaminated layer that is almost guaranteed to fail. For homeowners, knowing how to properly handle poured concrete is a crucial skill that separates a lasting job from one that will need repairs way too soon.
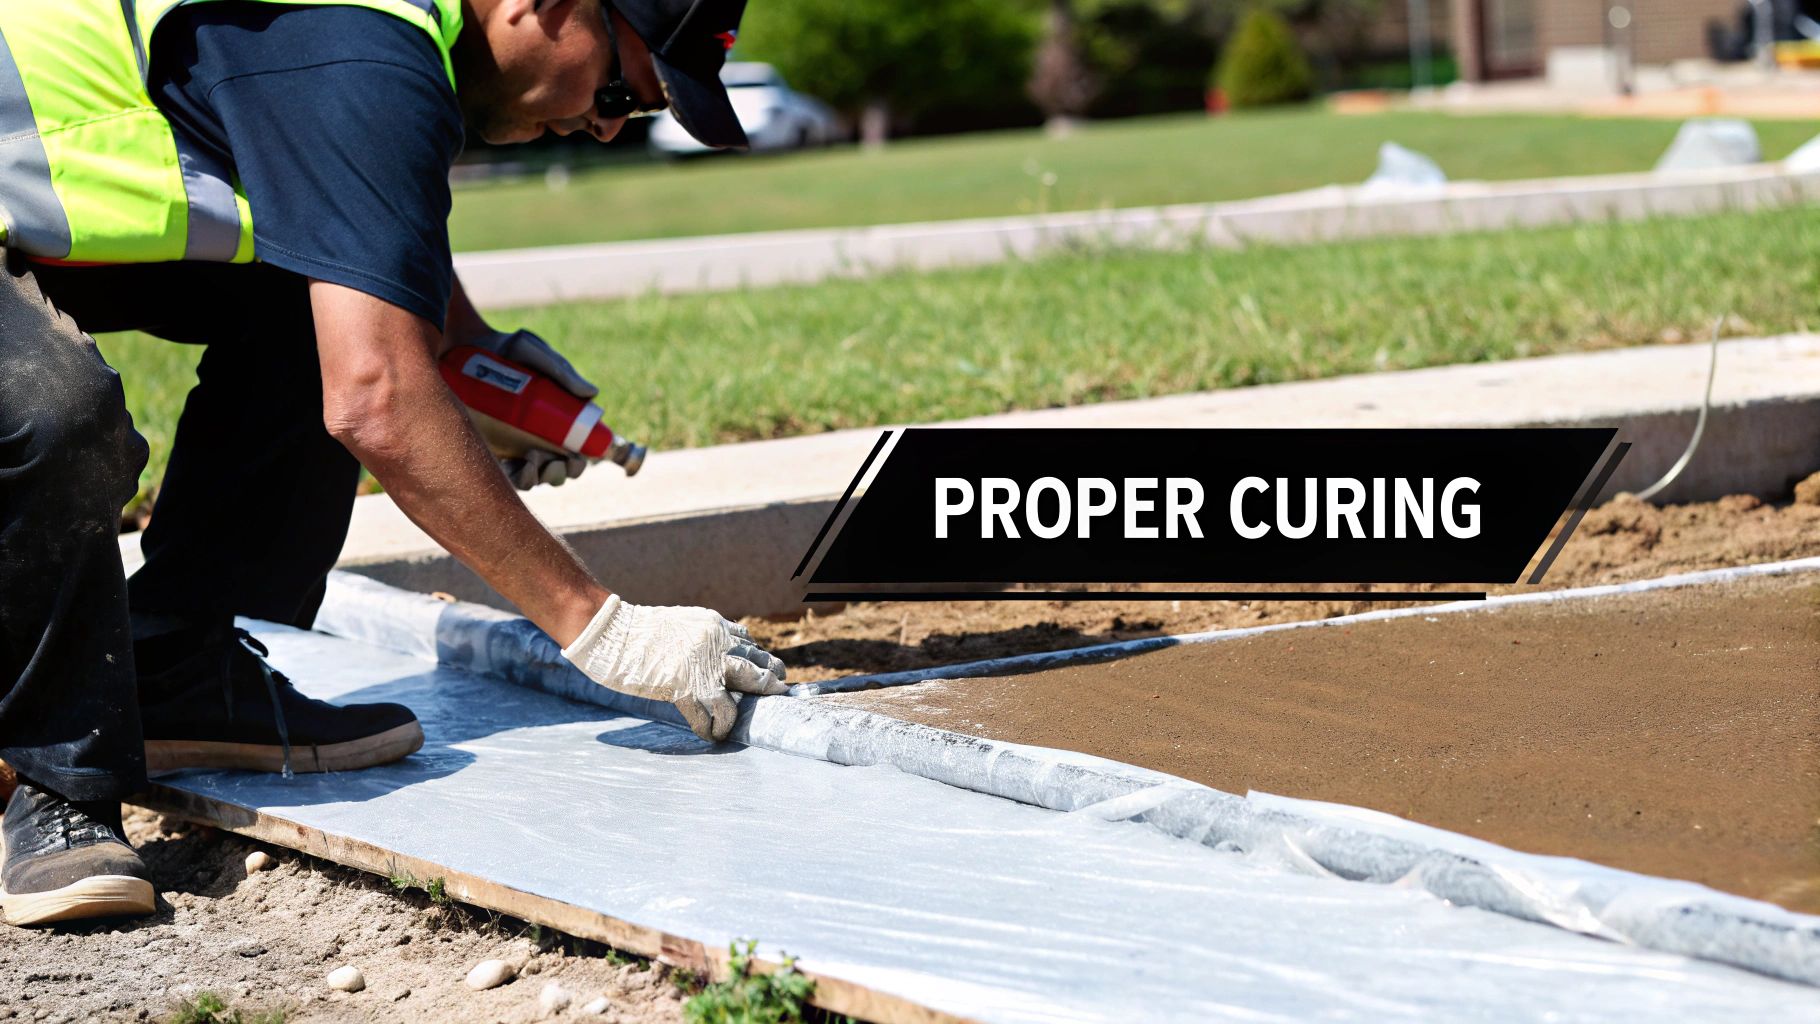
Curing Is Not Optional
If you take only one thing away from this guide, let it be this: curing is not the same as drying. Curing is the chemical process (hydration) that gives concrete its strength, and it requires water to happen. When you just let concrete "dry out," you're stopping that reaction dead in its tracks, leaving you with a weaker slab that shrinks too quickly.
Proper curing ensures the slab reaches its full design strength, making it denser and far less permeable. In fact, concrete that’s properly cured for seven days can be up to 50% stronger than concrete left to cure in the open air. This is your number one tool for fighting shrinkage cracks.
There are a few solid ways to cure your new slab:
- Liquid Curing Compounds: This is a popular and very effective method. You simply spray a waxy liquid onto the fresh concrete using a garden sprayer, and it forms a thin film that seals the moisture in.
- Plastic Sheeting: Covering the slab with 6-mil plastic is a great way to trap moisture. Just make sure you weigh down the edges so the wind can’t get underneath and dry everything out. For example, use bricks or 2x4s along all edges of the plastic.
- Water Curing: This involves keeping the slab continuously wet, either by sprinkling it with a hose or by covering it with soaked burlap blankets. It’s highly effective but requires constant attention for several days. A common example is setting a lawn sprinkler on a light mist setting over a new patio.
No matter which method you choose, the goal is the same: keep that slab moist, especially for the first three to seven days. It’s a simple step that pays off big time in durability and a crack-free finish.
Long-Term Concrete Care and Protection
https://www.youtube.com/embed/Br5i8nkW5DQ
Once your new concrete has fully cured, the job isn't quite over. If you want decades of solid, crack-free performance, you need to think about long-term care. It's really about protecting your investment from the daily grind of weather, moisture, and heavy loads.
The best tool you have for this is a high-quality concrete sealer. Fresh concrete might look impermeable, but its surface is full of tiny pores that drink up water. This is a big deal here in the Atlanta area, where our humidity and occasional freeze-thaw cycles can really do a number on unprotected slabs.
The Critical Role of a Penetrating Sealer
A good penetrating sealer doesn't just sit on top; it soaks into the concrete and creates a chemical barrier from within. This is what stops water, de-icing salts, oil, and other harmful chemicals from getting in and causing damage like spalling and internal deterioration. A good example is a silane/siloxane sealer, which reacts chemically with the concrete to form a hydrophobic layer.
For a new slab, you'll want to wait until it's fully cured—that's typically about 28 days—before putting on that first coat of sealer. If you jump the gun, you can trap moisture inside and mess with the final hydration process, which ultimately weakens the surface.
Sealing isn’t a one-and-done job. For driveways and patios that get a lot of foot traffic and weather exposure, make it a habit to clean the surface and reapply a quality sealer every 2 to 3 years. Honestly, this one step is the single best thing you can do to prevent moisture-related problems down the road. For example, you might notice that water no longer beads up on the surface—that's a sign it's time to reseal.
Manage Loads and Keep Water Away
Even the toughest concrete has its breaking point. A new driveway might feel hard, but it's still gaining strength for months. It's a good idea to avoid parking anything extremely heavy—like a big RV or a loaded work truck—on it for at least the first month. That kind of concentrated weight can create stress fractures that the young slab just can't handle yet. An example of a risky load is a dumpster delivered for a renovation project; always place plywood sheets down first to distribute the weight.
Water is concrete's number one enemy over time, and it attacks from all sides. Keeping the area around your slab well-drained is non-negotiable.
- Check that your downspouts are channeling water far away from the edges of your driveway or patio. Use extensions to carry water at least 5-10 feet away.
- Make sure the soil and landscaping around the slab slope away, not towards it. A good rule of thumb is a slope of at least 1/4 inch per foot.
- Never let water pool up against the concrete. This can wash away the subgrade, leaving the slab without support and leading to sinking and cracking.
If you start seeing cracks develop even after taking these precautions, it's best to jump on them quickly. For some professional guidance on what to look for and how to fix it, our guide on residential concrete and masonry repair has some great, practical tips.
Keep Your Control Joints Healthy
Finally, let's talk about those control joints you carefully cut into the slab. They're there to tell cracks where to go, but if left empty, they can also become a direct pipeline for water to get underneath your concrete.
Filling these joints with a flexible, self-leveling sealant is the way to go. It keeps water out, which protects the subgrade from washing away. It also stops dirt and pebbles from getting stuck in the joint, which can cause the edges to chip and spall when the slab expands in the summer heat. A great example of this problem is when a small stone gets lodged in a joint; when the concrete expands, the stone acts like a wedge and breaks off a small piece of the edge. A little bit of attention here goes a long way in making sure your concrete looks great and performs perfectly for years to come.