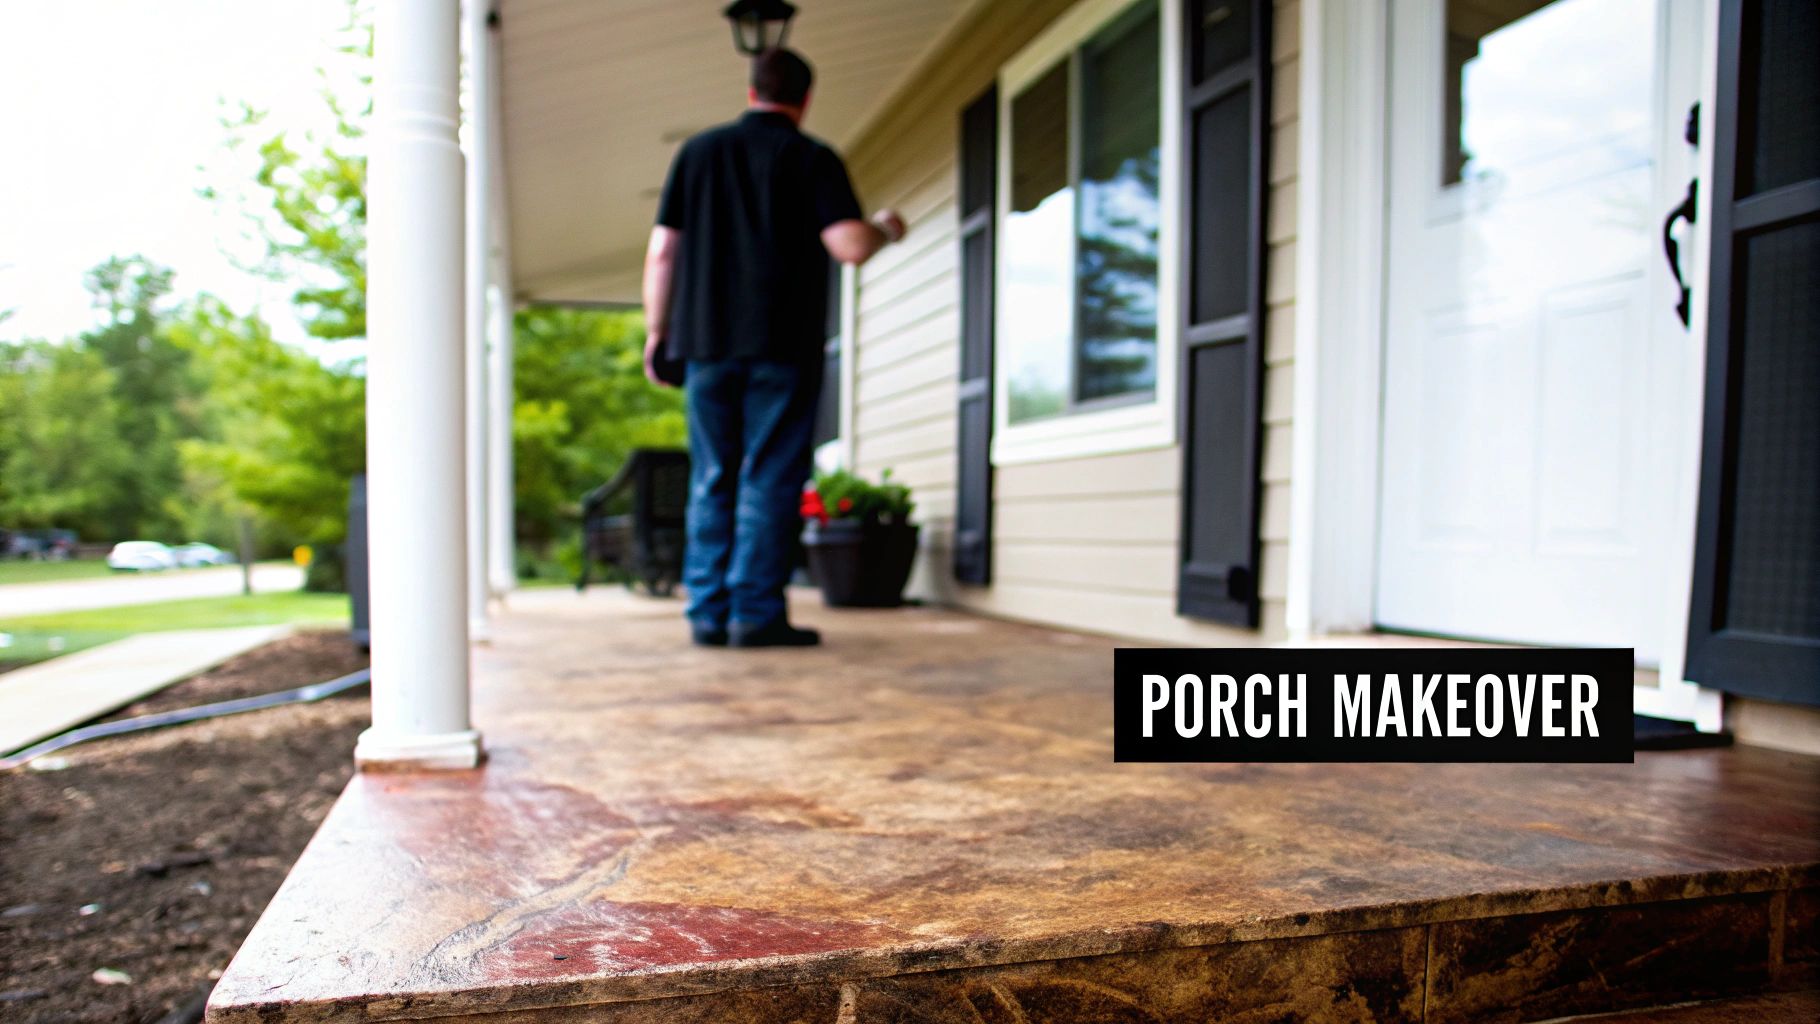
Tired of that boring, gray slab of concrete you call a porch? You're not alone. Giving it a rich, marbled color is one of the most rewarding and affordable DIY projects you can tackle. The secret isn't paint, but a stain that completely transforms the look of your outdoor space and seriously boosts your home's curb appeal.
It's all about meticulous preparation and giving each step the time it needs to do its job. Get that right, and you'll have a finish that lasts for years. This guide will provide the information and examples you need to achieve a professional look.
Transform Your Porch with Concrete Stain
Let's be clear: staining concrete is nothing like slapping a coat of paint on it. Paint sits on the surface, ready to chip and peel with foot traffic and weather. Stain, on the other hand, soaks into the concrete's pores. This creates a deep, translucent color that becomes a permanent part of the slab.
The beauty of this process is that it lets the unique character of your concrete shine through, creating a one-of-a-kind finish that can look surprisingly like expensive natural stone or high-end tile. For example, a brown acid stain can mimic the look of travertine, while a layered gray water-based stain can resemble slate.
It's no surprise this project has become a go-to for homeowners. The decorative concrete market is now valued at a massive USD 17.3 billion, with residential projects making up over 57.3% of that demand. People are catching on to this cost-effective way to beautify their homes.
Why Staining Beats Other Options
Before we get into the nitty-gritty, let's talk about why staining is often the best choice for a concrete porch. It delivers a combination of benefits that other treatments just can't touch.
- It’s Tough: Because the color is in the concrete, not on top of it, the finish is incredibly durable. It stands up to heavy foot traffic, patio furniture, and whatever the weather throws at it without chipping or peeling like paint.
- Endless Design Choices: You can go for an earthy, mottled look with an acid stain or pick a bold, consistent color with a water-based product. The aesthetic possibilities are huge. You can get a feel for the different looks on projects like these: https://www.atlantaconcretesolutions.com/projects.
- Super Low Maintenance: Once it’s sealed, a stained porch is a breeze to care for. A quick sweep and an occasional wash-down with a garden hose are all it takes to keep it looking sharp. For example, rinsing off pollen in the spring is usually all that's needed.
A lot of people think staining only works on brand-new concrete. That’s just not true. You can get stunning results on older, weathered porches, but it all hinges on doing the surface prep correctly—and we'll walk you through every bit of that.
To give you a clear roadmap, here's a quick overview of what to expect.
Your Concrete Staining Journey at a Glance
This table breaks down the entire project into manageable phases, from cleaning and repairs to the final protective seal. Think of it as your high-level guide to achieving a professional-quality finish.
| Phase | Objective | Key Actions |
|---|---|---|
| 1. Preparation | Create a clean, porous, and sound surface. | Deep cleaning, degreasing, patching cracks, and etching the concrete. |
| 2. Staining | Apply color evenly for the desired aesthetic. | Choosing between acid or water-based stain; applying with a sprayer or brush. |
| 3. Sealing & Curing | Protect the stain and enhance its color. | Applying a high-quality sealer and allowing adequate time to fully cure. |
| 4. Maintenance | Preserve the finish for long-term durability. | Regular cleaning and re-applying the sealer every few years. |
With this framework in mind, you’re ready to get started. While we’re focusing on staining, if you're still weighing your options, you might also find this guide on painting a concrete porch helpful for comparison. Now, let’s dive into the details.
Getting Your Concrete Ready for a Flawless Finish
If you take only one thing away from this guide, let it be this: proper surface preparation is everything. It’s the least glamorous part of the job, but it’s the absolute foundation for a stain that looks great and actually lasts. Nine times out of ten, when a DIY stain job goes wrong—peeling, blotchy spots, a finish that just gives up—it’s because this phase was rushed.
Think of your porch as a giant, hard sponge. For the stain to work its magic, it needs to soak deep into the concrete's pores. But years of dirt, grime, old sealers, and who-knows-what have clogged those pores, creating a barrier. Your job is to get that surface perfectly clean and ready to drink up the stain.
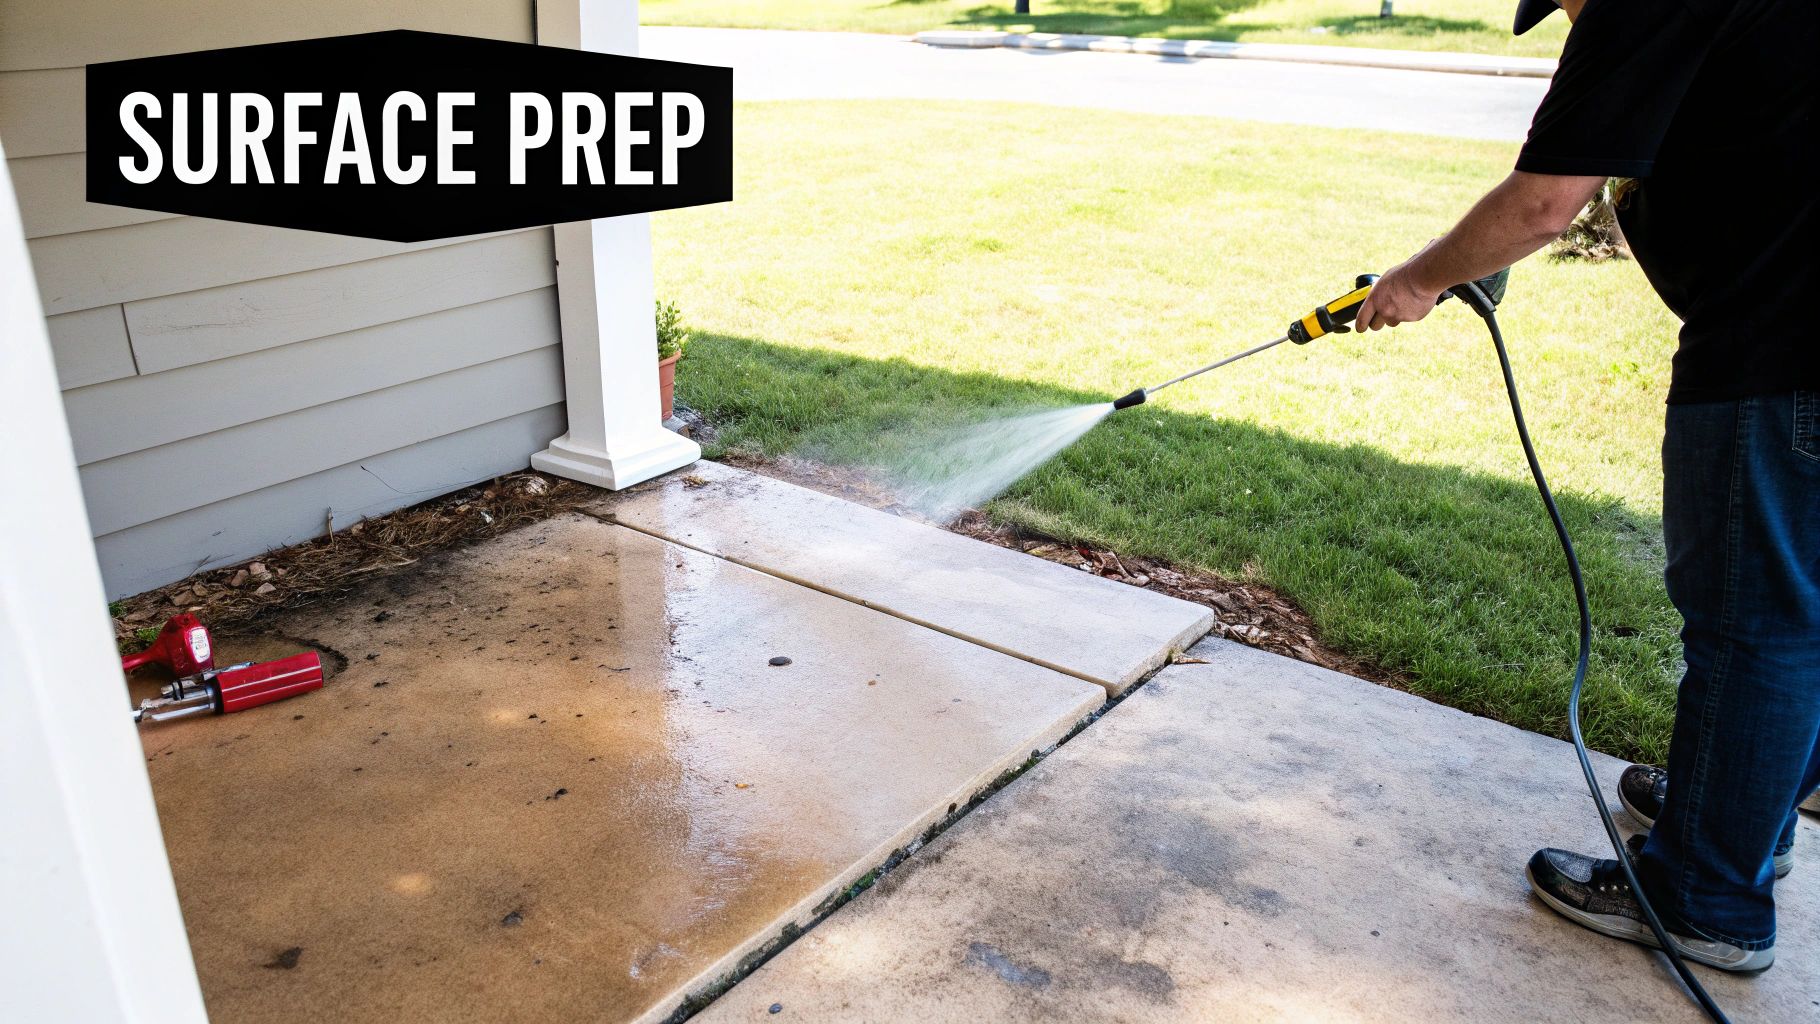
Give It a Deep Clean with a Pressure Washer
Your best friend for this part of the project is a pressure washer. A garden hose just doesn't have the muscle to get the job done right. You need that high-pressure blast to strip away years of embedded gunk and reveal the true surface underneath. For example, this step will remove stubborn green mildew that soap and water won't touch.
For a typical concrete porch, a pressure washer rated around 3,000 PSI (pounds per square inch) is the sweet spot. It’s got enough power to handle stubborn dirt and mildew without chewing up the concrete itself. When you start, use a wider-angle tip, maybe a 25-degree, and keep a consistent distance from the surface. This helps you avoid leaving behind ugly lines or "wand marks."
Work your way across the entire porch methodically, slightly overlapping each pass. You’ll be shocked at the difference this one step makes.
Why You Can't Skip Etching the Concrete
After the porch is clean and has had a day or two to dry out completely, it's time to etch. This means applying a special concrete etching solution—basically a mild acid or a safer acid replacement—that microscopically roughs up the surface. This opens up the concrete's pores and gives the slab a texture like medium-grit sandpaper, which is exactly what the stain needs to grab onto.
It’s so tempting to skip this step, but trust me, it’s a huge mistake. A smooth, sealed-off surface won't take the stain properly. Industry data shows that skipping the etching process is a leading cause of project failure, contributing to as many as 20% of cases where the stain or sealer peels prematurely. With porches representing up to 20% of residential decorative concrete applications, getting this right is crucial.
Pro Tip: Not sure if you need to etch? Try the "water drop test." Sprinkle a few drops of water on the clean, dry concrete. If the water beads up and just sits there, you absolutely need to etch. If it soaks in within a minute or so and darkens the concrete, the surface might be porous enough already.
Patching Up Minor Cracks and Flaws
Once the surface is clean and etched, every little flaw is going to stand out. This is the perfect time to fix any small hairline cracks or chips before they become a permanent part of your newly stained porch. Remember, stain is translucent; it won’t hide these imperfections—it will often make them more obvious.
For tiny cracks (less than 1/8 inch wide), a flexible concrete crack filler or a cement-based patching compound is your best bet. Just follow the product directions.
- Clean Out the Crack: Use a wire brush and a shop vac to get all the loose debris out.
- Apply the Filler: Squeeze or trowel the patching compound into the crack, making sure it’s completely full.
- Smooth It Out: Use a putty knife to smooth the patch flush and feather the edges so it blends in.
Now, if you're dealing with bigger issues like wide, structural cracks or spalling (where the surface is flaking off), it's really best to call in a professional. A bad DIY repair on major damage can create even bigger headaches later. You can learn more about professional options with our guide on Atlanta residential concrete and masonry repair.
Once your patches are fully cured, you’re finally ready for the fun part: applying the stain.
Choosing the Right Stain for Your Porch
Picking the right stain is easily the most critical decision you'll make for your concrete porch. This one choice sets the entire mood, dictating the color, character, and final look of the whole project. You're essentially choosing between two different philosophies: acid-based stains and water-based stains, and they couldn't be more different in how they work.
Knowing what makes them tick is the key to getting the look you want. One creates a classic, marbled, and somewhat unpredictable finish, while the other gives you solid, uniform color. Let's dig in.
The Organic Beauty of Acid-Based Stains
Acid-based stains are the old-school classic, and for good reason. They're famous for creating those rich, earthy tones that make concrete look like a slab of natural stone. This isn't just a layer of color sitting on top; it's a genuine chemical reaction. The metallic salts in the stain react with the free lime (calcium hydroxide) that’s already in your concrete.
This is where the magic happens. Because every single concrete slab has a slightly different chemical makeup, the reaction is always unique. What you get is a variegated, multi-toned finish with incredible depth and marbling. Seriously, no two acid-stained porches will ever be identical. For example, a "walnut" acid stain might result in a mix of deep browns, subtle ambers, and even hints of dark red on your specific porch.
Think of it like developing film in a darkroom—you apply the solution, and the final image slowly reveals itself as the chemicals do their thing.
The wild, unpredictable nature of acid stain is its biggest selling point and, for some, its biggest drawback. If you love organic, one-of-a-kind results, this is for you. But if you need to hit a specific color swatch, you'll find it maddeningly imprecise.
The Versatility of Water-Based Stains
If you're after more control and a broader palette of colors, water-based stains are the modern answer. Unlike their reactive cousins, these are non-reactive. They're essentially advanced pigments suspended in a water-based acrylic polymer. This solution soaks into the concrete's pores and bonds right to the surface.
What does that mean for you? The color you see in the bucket is pretty much the color you'll get on your porch. The finish is far more consistent and uniform, without the dramatic, mottled look of an acid stain. This makes them perfect when you're trying to match your home’s trim, siding, or other outdoor features.
The color selection is also huge. Acid stains are generally limited to earthy tones like browns, ambers, and subtle blues or greens. Water-based stains, on the other hand, come in dozens of shades—from soft grays and beiges to bold blacks, reds, and even bright whites. For example, you could choose a "terracotta" water-based stain to perfectly match nearby clay pots.
Acid Stain vs Water-Based Stain: Which Is Best for You?
So, how do you decide? It really boils down to your personal taste and what you want to achieve with the space. Let's run through a few real-world scenarios to help you visualize the difference.
| Feature | Acid-Based Stain | Water-Based Stain |
|---|---|---|
| Final Look | Variegated, marbled, translucent, natural stone appearance. | Opaque, uniform, consistent color. |
| Color Palette | Limited to earthy tones (browns, ambers, soft blues/greens). | Vast color selection, including bold and vibrant shades. |
| Application | More complex; requires neutralization and thorough cleanup. | Simpler, more direct application process. DIY-friendly. |
| Predictability | Low. The final color is a chemical reaction and can vary. | High. The color is consistent and predictable. |
| Best For | Achieving a unique, one-of-a-kind, high-end look. | Specific color matching, logos, patterns, and modern designs. |
| UV Stability | Excellent. The color is part of the concrete itself. | Good to excellent, depending on the quality of the product. |
Ultimately, the best choice depends on whether you value organic, unique character (acid) or predictable, consistent color (water-based).
Making the Right Choice for Your Home
-
For a Timeless, Rustic Look: Picture a classic brick home with a big, welcoming porch. An acid stain in a warm "Cola" or a rich "Amber" would create a timeless, elegant finish that feels like it’s always been part of the house. The natural variation would be a perfect complement.
-
For a Sleek, Modern Finish: Now, think of a contemporary home with sharp lines and a minimalist vibe. A water-based stain in a solid slate gray would deliver a clean, uniform surface that enhances that modern aesthetic without distracting from it.
-
For Custom Designs and Logos: If you have an artistic streak and want to create patterns or even a logo on your porch, water-based stains are your only real option. Their predictability gives you crisp lines and clean color separation—something that’s nearly impossible with the free-flowing nature of acid stains.
Looking at what others have done is a great way to find inspiration. For those of us here in Atlanta, seeing local examples of residential decorative concrete projects can really open your eyes to what’s possible with both types of stain. The right one will perfectly match your home's style and the vision you have for your outdoor space.
Applying Concrete Stain Like an Expert
Now for the fun part. With all the prep work behind you, it's time to bring your porch to life with color. Applying concrete stain is where the real transformation happens, and it’s more art than science. The goal isn't just to slap on some paint; it's to work with the concrete to create a finish with real depth and character.
The secret to a beautiful, streak-free look is the right tool for the job. While you might be tempted to grab a roller, a simple garden pump sprayer is your best friend here. It lets you apply a fine, even mist of stain across the surface, which is the key to avoiding those ugly lines and blotches that can ruin an otherwise perfect project.
The Art of the Application
Think about how color appears in natural stone—it's full of subtle variations, not a solid, uniform sheet. That's the look you're trying to mimic. The best way to do this is with random, overlapping circular motions as you spray. This technique prevents obvious start-and-stop lines and helps the stain settle in a much more organic way.
Whatever you do, don't spray in straight lines like you're mowing the lawn. That's a guaranteed way to end up with a striped porch. Keep the sprayer wand moving constantly, layering the mist lightly until you get the coverage you want.
Crucial Tip: Always maintain a 'wet edge.' This just means that as you move to a new section, you should slightly overlap the still-wet edge of the area you just sprayed. It's the most important trick for blending sections seamlessly and preventing harsh lines from forming as the stain dries.
Here’s a practical tip: start in the corner furthest from your exit (like the back door). This lets you work your way out without painting yourself into a corner or, even worse, stepping on your fresh stain. Plan your escape route before you spray a single drop.
This flowchart breaks down the different paths and key steps for both acid and water-based stains.
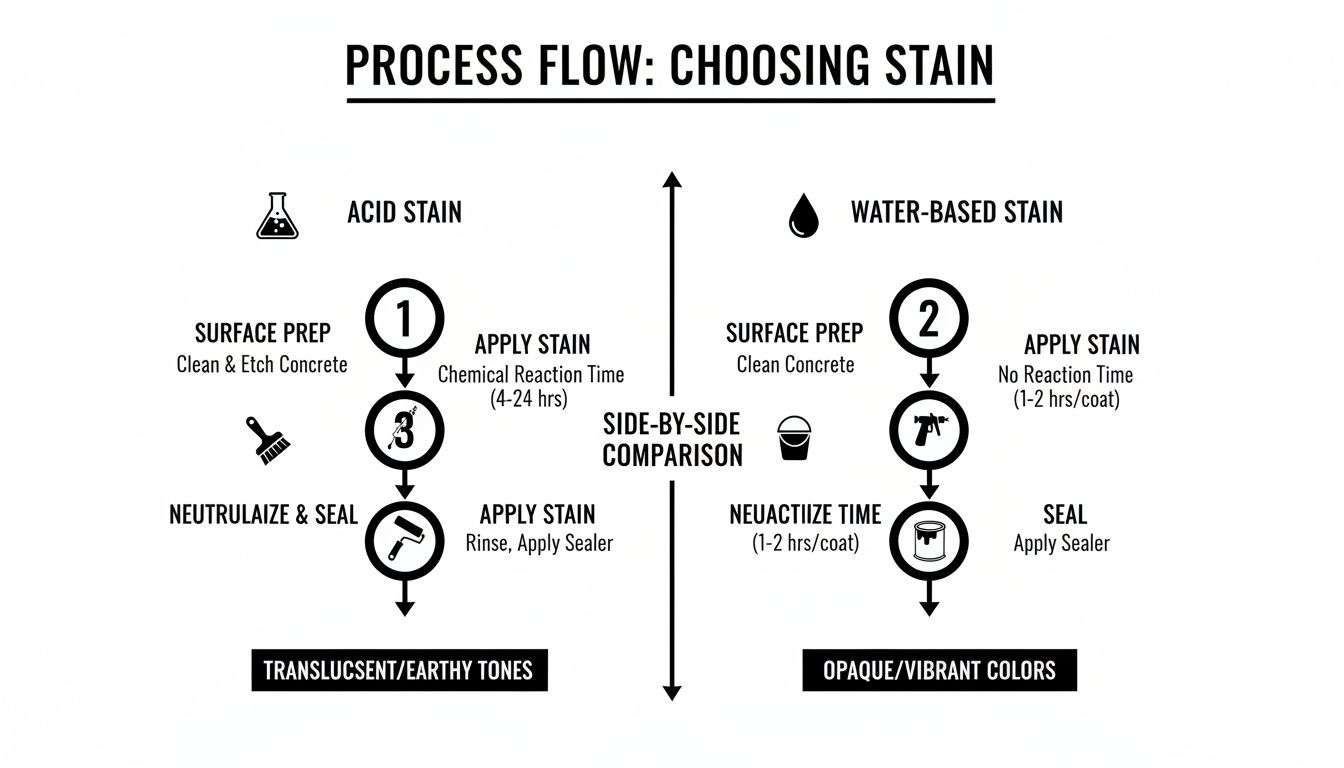
As you can see, acid stain involves a chemical reaction that requires a neutralization step, while water-based stains offer a more direct application-to-finish process.
The Critical Neutralization Step for Acid Stains
If you went with an acid stain, this next step is non-negotiable. After the stain has dried and worked its magic, you must neutralize it. The acid will keep reacting with the concrete forever unless you stop it. If you skip this, your sealer won't bond properly, and you'll be dealing with peeling and flaking down the road.
Thankfully, it's a simple process. You just need to wash the surface with a basic solution.
- Mix Your Solution: A cup of baking soda dissolved in a gallon of water works perfectly. You can also use a mix of water and ammonia.
- Apply and Scrub: Mop or spray the solution over the entire porch. Use a soft-bristle brush to gently scrub it in, making sure it gets into all the pores.
- Rinse It All Off: Finally, rinse the porch thoroughly with clean water. You'll see some colored residue washing away—that's totally normal. Just keep rinsing until the water runs clear.
Neutralizing doesn't just stop the chemical reaction. It also cleans off any leftover residue, getting the surface perfectly prepped for the sealer and locking in the beautiful color you just created.
Tips for a Flawless Finish
Getting that professional look often comes down to the little things. Keep these pointers in mind to avoid common mistakes and make sure your porch looks amazing.
- Protect Everything: Before you start, use painter's tape and plastic sheeting to cover siding, door frames, and nearby plants. Concrete stain is permanent, and overspray is a nightmare to remove.
- Build Color in Thin Coats: It's always better to apply two or three light coats than one heavy, saturated one. This gives you far more control over the color and prevents puddles or dark spots.
- Pick the Right Day: Hot, direct sunlight will make the stain dry way too fast, leaving you with lap marks and an uneven finish. An overcast day with temps between 50–80°F is ideal.
- Embrace Imperfection: This is especially true for acid stains. The final look is meant to be variegated and unique. Don't chase a perfectly uniform color. Those subtle variations are what give stained concrete its high-end, custom look.
Sealing and Protecting Your New Porch Surface
You’ve done the hard work, and your porch looks fantastic. Now for the final, crucial step: sealing it. I can't stress this enough—sealing your stained concrete is absolutely non-negotiable. It’s the invisible shield that protects all your effort from weather, foot traffic, and time itself.
Think of it as the clear coat on a car. Without it, the beautiful color you just applied is left vulnerable. A good sealer locks in the stain, makes the color pop with more vibrancy, and creates a tough barrier against UV rays, moisture, and everyday wear and tear.
Choosing the Right Sealer for the Job
When you walk down the aisle at the hardware store, you'll see a few different types of sealers. For an outdoor porch, I almost always recommend an acrylic sealer. The main reason is that they're breathable. This lets any moisture vapor escape from the concrete instead of getting trapped underneath, which prevents that ugly bubbling or peeling you sometimes see.
Acrylics come in two main flavors: solvent-based and water-based. For most DIY projects, a water-based acrylic is the way to go. They’re much more user-friendly, have lower VOCs (fewer fumes), and clean up easily with just soap and water. They offer great protection and won't drastically change the color of your stain.
You'll also get to pick the final look. This part is all about personal taste:
- Gloss Finish: Gives you that shiny, "wet" look that really punches up the color and adds a lot of depth. It's a statement finish.
- Matte or Satin Finish: If you prefer something more understated, these low-sheen options provide a subtle, natural appearance while still offering top-notch protection.
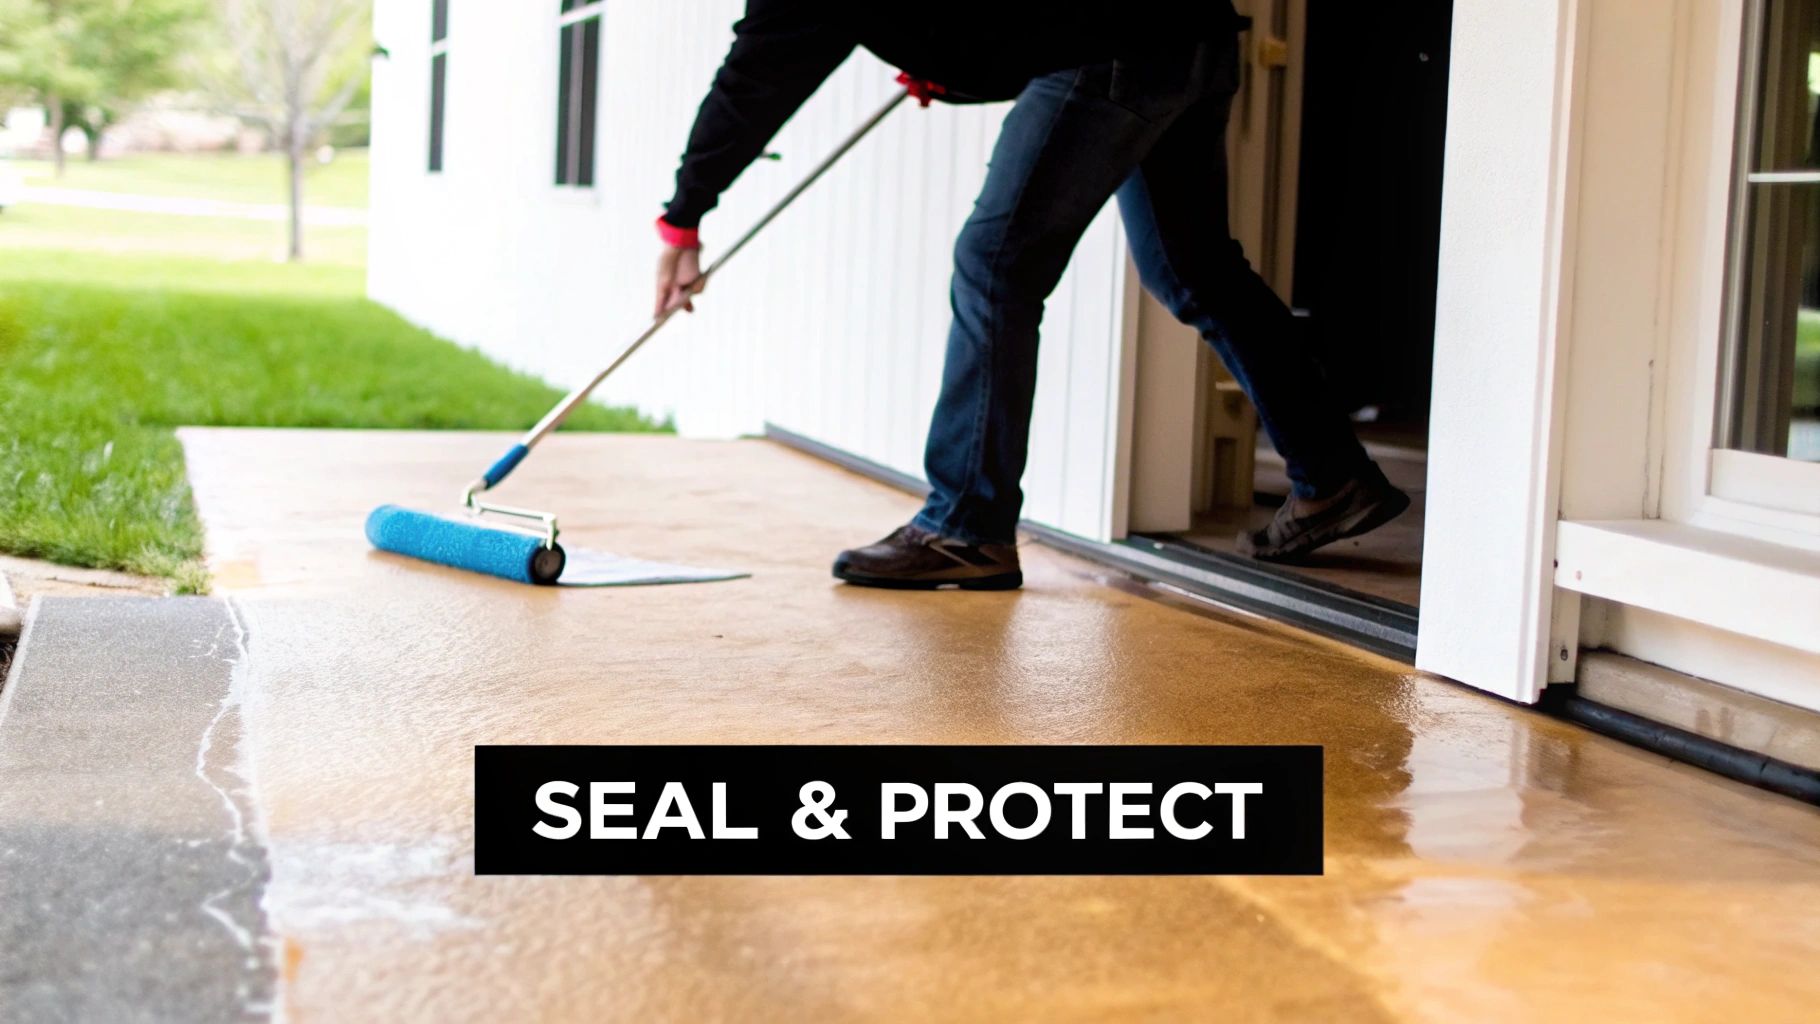
Applying the Sealer with a Roller
The application itself is pretty simple, but your technique will make or break the final result. Grab a short-nap roller (a 3/8-inch nap is perfect) to get a nice, smooth coat. Before you even think about opening the sealer, make sure your porch is completely clean and bone dry.
Pour a bit of sealer into a paint tray and start rolling it on in thin, even coats. Work in small, manageable sections, and just like when you were staining, always keep a "wet edge" to prevent ugly lines where your roller strokes overlap. Let the roller do the work; don't push down. You're aiming for a thin film, not a thick, gloppy layer.
Pro Tip: The most common mistake I see is applying sealer too heavily. This is what causes that cloudy, milky look. It’s always better to apply two or three thin coats than one thick one. This approach builds up durability and gives you a perfectly clear, professional-looking finish.
Let each coat dry thoroughly before you even think about adding the next one. This usually takes about one to two hours, but always check the product label and consider the humidity.
Don't Forget This Crucial Safety Step
One last thing to think about is safety. A freshly sealed porch, especially with a gloss finish, can get incredibly slippery when it’s wet. To avoid turning your porch into an ice rink, I highly recommend mixing a non-slip additive into your final coat of sealer.
This stuff is basically a super-fine grit, almost like sand, that you just stir into the sealer right before applying that last coat. You won't really see it, but you'll feel the traction under your feet. It’s a cheap, easy addition that makes your beautiful new porch a whole lot safer for everyone.
A Few Common Questions About Staining Your Porch
Even after laying out all the steps, there are always a few lingering questions that come up right before you start. Let's tackle some of the most common ones I hear from folks taking on this project for the first time. Getting these details straight can be the difference between a good result and a great one.
How Long Will My Stained Concrete Porch Actually Last?
This is the big one, and the answer is better than you might think. The stain itself is pretty much permanent. Because it soaks into the concrete and triggers a chemical reaction (with acid stains) or bonds within the pores (with water-based ones), the color isn't just sitting on top waiting to peel off.
The real hero for longevity is the sealer. Think of the sealer as a clear shield that takes all the abuse from foot traffic, harsh UV rays, and whatever weather Atlanta throws at it. A good-quality exterior sealer will need a fresh coat every 2-3 years. Keep up with that simple bit of maintenance, and the color underneath will stay protected and look fantastic for years. For example, if you notice water no longer beads on the surface after it rains, that's a good sign it's time to reseal.
Can I Stain a Porch That's Already Been Painted?
Yes, you can, but I won't sugarcoat it—you've got some serious prep work ahead of you. Stain has to penetrate bare, porous concrete. Paint creates a non-porous barrier, like a raincoat, that completely blocks the stain. You simply cannot stain over paint; it just won't take.
To get it right, every last speck of that old paint has to go. You're looking at two main paths to get there:
- Chemical Strippers: These are messy but effective. You apply the product, let it soften and dissolve the paint, and then get to work scraping it all off.
- Mechanical Grinding: This is the more aggressive, and often more thorough, method. You'll need a concrete grinder fitted with a specialized abrasive disc to literally grind the paint off the surface.
This is a non-negotiable step. If you leave any paint behind, you'll end up with a blotchy, uneven stain, and the sealer will almost certainly fail in those spots.
I often see homeowners with a peeling porch think they can just stain the bare spots. What happens is the stain soaks into the bare concrete but beads up on the remaining paint, creating a patchy disaster that looks far worse than the original peeling paint.
What's a Realistic DIY Budget for a Porch Staining Project?
One of the best things about this project is how much bang you get for your buck. For a typical porch around 200 square feet, you can expect your materials to run you somewhere between $200 and $500.
That budget usually covers everything you'll need:
- Concrete cleaner and etcher (e.g., muriatic acid or a safer alternative)
- The stain itself (acid or water-based)
- A quality acrylic sealer
- Application tools like a pump sprayer, roller, brushes, and painter's tape
Of course, the brands you pick and the quality of the products will move that final number up or down. But even on the high end, it's a world away from the cost of hiring a crew or laying down new stone pavers or tile.
When Should I Just Call a Pro?
Doing it yourself is a great way to go for most standard porches, but there are definitely times when bringing in a professional is the smart move. You should seriously think about hiring a pro if you're looking at any of these situations.
- Major Damage: If your porch has big, deep cracks, significant spalling (where the surface is flaking and chipping away), or just feels structurally questionable, you need an expert to properly assess and repair the concrete first.
- Stubborn Old Coatings: Trying to remove a bulletproof old coating like epoxy or multiple thick layers of paint can be a nightmare. A pro will have the heavy-duty grinding equipment to get the job done efficiently and without damaging the concrete.
- Complex Designs: If you're dreaming of an intricate, multi-color pattern or a custom logo, an experienced decorative concrete artist can deliver a level of precision that’s incredibly tough to achieve on your first try.
Bottom line: if the prep work seems overwhelming or the risk of a permanent, ugly mistake feels too high, there’s no shame in calling for a quote. They have the gear and the experience to guarantee a flawless finish.
If your porch needs more than just a stain, or if you'd rather leave the job to seasoned experts, Atlanta Concrete Solutions is here to help. From complex repairs to stunning decorative finishes, our team ensures every project in the Atlanta area is done right. Get your free quote today!