Achieving that perfect, glass-like concrete finish is all about timing, technique, and having the right tools on hand. It's a dance with the material. You start by leveling the wet concrete, then floating it to bring the "cream" to the surface, and finally, troweling it methodically until it’s dense and smooth. For example, getting the timing right on a hot day means you might have only 30 minutes between floating and the first trowel pass, whereas on a cool, humid day, you could be waiting for hours. Getting these stages right is what separates a basic pour from a truly professional-grade slab.
Why a Perfect Smooth Finish Matters
That flawless, almost liquid-looking surface on a high-end garage floor or modern patio isn't just for show. It's a sign of a job done right—a mark of durability and quality. A proper smooth finish makes the concrete surface denser and less porous, which is your best defense against wear, stains, and moisture. For example, a well-finished garage floor will resist oil stains, allowing you to wipe them up easily, whereas a porous, poorly finished one will absorb them instantly, leaving a permanent mark. You’re essentially creating a built-in shield for the slab.
This guide isn't about reciting the back of a concrete bag. We're going to get into the techniques the pros use, especially when dealing with tricky conditions like the weather here in Atlanta. One day, the high humidity slows everything down, and the next, a surprise heatwave means you have to work twice as fast. You have to know how to read the concrete and react.
The Value of a Flawless Surface
A top-notch smooth finish brings more to the table than just good looks. The real benefits are in its performance over time.
- Increased Durability: The act of troweling compacts the concrete's surface, hardening it against scuffs, scratches, and impacts. A poorly finished slab will start to look old and beat up in no time. For instance, a smooth, hard-troweled surface in a workshop can withstand dropped tools and dragging heavy equipment much better than a rougher, unrefined finish.
- Easier Maintenance: Let's be honest, nobody likes cleaning. A smooth, non-porous surface makes it a breeze. Spills tend to bead up instead of soaking in, and a quick sweep or mop is all it takes. Think of a kitchen with a polished concrete floor; a dropped glass of red wine can be wiped up without a trace, a feat impossible on porous concrete.
- Enhanced Safety: In a workshop or garage, an even floor is a safe floor. A smooth finish eliminates tripping hazards and gives you a stable, solid base for heavy toolboxes, cars, and equipment. A lumpy, uneven surface can cause rolling tool chests to tip or create puddles of water that become slip hazards.
A great concrete finish is the finisher's signature. It tells you they were patient, their timing was impeccable, and they truly understood how to work with the material, not against it.
Think of this guide as your roadmap. We’ll cover everything from picking the right trowel for the job to the final, crucial curing steps that lock in the slab's strength for the long haul. This is your blueprint for turning a standard project into a durable, beautiful surface that will last for decades.
Your Essential Concrete Finishing Toolkit

Trying to get a smooth concrete finish without the right gear is a recipe for frustration. You can't just wing it. Each tool plays a specific role in the sequence, and using them correctly is what separates an amateur job from a truly professional one.
Think of it this way: building your toolkit is about more than just grabbing what's on the shelf. It's about knowing why you're reaching for a magnesium float instead of a wood one at a particular moment. This is where you start to learn how to finish concrete smooth with real control and skill.
Floats: The First Touch for a Flawless Surface
Right after your concrete is screeded level, the floats come out. Their job is to push the heavy gravel (the aggregate) down just beneath the surface. This action brings a rich layer of cement paste, known as "cream," to the top, which is essential for getting that final smooth texture.
You'll mainly be working with two types:
- Wood Floats: The old-school choice for a reason. Their natural texture is fantastic for working the aggregate down. They also leave a slightly grittier surface, which is perfect if you're planning on a broom finish later. A good example is using a wood float on a sidewalk pour before brooming to ensure a non-slip texture.
- Magnesium Floats: Lighter and tougher than wood, a "mag" float glides across the concrete with almost no friction. It's excellent for "opening up" the slab's pores, which lets trapped air and extra water (bleed water) escape. This is the go-to tool for preparing indoor slabs that will eventually receive a hard trowel finish. Honestly, most pros I know carry both.
For a small job like a patio, a simple hand float will do. But for a driveway or anything bigger, you absolutely need a bull float. It's just a big float on a long handle, but it lets you smooth the entire slab from the perimeter without stepping in your fresh pour.
A quick word of advice from the field: The biggest mistake I see beginners make is overworking the concrete with the bull float. All you need is one or two smooth, even passes. Go over it too many times, and you'll seal the surface too early, trapping water that will cause major headaches down the road. For example, if you see blisters forming an hour after you float, you've likely overworked it.
Trowels: Your Key to That Glass-Like Sheen
After the floating is done and the concrete has firmed up, it's trowel time. This is the step that creates that final, dense, almost glassy surface. Steel trowels come in different sizes, and you'll want a few—a smaller one (e.g., 4×12 inches) for getting into tight corners and around pipes, and a larger one (e.g., 4×20 inches) for making quick work of open areas.
The art of troweling is all about patience and timing. With each pass, you're compacting the surface paste a little more, making it harder and smoother. It’s this final touch that defines the quality of the job.
The demand for these tools is huge. The market for concrete finishing equipment is projected to climb from USD 12.5 billion to USD 20.3 billion by 2035. With the residential sector making up about 38.4% of the global concrete market, it's clear these tools are a staple for home projects. If you're curious about industry shifts, you can read up on the latest concrete contractor market trends.
Hand Tools vs Power Tools for Concrete Finishing
Choosing between manual tools and powered equipment often comes down to the scale of your project and the finish you're aiming for. A walk-behind or ride-on power trowel, for instance, is a game-changer for large slabs like warehouse floors, delivering a much harder and flatter surface than you could ever achieve by hand. Here’s a quick breakdown to help you decide.
| Tool Type | Best For | Pros | Cons |
|---|---|---|---|
| Hand Trowels & Floats | Small projects (patios, sidewalks, repairs), detailed edge work. | Inexpensive, excellent control for detailed work, no fuel or power needed. | Labor-intensive, slow for large areas, difficult to achieve a perfectly flat finish on big slabs. |
| Power Trowels | Large projects (driveways, garage floors, commercial slabs). | Extremely fast and efficient, produces a very hard and flat surface, reduces physical strain. | Expensive to buy or rent, requires training to operate safely, not suitable for small or tight spaces. |
For most DIYers, hand tools are the way to go. But if you're tackling a big driveway or garage floor, renting a power trowel for the day is often a smart investment that will save your back and give you a far superior result.
Don't Forget These Essential Supporting Tools
A few other tools are non-negotiable for a clean, long-lasting finish.
- Edgers: This L-shaped tool creates a clean, rounded edge along the slab's perimeter. It's not just for looks—a rounded edge is far more resistant to chipping and breaking than a sharp 90-degree corner. Think about a patio edge where a lawnmower might bump it; the rounded edge will resist chipping far better.
- Groovers (or Jointers): Concrete shrinks as it cures, and that shrinkage causes cracks. A groover is used to cut control joints (shallow, straight lines) into the wet concrete. These joints create a deliberate weak spot, so when the slab eventually cracks, it does so neatly inside the invisible groove. For a standard 4-inch thick patio, joints should be cut at least 1 inch deep and spaced every 8-10 feet.
From Wet Pour to a Flawless Finish
Once the concrete hits the forms, the clock is on. This is where all your prep work and tool selection really start to pay off. Turning a wet, lumpy pour into a sleek, durable surface is all about a sequence of carefully timed actions. Each step builds on the last, and frankly, nailing the timing is the biggest part of the battle.
You have to learn to read the concrete. What's it telling you? The sun, wind, and notorious Atlanta humidity can completely change your game plan. A hot, breezy day might slash your working window in half, while a cool, overcast afternoon gives you a bit more breathing room to get things right.
The First Pass: Screeding the Surface
As soon as the concrete is in place, your first move is to strike it off, or screed it. Grab a dead-straight 2×4 or a proper magnesium screed and pull it across the top of your forms. The goal here is simple but absolutely critical: get rid of the excess concrete and establish a flat, even plane.
Use a back-and-forth sawing motion as you pull the board toward you. This little trick helps move the concrete around without letting the board dig in and create a low spot. On anything bigger than a small pad, you’ll want a person on each end of the board to keep it steady. Don’t worry about making it pretty just yet—you’re just setting the final height.
Next Up: The Bull Float
After screeding, the surface is level but still pretty rough and open. Time to break out the bull float. This is essentially a big, long-handled float that lets you smooth the whole slab from the edges without leaving your boot prints all over your fresh work.
Bull floating accomplishes two key things:
- It knocks down the high spots and fills in the low spots left behind by the screed board.
- It gently pushes the heavier rocks (the aggregate) down while coaxing the "cream"—that rich paste of cement and sand—to the surface. This cream is what you'll be working with for that perfect smooth finish.
Sweep the bull float across the surface in long, smooth passes. On the push pass, tilt the leading edge up just a hair so it doesn't dig in. When you pull it back, do the same with the other edge. Two passes should do it. One of the biggest rookie mistakes is overworking the concrete at this stage. You can accidentally seal the surface too early, trapping water and setting yourself up for blisters down the road.
You're ready to bull float the second you're done screeding. Don't hang around. The concrete should still be soft and pliable. Your only goal is to create a uniform canvas for the next steps.
The Hardest Part: Knowing When to Wait
This is it. The single most important part of the whole job: waiting. After you’ve bull floated, you’ll see a layer of water magically appear on the surface. That’s bleed water, and you cannot, under any circumstances, touch that slab with another tool until every last drop has evaporated.
Troweling over bleed water is the cardinal sin of concrete finishing. It forces that water back into the top layer, creating a weak, porous surface that will flake, scale, and dust apart in no time.
So, how do you know the wait is over?
- Look for the Sheen: That wet, glossy look from the bleed water needs to be completely gone. The surface should look dull, almost matte.
- Try the Boot Print Test: Carefully step on the slab near the edge. If your boot sinks more than 1/4 inch, it's still too wet. If you leave a clean, firm print about 1/4 inch deep, the timing is perfect. Game on.
This waiting game can take anywhere from an hour to several hours, all depending on the day's weather. Patience isn't just a virtue here; it's a non-negotiable requirement for a slab that lasts.
The Final Trowel: Getting That Glassy Sheen
Once the concrete is firm enough to walk on (passing that boot print test), it's time for the final passes with a steel trowel. This is what creates that dense, hard, and impossibly smooth surface you're aiming for. For homeowners tackling a patio or walkway, mastering these final steps is what separates a decent job from a professional one, just like the finishing touches on a large-scale residential poured concrete project.
You'll make multiple passes, and each one has a specific job.
First Trowel Pass
For your first go-around, keep your steel trowel almost perfectly flat against the surface. Use big, sweeping arcs. This pass is all about getting a final smooth texture and pushing down any little bits of aggregate that might still be poking through.
The Next Passes
Let the concrete set up a little more between passes. With each new pass, you'll need to lift the leading edge of your trowel just a bit more. This increasing angle is what really burnishes and compacts the surface, making it harder and smoother every time.
- Second Pass: You'll have a slight angle on the trowel. Listen for a faint ringing or zinging sound as it glides over the surface—that’s how you know you're doing it right.
- Final "Hard" Trowel: Now you're using a much steeper angle. You'll have to put some serious muscle behind it to make an impact. This is the pass that delivers that signature hard, dense, almost-polished look.
Always work from the edges inward and be mindful not to leave any trowel marks. If you do create a ridge, you can usually flatten it out on your next pass. The goal is a flawless, uniform finish that not only looks fantastic but will stand up to anything for years to come.
Taking Your Finish to the Next Level: Advanced Techniques
Once you've got the hang of the basic screed, float, and trowel rhythm, it's time to talk about the techniques that really separate a good job from a great one. This is where you move beyond just making concrete flat and start crafting a surface with a specific look, feel, and performance. We're talking about the high-end, machine-perfect floors you see in custom garages, showrooms, and modern homes.
The demand for these top-tier finishes has exploded. Back in the day, most residential jobs were done by hand, which took forever. Now, with clients expecting incredibly smooth, low-waviness surfaces, the global concrete finishing equipment market has ballooned to around USD 12.5 billion. The tools have evolved, and so have the expectations.
This visual gives you a quick reminder of the fundamental steps that come before you can even think about these advanced methods.
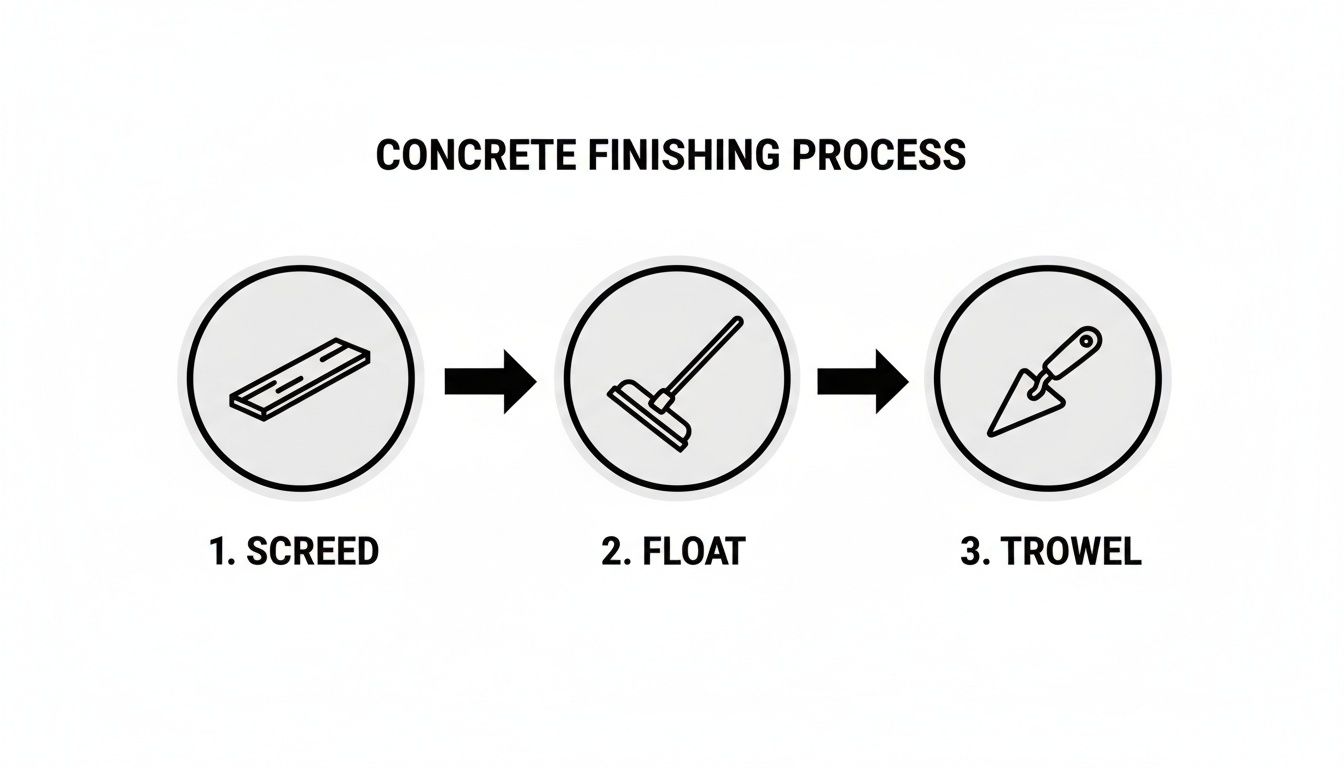
You absolutely have to nail this three-step process—screed, float, and trowel—before moving on. There are no shortcuts.
Mastering the Power Trowel
For any large slab—think driveways, basement floors, or patios—a walk-behind power trowel is a game-changer. This machine does the work of ten people, using rotating blades to smooth and harden the concrete with an efficiency you just can't match by hand. The secret to using one correctly is all in the blade pitch, which is just the angle of the blades.
- First Pass (Float Pans): You'll start with float pans or combination blades set completely flat (0-degree pitch) against the concrete. This first run is basically a powered bull float, knocking down high spots and getting the surface ready for the real finishing work.
- Subsequent Passes (Finishing Blades): After that initial pass, you'll swap over to finishing blades. With every pass you make across the slab, you’ll crank the blade pitch up just a little bit. For example, your second pass might be at a 5-degree pitch, the third at 10 degrees, and so on, until the surface is hard and shiny. This gradual increase in angle is what packs the concrete down, densifying and burnishing the surface to a hard, smooth sheen.
Achieving a Burnished or "Hard Trowel" Finish
A “hard trowel” finish is the signature of a true pro. It leaves the concrete with a dense, almost reflective surface that’s incredibly tough. This is the look people want for workshop floors, high-traffic commercial spaces, or as the perfect base for a decorative stain. Getting there takes multiple, perfectly timed passes with a power trowel or a whole lot of elbow grease with a hand trowel.
You essentially keep troweling the surface until it starts to look dark and glossy. What you're doing is compacting the surface so tightly that you're closing up all the tiny pores in the concrete paste. The result is a floor that’s ridiculously durable and a breeze to clean. That smooth, non-porous surface is a key feature we discuss in our guide to residential polished concrete.
Pro Tip: You'll know you've achieved a true hard trowel finish when water beads up on it like it does on a freshly waxed car. This makes it the perfect choice for garages and basements where you need maximum resistance to moisture and spills.
Exploring Combination Finishes
Glass-smooth isn't always the goal. For outdoor spaces like pool decks or walkways, you need a smart balance between smoothness and texture for slip resistance. This is where a combination finish really shines.
A classic example is the trowel-and-broom finish.
- First, you go through the full troweling process to get a dense, sealed surface.
- Then, right before the concrete sets up too much, you lightly drag a specialized concrete broom across the slab—all in one direction.
This light brooming action etches fine, uniform lines into the otherwise smooth surface. It creates just enough texture for a solid grip underfoot without compromising the durability you worked so hard to build with the trowel. Another example is a "picture frame" border, where the main field has a broom finish for safety, while a 12-inch border is hand-troweled smooth for a decorative contrast.
Learning these advanced methods puts you in control of not just the function of your concrete, but its final look and feel. The principles of aiming for perfection apply across many projects, and you can learn more about how to achieve a perfect professional finish in other home projects to broaden your skills.
Getting Curing and Sealing Right: The Final Steps to a Perfect Slab
You’ve put in the sweat equity to get that glass-smooth finish, but don't hang up your tools just yet. The next stage—curing—is arguably the most important for the concrete’s long-term health and strength.
This isn’t about drying the concrete. It's the exact opposite. Curing is all about slowing down the evaporation of water, giving the cement particles the moisture they need to chemically react and form the rock-solid crystalline bonds that make concrete so tough. This process is called hydration.
Letting a slab dry out too quickly, especially under that hot Atlanta sun, is a recipe for disaster. You’ll end up with a weak, powdery surface that’s prone to ugly cracks and spalling. A good cure is what makes your beautiful finish last a lifetime.
Why Curing Is Non-Negotiable
Here’s a number that should stick with you: properly cured concrete can be up to 50% stronger than a slab that was just left to fend for itself. The mission is simple: keep that surface consistently damp for at least three to seven days after your final pass with the trowel.
You have a few solid options for doing this:
- Continuous Water: This is the old-school, tried-and-true method. Think a sprinkler on a fine mist setting or covering the slab with burlap or sand that you keep soaked. It's effective but requires constant attention.
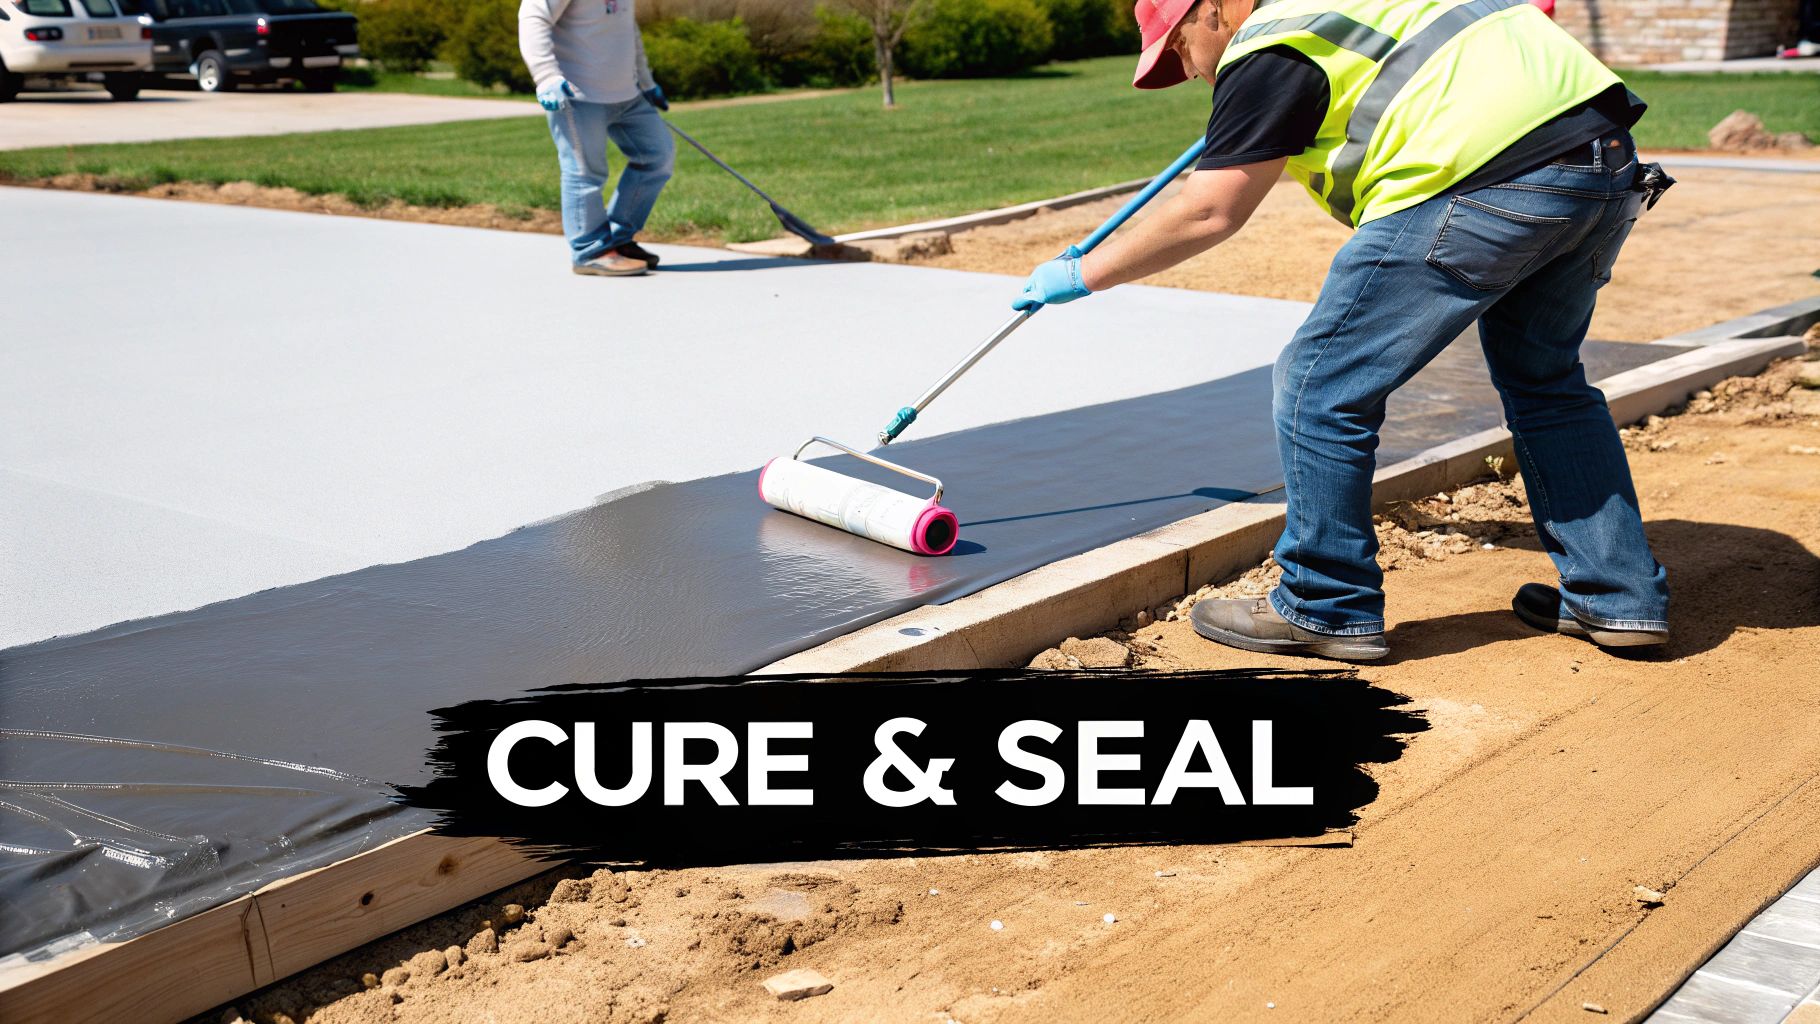
- Plastic Sheeting: An easier approach for many. Simply lay down 4- to 6-mil plastic sheeting over the slab. It traps the concrete's own bleed water, creating a perfect humid microclimate. Make sure to tape the seams to prevent moisture from escaping.
- Curing Compounds: For most residential jobs, this is the most practical choice. These are liquids you spray or roll on that form a thin, temporary membrane, locking moisture in. A single application with a garden sprayer is usually all that's needed.
Timing is everything. As soon as the concrete is hard enough that you can walk on it without leaving an imprint, it’s time to start the curing process. Don't delay.
Sealing: The Armor for Your Concrete
Once the slab has cured and gained most of its strength—which takes about 28 days—it's time for the final touch: sealing. A good sealer acts like a clear coat for your concrete, providing a crucial barrier against pretty much everything you don't want soaking in: water, oil, road salts, and dirt.
This step is a smart investment. It keeps your new concrete looking fresh and makes cleaning a breeze. On a driveway, it means an oil drip wipes up instead of leaving a permanent stain.
Sealing isn’t a one-and-done deal. To keep that protection strong, plan on reapplying your sealer every two to five years. The exact timing depends on the product you use and how much foot or vehicle traffic the area gets. For instance, a driveway in a snowy climate that sees road salt will need sealing more frequently than a patio in a mild climate.
Picking the Right Concrete Sealer
You’ll see a lot of options at the store, but they generally fall into three categories. The best one for you comes down to where the concrete is and the look you’re going for.
| Sealer Type | Best For | Appearance |
|---|---|---|
| Acrylic Sealers | Exterior concrete like driveways and patios. | Forms a thin, protective film on the surface. You can get them in matte, satin, or high-gloss finishes. |
| Penetrating Sealers | Anywhere you want a natural, unchanged look. Excellent for freeze-thaw protection. | Soaks into the concrete instead of forming a film. Provides an invisible, matte finish. |
| Epoxy/Urethane Systems | Interior floors, especially garages and basements. | Creates a very thick, durable, and glossy coating that stands up to heavy abuse and chemicals. |
For a typical Atlanta driveway, an acrylic sealer hits the sweet spot between protection, looks, and cost. If you’re dreaming of a showroom-quality garage floor, though, a high-performance epoxy system is the only way to go. This final step is your insurance policy, protecting all your hard work for years to come.
Common Finishing Mistakes and How to Avoid Them
Ask any seasoned pro, and they'll have a story about a concrete finish that went sideways. The difference is, they’ve learned from those mistakes. Knowing what can go wrong is your best defense against having to live with a flawed surface or, even worse, paying for a costly fix.
Nine times out of ten, these problems boil down to timing and technique. The concrete itself gives you all the signals you need; the real skill is learning to read them. Getting this right is what separates a pretty finish from one that truly lasts.
Finishing Too Early or Too Late
I can't stress this enough: timing is everything in concrete work. Jumping the gun or waiting too long can completely derail all your hard work.
-
Finishing Too Early: The cardinal sin of finishing concrete is working over bleed water. When you trowel that surface moisture back into the slab, you're creating a weak, watery layer right at the top. This is a direct cause of dusting (that chalky residue), scaling (flaking), and blisters, where trapped air and water bubbles up under the surface. A classic example is a garage floor that starts to flake and peel under the tires after one winter—this is often caused by finishing too early.
-
Finishing Too Late: On the other hand, if you hesitate for too long, the concrete will get away from you. It becomes too stiff to work properly. You'll fight to close up the surface, leaving it rough and porous. At that point, no amount of elbow grease will get you the smooth, dense finish you were aiming for. You'll see visible trowel marks that you can't erase no matter how hard you press.
The fix here is simple, but not always easy: patience. Wait until every last bit of that bleed water has evaporated. A good rule of thumb is when the slab can support your weight leaving only about a 1/4-inch deep boot print.
Over-Troweling the Surface
It's so tempting to keep passing that trowel over the slab, chasing that perfect, glass-like sheen. But in this case, more is definitely not better. Over-working the concrete, especially with a power trowel, can cause a serious issue called delamination.
This happens when the surface gets sealed up too tight, too early, trapping air and bleed water just underneath. You end up with a thin, brittle top layer that isn't bonded to the rest of the slab. Sooner or later, that layer will chip, flake, or pop off. You can often detect it by tapping the surface with a hammer; a delaminated area will sound hollow compared to solid concrete.
A great tip I learned years ago is to listen to your trowel. On your final passes, the steel should make a distinct ringing sound as it glides over the hardening concrete. If it sounds wet or feels like you're just pushing paste around, back off and give the slab more time.
For minor imperfections that show up later, like small trowel marks or a bit of uneven texture, you can often smooth them out with a rubbing stone. But for bigger problems like deep spalling or widespread scaling, it's best to call in an expert. Looking into professional residential concrete and masonry repair can give you a lasting solution that restores the look and strength of your slab, stopping a small issue from becoming a major headache.
Got Questions? Here Are Some Quick Answers
Even the best guides can't cover every single question that pops up on a job site. Let's tackle some of the most common things people ask when they're trying to get that perfect smooth concrete finish.
How Long Should I Wait Before Troweling?
This is the big one, and the answer is: it depends. The golden rule is to wait until all the bleed water—that shiny layer of water on the surface—is completely gone.
The concrete needs to be firm enough that when you step on it, you only leave a shallow boot print, maybe 1/4 inch deep.
Here in Atlanta, that timing can swing wildly. On a hot, sunny afternoon, you might be ready to go in just an hour. But on a damp, overcast day, you could be waiting for several hours. Don't rush it. Jumping the gun and troweling too soon is one of the worst mistakes you can make; it traps water and leads to a weak surface that will flake and dust down the road.
Can I Just Smooth Out My Old, Rough Driveway?
Unfortunately, no. Once concrete is fully cured, you can't just go back and re-trowel it to make it smooth. The window for that has closed.
What you can do is resurface it. This means applying a special concrete resurfacer or microtopping over the old slab to give it a fresh, smooth face. It's a job in itself:
- First, you have to meticulously clean and prep the old concrete. This often involves pressure washing and acid etching.
- Then, you apply a thin layer of a polymer-modified cement.
- Finally, you trowel that new layer smooth as it sets.
If your driveway has major problems like deep cracks or is crumbling (spalling), putting a thin layer over it is just a temporary fix. In those cases, a full replacement is usually the better investment. For example, resurfacing a driveway with structural cracks will only result in those same cracks reappearing through the new layer within a few months.
The key takeaway is that true finishing happens when the concrete is in its plastic state. Once it's hard, your options shift from finishing to resurfacing or replacement.
What’s the Difference Between a Float and a Trowel Finish?
They might sound similar, but they serve two very different purposes.
A float finish is what you do first. Using a magnesium or wood float, you smooth out the surface and push the larger stones (the aggregate) down below the surface. This leaves a slightly sandy, textured finish with great grip, which is perfect for outdoor walkways. It has a matte, non-reflective appearance.
A trowel finish comes after floating. You switch to a steel trowel and make multiple passes over the slab. Each pass makes the surface harder, denser, and smoother. This is the glass-like finish you want for interior floors like basements or garages, especially if they’ll be sealed or polished later. It creates a much slicker, shinier surface.
When you need a flawless finish without the guesswork, trust the experts. For any project, from a new driveway to a custom patio, the team at Atlanta Concrete Solutions has the experience to deliver durable, beautiful results. Contact us for a free quote today at https://atlantaconcretesolutions.com.