
Tired of that plain, boring gray slab? You might be surprised to learn that your concrete patio or driveway has a ton of hidden potential. With the right stain and a little elbow grease, you can give it a rich, custom finish that completely transforms your home's curb appeal, and you don’t have to spend a fortune to do it. This guide will walk you through everything you need to know to get a professional-looking result, whether you’re aiming for the unique, marbled effect of an acid stain like a "Cola" or "Walnut" brown, or the consistent color of a water-based one like a solid "Terra Cotta" or "Slate Gray".
Give Your Concrete a High-End Custom Look
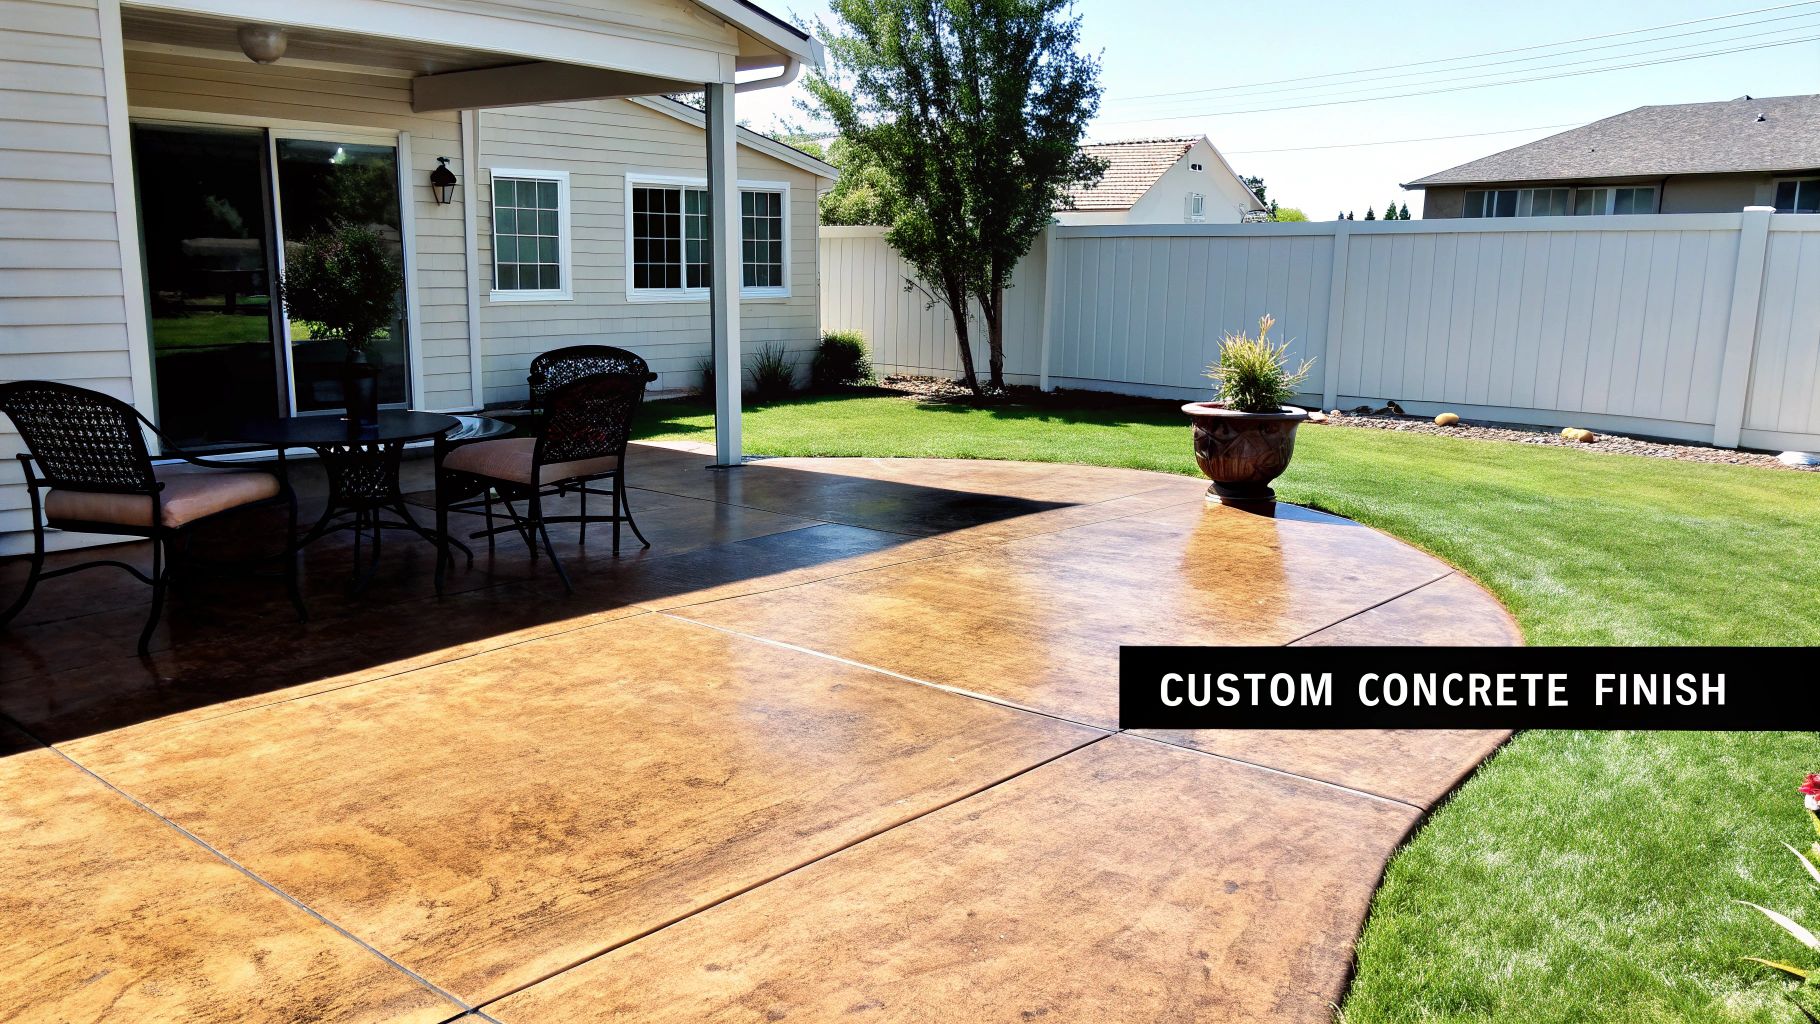
Turning a dull concrete slab into something beautiful is one of the most rewarding DIY projects out there. This isn't just a coat of paint. Concrete stain actually soaks into the pores of the concrete, creating a deep, translucent color that won’t chip or peel off like a surface coating. It lets the natural character and small imperfections of the concrete show through, giving you a one-of-a-kind finish that looks far more expensive than it is. For example, a simple gray slab can be transformed to mimic the rich, variegated look of weathered flagstone or the warm tones of Italian travertine.
And this isn't a project just for the pros anymore. Thanks to more user-friendly products hitting the shelves, homeowners are getting amazing results on their own. The entire decorative concrete market, which was valued at around USD 19.84 billion in 2025, is only getting bigger, which tells you just how popular these finishes are becoming. You can dig into the numbers yourself over at DataHorizzon Research.
Why Staining Beats Other Options
Think about it—epoxy can look a bit plasticky, and paint inevitably flakes and peels, especially outdoors. For instance, a painted walkway might look great for one season, but after a year of sun and rain, you'll likely see chipping where foot traffic is heaviest. Stain, on the other hand, becomes a permanent part of the concrete itself. That built-in durability makes it the perfect solution for areas that see a lot of foot (or tire) traffic.
- Patios: Instantly create a warm, inviting outdoor room with rich, earthy tones like a deep mahogany or a soft amber.
- Walkways: Add some serious curb appeal with a color that pulls your whole exterior together, such as a subtle gray-green that complements your landscaping.
- Driveways: Make a great first impression that stands up to tire marks and daily wear with a durable, mottled brown or charcoal finish.
The key takeaway is that stained concrete offers an unbeatable combination of beauty, durability, and value. You gain a finish that mimics the look of natural stone for a fraction of the cost.
Whether you're trying to breathe new life into an old, weathered patio or putting the finishing touch on a brand-new installation, this guide has you covered. We’ll go over everything from the crucial prep work to applying that final protective seal. If you're working with a new slab, you can get more specific tips from our guide on residential driveway concrete. The payoff is a stunning, long-lasting surface that adds both character and real value to your home.
Mastering Surface Prep for a Flawless Finish
Let me tell you, the real secret to a professional-looking DIY concrete stain job has almost nothing to do with the stain itself. It’s all about the prep work. This is the make-or-break foundation for the entire project, and it’s non-negotiable. I've seen it time and time again: rushing this stage is the number one reason DIY jobs end up looking blotchy, uneven, or just plain fail after a few months. For example, a homeowner who skips degreasing a driveway will find perfect-looking stain everywhere except for the faint outlines of where their car's oil dripped, which will remain gray and bare.
Think of your concrete slab like a painter's canvas. You'd never start a masterpiece on a dirty, greasy, or sealed surface, right? The same logic applies here. The stain has to get into the concrete's pores to work its magic, and anything from a forgotten oil spill to old paint or an invisible sealer will block it completely.
Cleaning and Degreasing Your Concrete
First things first, you've got to give the surface a deep, thorough cleaning. For most outdoor patios and walkways, a pressure washer is going to be your best friend, blasting away years of built-up dirt, grime, and even algae. But if you’re working on a garage floor or a driveway, you’re almost guaranteed to run into stubborn oil and grease spots.
These spots need to be handled before you do anything else, because they will absolutely repel the stain.
- Hit Oil Stains First: Grab a good concrete degreaser (like Pour-N-Restore or similar products) or mix up a paste using trisodium phosphate (TSP) and water. Really scrub it into the stain with a stiff, nylon-bristle brush, let it work its magic for about 20-30 minutes, and then rinse it away completely. For a very stubborn stain, you may need to repeat the process.
- Get Rid of Old Paint or Coatings: If there's any flaking paint or a failing sealer, it all has to go. Depending on how stubborn it is, you might need a chemical paint stripper designed for masonry or even a floor grinder rented from a local home improvement store.
Proper cleaning is what ensures the stain can soak in evenly everywhere. If you find deep cracks or significant spalling (chipping) while you're cleaning, now is the time to deal with them. You can find good advice on tackling these kinds of problems by looking into residential concrete and masonry repair.
The Critical Water Drop Test
So, how can you tell if there’s an old sealer on the concrete? It’s often totally invisible, but it will ruin your staining project before you even start. The fix is a dead-simple trick I call the "water drop test."
Just sprinkle a few drops of water onto the clean, dry concrete in several different spots. If the water beads up like on a freshly waxed car, you've got a sealer. It has to be stripped off with a chemical remover. But if the water soaks in right away and darkens the spot, you're in the clear—the pores are open and ready for stain.
This simple test takes less than a minute but can save you from a complete project disaster. A surface that's ready to go will absorb water within 30-60 seconds.
When and Why to Etch Concrete
Etching is just a fancy term for using a mild acid solution to rough up the surface of the concrete on a microscopic level. It creates a texture like fine-grit sandpaper, helping the stain get a better grip. This step is especially important for super-smooth, dense concrete, like a freshly poured garage floor that has been power-troweled, which can be stubborn about absorbing stain.
Thankfully, most modern kits include safer acid-replacement cleaners that clean and etch at the same time. Whatever product you use, follow the dilution and safety instructions to the letter. A typical process involves mixing the etcher with water in a plastic watering can, sprinkling it evenly over the concrete, scrubbing with a stiff brush for 5-10 minutes until the fizzing stops, and then thoroughly rinsing it away. Of course, the quality of the concrete you start with makes a huge difference. For a solid base, it's always helpful to start with good material, and you can learn more by understanding rural concrete essentials, which covers the fundamentals.
Time to Apply the Stain: The Fun Part
Okay, your concrete is clean, prepped, and ready to go. This is where the magic happens, but it's also where a little patience goes a long way. If you rush the application, you’ll end up with roller marks, uneven patches, and a look you didn't sign up for. All that prep work deserves a great finish.
Before you go all in, please do a test patch. I can't stress this enough. Find a spot that won't be seen—maybe behind where the grill will sit or in a closet corner—and apply a small amount of your stain. Let it dry completely, and even apply sealer over it. This is your only chance to confirm the color is what you want and to see how your specific slab of concrete drinks it up. A color chip that looks like a warm tan might turn out more orange on your concrete.
The image below breaks down the core prep process. Think of it as the foundation for a flawless stain job.
Seriously, don't skip any of those steps. Cleaning, testing, and etching are what allow the stain to penetrate properly and give you that deep, lasting color you're after.
Picking the Right Tool for the Job
How you get the stain onto the concrete completely changes the final look. There’s no single best way; it all comes down to the aesthetic you’re chasing.
- Pump Sprayer for an Even Coat: If you want a consistent, uniform color, a simple plastic garden pump sprayer is your best friend. Just be sure it’s plastic—never use a metal one with acid stain! Apply the stain in a gentle, circular or figure-eight motion for a light, even layer. For example, hold the nozzle about 18 inches from the surface and keep moving to avoid puddles.
- Sea Sponge for an Artistic Touch: To get a more marbled, natural stone effect, grab a sea sponge. You can dab on accent colors—like a darker brown over a lighter tan base—to create depth and character, which is a great way to break up a single, solid color.
- Brushes and Rags for the Details: A good 3-inch synthetic bristle brush is essential for cutting in along walls and edges neatly. Rags are also surprisingly useful for blending colors or even wiping some stain away to create subtle highlights before it fully dries.
It's no surprise that water-based stains are a huge hit with DIYers. They're just easier and safer to work with, thanks to their low VOC content. This user-friendly aspect is a big reason why the decorative concrete market is booming—it's expected to jump from USD 19.5 billion in 2024 to USD 31.6 billion by 2033. If you're curious, you can read more about these market trends and see where things are headed.
Pro Tips for a Flawless Finish
Applying stain to a big patio or garage floor can feel intimidating. The key is to have a game plan so you don't end up with marks that scream "amateur."
If there’s one rule to remember, it's this: always maintain a "wet edge." This just means you need to apply new stain right next to the section you just put down before it starts to dry. This is how you blend the areas together without creating lines.
The easiest way to do this is to break up the job into smaller, more manageable chunks. Mentally map out a 4×4 foot square, for instance. Focus on completing that section before you even think about moving to the next one. Always start at the far end of the room or patio and work your way toward your exit. You don't want to stain yourself into a corner and have to walk all over your beautiful, wet finish. For a large driveway, it’s often helpful to work with a partner: one person sprays while the other follows immediately behind with a roller or brush to back-roll the stain, ensuring it penetrates evenly.
Time to Neutralize and Seal Your New Concrete Floor
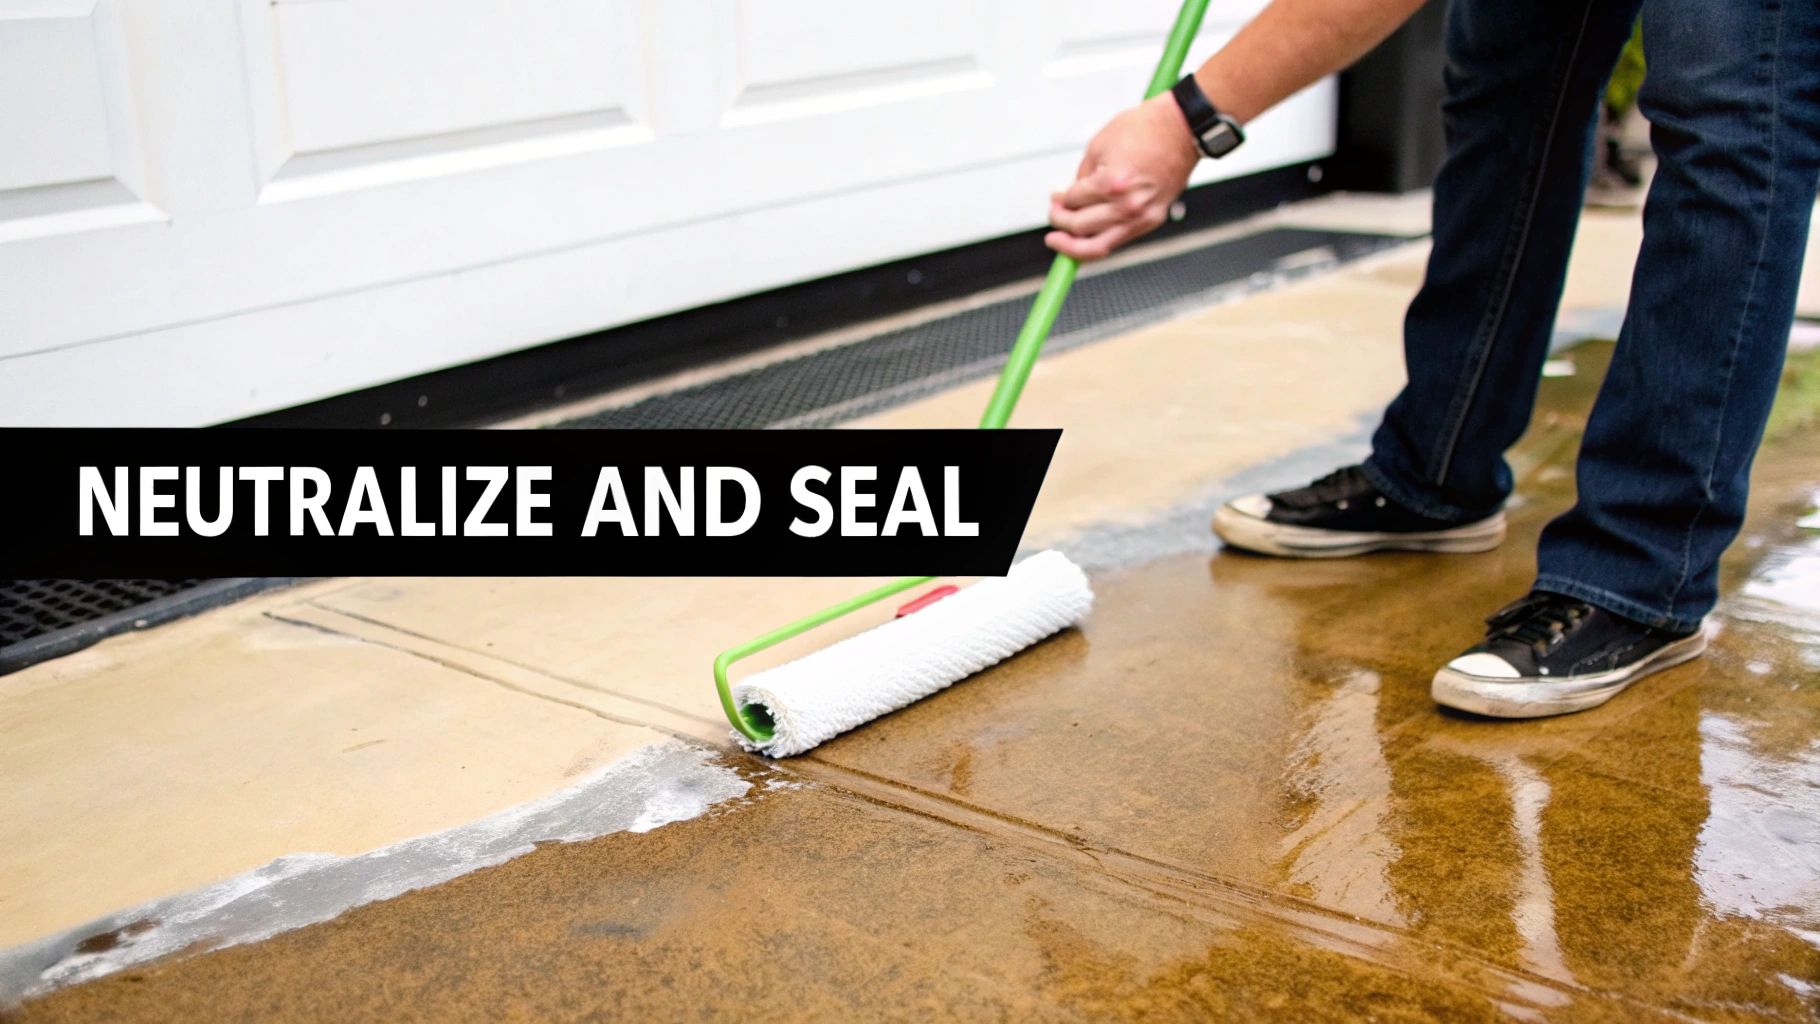
You’ve made it through the staining, and your concrete is finally showing its new personality. But don't break out the patio furniture just yet. This next stage—sealing—is what separates a decent DIY job from a professional-looking one that truly lasts. Sealing is the crucial final step that protects the stain from the elements and foot traffic while dramatically deepening the color for that rich, finished look.
First Things First: Neutralize That Acid
If you went with an acid-based stain, you absolutely cannot skip this next step. The acid is still actively reacting with the concrete, and you need to stop it in its tracks to lock in the color you've worked so hard to achieve. Fail to neutralize, and you’ll end up with a chalky, faded residue on the surface that looks nothing like you envisioned.
Thankfully, it's a simple fix. All you need is a basic solution to counteract the acid.
- Baking Soda Mix: A classic for a reason. Just dissolve one cup of baking soda into a gallon of warm water.
- Ammonia Mix: Another solid option is adding a half-cup of household ammonia to a gallon of water.
Grab a mop or a sprayer and apply your chosen solution generously across the entire stained area. You might notice a little foaming, which is a great sign—it means the neutralization is working. Let it sit for about 10-15 minutes, give it a light scrub with a nylon brush, and then rinse it thoroughly with clean water. I mean really rinse it. Use a wet/dry vac or a squeegee to remove all the rinse water and residue. Repeat the rinse two or three times to make sure you get all the residue off, then let the slab dry completely. This isn't a quick process; plan on waiting 24-48 hours for it to be bone-dry.
Choosing the Right Sealer for the Job
Once the surface is neutralized and totally dry, you’re ready to seal. Think of the sealer as the armor for your project. The right choice depends entirely on where your concrete is and what kind of abuse it's going to take.
- Acrylic Sealers: This is the workhorse for most outdoor DIY projects. Acrylics are affordable, easy to work with, and—most importantly for us here in Atlanta—offer good UV protection. A solvent-based acrylic will give you a "wet look" that really makes colors pop, while a water-based version provides a more natural, satin finish.
- Epoxy Sealers: If you're working indoors on a garage or basement floor, epoxy is your friend. It creates an incredibly thick, hard-wearing film that laughs at hot tires, chemical spills, and general abrasion. Just keep it inside; most epoxies will turn yellow in direct sunlight.
- Urethane Sealers: Think of urethane as the premium clear coat. It's often layered over an epoxy base for the ultimate shield against scratches and sun damage. It’s a pricier option, but for a high-traffic interior floor like a workshop, the high-gloss, long-lasting finish is worth it.
For a typical Atlanta patio or walkway, a good solvent-based acrylic sealer is almost always the best bet. It does a fantastic job of making the color pop while protecting it from our intense summer sun and humidity.
Application Tips for a Flawless Finish
Applying sealer isn’t complicated, but a little care goes a long way. Use a short-nap roller (a 3/8-inch nap is ideal) and focus on applying thin, even coats. Trust me on this: two thin coats are infinitely better than one thick, gloppy one, which can trap moisture and turn cloudy. Follow the manufacturer’s instructions for dry time between coats, which is usually a few hours.
One last critical tip: if you're sealing any surface that might get wet—like a pool deck, entryway, or steep walkway—mix a non-slip additive into your final coat of sealer. This is a very fine powder, often made of polymer grit, that you stir directly into the sealer can. It’s a super-fine grit that you’ll barely see, but it provides essential traction underfoot and can prevent a nasty fall.
Properly sealing your work is what truly elevates a diy staining concrete project. While the steps are straightforward for most patios, achieving that perfectly smooth, incredibly durable finish seen in high-end residential polished concrete often requires professional-grade equipment and experience, especially for large interior spaces.
Troubleshooting Common Concrete Staining Problems
Even when you follow every step to the letter, a diy staining concrete project can sometimes throw you a curveball. Don't worry—it happens to the best of us. When things go wrong, it’s rarely a disaster. Most issues are fixable and usually trace back to either a slip-up in the prep work or a small hiccup during the application.
The most common headache I see is a blotchy, uneven finish. You know the look: some areas are deep and vibrant, while others look faded and washed out. Nine times out of ten, this points directly back to the cleaning and prep phase. If you didn't manage to get every last bit of oil residue, lingering old sealer, or even just some stubborn grime, that spot will resist the stain. For example, the shadowy imprint of a flower pot that sat on the patio for years might absorb stain differently because the concrete underneath was protected from weathering.
Another classic frustration is seeing the ghost of your roller or sprayer in the finished product. These distinct lines and marks pop up when you fail to maintain a "wet edge" while you're working. This means one section of stain starts to dry before you can blend the next pass into it. Working too fast, or worse, working under the hot Atlanta sun, will speed up that drying time and make these marks almost inevitable.
Fixing Uneven or Blotchy Color
If your color came out inconsistent, take a deep breath. You've got a few good ways to tackle it. The goal here is to work with what you have, not fight against it.
Often, the simplest fix is to just add another layer of color. Applying a second, very thin coat of the same stain can do a fantastic job of deepening those lighter spots and bringing the whole surface into harmony.
-
Go a Shade Darker: For really stubborn patches, layering a slightly darker, complementary color is a fantastic trick. Grab a sea sponge and dab the darker stain over the light areas. This creates a beautiful, marbled look that appears completely intentional. For instance, if you started with a light tan, dabbing on a medium brown can hide every imperfection and add incredible depth.
-
Dilute and Blend: What if the color is too intense? If you're using a water-based stain and haven't sealed it yet, you're in luck. Just mist the overly dark area with some water and give it a gentle scrub with a nylon brush. This can lift just enough pigment to tone it down. This is much harder with acid stains, as the color is a permanent chemical reaction.
Smoothing Out Application Marks
Visible lines from your sprayer or roller can really kill the vibe you were going for. Thankfully, if you catch them before you seal, getting rid of them is pretty straightforward.
For those hard lines left by a roller, a little light sanding can make a world of difference. I'd start with a fine-grit sandpaper—120-grit is usually perfect—attached to a pole sander. Gently scuff the surface to knock down the high spots and feather out the edges of the lines. Wipe up all the dust, then reapply a super-thin coat of stain, making sure to blend it into the surrounding area.
The best defense is a good offense, and in this case, that means camouflage. By using a sponge to introduce a second color or create a mottled effect, you break up the single-color field that makes those lines stand out. You’re not just fixing a mistake; you’re turning it into a custom design element.
Think of these little fixes as your project’s built-in insurance policy. A small problem doesn't mean you've failed. It's just a chance to get a bit more creative and still end up with a floor that looks amazing and is truly one-of-a-kind.
Common Questions About Staining Concrete Yourself
Embarking on a concrete staining project for the first time usually brings up a few questions. I've been there. Getting these answers sorted out before you even buy your first brush can save you a world of headache down the line. Let's walk through the most common things homeowners ask.
This is also the perfect point to start gathering your supplies. Having high-quality materials from the get-go is half the battle in any home project. It's always a good idea to find a trusted source for DIY supplies and expert advice so you can start with confidence, knowing you have the right stuff for the job.
How Much Does It Cost to Stain a Concrete Patio Myself?
The cost savings are probably what got you interested in doing this yourself, and for good reason. A typical DIY project to stain concrete usually lands somewhere between $0.75 and $2.00 per square foot. That range covers just about everything you’ll need: the stain, a good cleaner, a reliable sprayer, sealer, and all your safety gear.
To put that into perspective, staining a standard 200-square-foot patio would probably set you back between $150 and $400. When you compare that to hiring a pro, where costs often start at $4 to $6 per square foot and can climb past $15 for custom work, the savings are massive. For example, that same 200 sq. ft. patio could cost between $800 and $3,000+ if done professionally.
How Long Does Stained Concrete Last?
Here’s the good news: when you do it right, stained concrete can look great for decades. The color from the stain becomes a permanent part of the concrete itself. The real key to its longevity, however, isn't the stain—it's the sealer you put on top.
For outdoor concrete here in Atlanta, that means dealing with intense sun and seasonal rain. You should plan on cleaning and reapplying a fresh coat of sealer every 2 to 4 years. That simple step is the secret to protecting the color from wear and fading, keeping your patio or driveway looking sharp. A good indicator that it's time to reseal is when water no longer beads up on the surface.
The stain gives you the color, but the sealer gives you the lifespan. Think of it this way: regular re-sealing is the single most important maintenance task for keeping your stained concrete looking its best.
Can I Stain Old Concrete with Cracks?
Absolutely. You can definitely bring old concrete back to life with stain, but you have to be extra diligent with your prep work. That surface needs a deep, thorough cleaning to get rid of years of built-up dirt and oils.
It’s crucial to remember that stain is translucent, not opaque like paint. It won't hide cracks, deep gouges, or other imperfections. In some cases, it can actually make them stand out more. For instance, a hairline crack will often absorb more stain and appear as a dark, web-like line after application.
For a clean finish, you'll want to tackle any significant cracks first. Use a quality concrete patch product to fill them, and then grind the repaired spots so they’re smooth and flush with the surrounding surface. Do all of this before you start cleaning and staining.
When Is It Better to Hire a Professional?
DIY staining is a fantastic and rewarding project, but there are times when calling in a professional is the smarter, safer bet.
You should seriously consider hiring a pro for:
- Massive areas (anything over 1,000 square feet) where it’s nearly impossible for one person to keep a wet edge and avoid lap marks.
- Concrete with serious issues, like major cracking, spalling (flaking or chipping), or significant heaving. A pro can assess if the slab is even a good candidate for staining.
- Elaborate artistic finishes that require multiple colors, stencils, logos, or other detailed patterns, such as creating a faux tile or compass rose design.
Professionals bring heavy-duty equipment, like industrial grinders and auto scrubbers, and the kind of hands-on experience needed to deliver a perfect result on these more demanding jobs.
If your project feels a bit too big for a weekend warrior, or if you simply want the peace of mind that comes with a flawless, professional-grade finish, our team at Atlanta Concrete Solutions is ready to help. From complex decorative designs to large driveway makeovers, we have the expertise and tools to do it right. Contact us today for a free, no-obligation quote!