
You've cleaned the stamped driveway, the color looks richer, and the forecast finally shows a clear stretch. Then you notice the old coating still beads water in some spots, while other areas look dull. That's where sealing jobs go sideways: the surface may look ready, but its cure, moisture, temperature, and existing coating all affect whether new sealer will bond.
Knowing how to apply stamped concrete sealer means treating the work as a sequence of checks, not a quick spray-and-go chore. In Atlanta, humidity, summer heat, sudden rain, and textured stamp recesses can all complicate drying and application. Get the conditions right before opening the sealer, and you'll have a better chance of an even finish that protects the surface without leaving puddles, haze, or a slippery film.
Why Sealing Stamped Concrete Is Harder Than It Looks
Stamped concrete has more places for trouble to hide than a smooth, broom-finished driveway. The texture holds water after washing, and the joints and stamp recesses can collect sealer. A thick layer may look glossy at first, but trapped moisture or excess coating can leave the finish cloudy, uneven, or soft.
The sealer also has to work against water, sun, and abrasion. Rain and humidity challenge drying and adhesion. Sun and heat can affect how quickly a coating levels, while tires and foot traffic wear the surface over time. On stamped concrete, the decorative color is close to the surface, so a poorly bonded coating can spoil the appearance as well as the protection.
That's why the job starts before you pick up a sprayer. Concrete needs adequate curing, and the surface must be clean and dry. The American Concrete Institute's ACI 302.1-15 guidance recommends curing conventional concrete for 7 days when temperatures remain above 40°F (5°C), while high-early-strength concrete may require 3 days when temperatures are at least 73°F (23°C). Decorative-concrete practice also commonly uses 28 days as the benchmark for fully cured conventional concrete, but the sealer manufacturer's instructions may specify a different interval. ACI's decorative-concrete sealing guidance underscores why cure age and product instructions belong in the same decision.
Weather changes the working window
Atlanta conditions can extend drying times. A slab that appears dry after a shower may still hold moisture, and a humid evening can make it harder for a coating to cure cleanly. If you're deciding whether to clean during unsettled weather, Dublin homeowners' drizzle cleaning tips offer useful context on adjusting outdoor cleaning plans when rain threatens.
Practical rule: Don't seal because the calendar says it's time. Seal when the slab's cure age, surface dryness, temperature, and product requirements all line up.
Tools, Materials, and Safety Gear to Gather First
Have your equipment ready before opening the sealer. Stopping to find an applicator halfway through the driveway can leave a lap mark or a section that starts drying before you can blend it.

Gather the application equipment
- Low-pressure pump sprayer: Choose one compatible with your sealer chemistry. A garden sprayer isn't automatically suitable, especially for thicker or solvent-based products.
- Back-roll roller and extension pole: These help even out the spray and work sealer across textured profiles. Use a roller compatible with the product.
- Mixing paddle and clean bucket: Stir gently and evenly. Don't shake the container, since that can introduce bubbles.
- Masking supplies: Keep sealer off siding, door thresholds, landscaping, pool water, and adjacent surfaces with suitable drop cloths and masking materials.
- Cleaning supplies: Use a pH-neutral cleaner and a stiff nylon brush where needed. Have clean rinse water and absorbent cloths ready.
A moisture meter is useful for checking whether the slab meets the manufacturer's moisture limit. One sealer technical data sheet specifies surface-zone moisture no higher than 4% by weight. The product data sheet also gives an example of why you should check the specific product rather than assume every sealer has identical requirements.
Wear safety glasses and chemical-resistant gloves. For solvent-based products, use the respirator and ventilation specified on the label and safety data sheet. Don't apply a solvent product in an enclosed or poorly ventilated area without the required protection, and don't use equipment that the manufacturer says is incompatible.
Choosing the Right Sealer for Your Surface
Pick a sealer by matching its finish and chemistry to the location, traffic, and existing coating. A driveway exposed to vehicle tires and direct weather has different demands from a shaded patio or a pool deck where slip resistance matters. The product label and technical data sheet should decide whether a specific slab and coating are compatible.
Film-forming acrylics create a surface layer that can deepen stamped color and provide the familiar wet-look finish. They're often considered for decorative driveways, but a thick or poorly cured film can become cloudy, uneven, or slippery. Solvent-based acrylics may offer a richer-looking finish, but their odor and ventilation requirements make them a less convenient choice around occupied spaces or nearby air intakes.
Penetrating sealers soak into the concrete rather than forming a prominent surface film. They're a possible fit when a more natural appearance and breathability matter more than a glossy color boost. They won't necessarily deliver the dramatic wet-look effect homeowners expect from an acrylic coating.
Water-based products can be a practical option where lower odor is a priority, such as around a pool or near HVAC intakes. Don't assume water-based means suitable for every surface or weather condition. Check the temperature, moisture, and recoat limits printed for that product.
| Sealer Type | Finish | Best Use | Watch Out For |
|---|---|---|---|
| Film-forming acrylic | Often enhances color and sheen | Decorative driveways where a surface film is desired | Excess film, trapped moisture, and compatibility with old coatings |
| Penetrating sealer | More natural appearance | Surfaces where a less film-like finish is preferred | Won't provide the same glossy wet-look effect |
| Water-based sealer | Varies by product | Projects where lower odor is useful | Product-specific substrate-temperature and moisture limits |
For a stamped driveway, compare the finish you want with the amount of vehicle and foot traffic it gets. Pool decks need particular attention to traction, not just gloss. Atlanta Concrete Solutions' decorative concrete services show the range of stamped and decorative finishes homeowners may be considering, but the sealer still needs to suit the actual surface and existing coating.
Preparing the Surface and Confirming It Is Ready
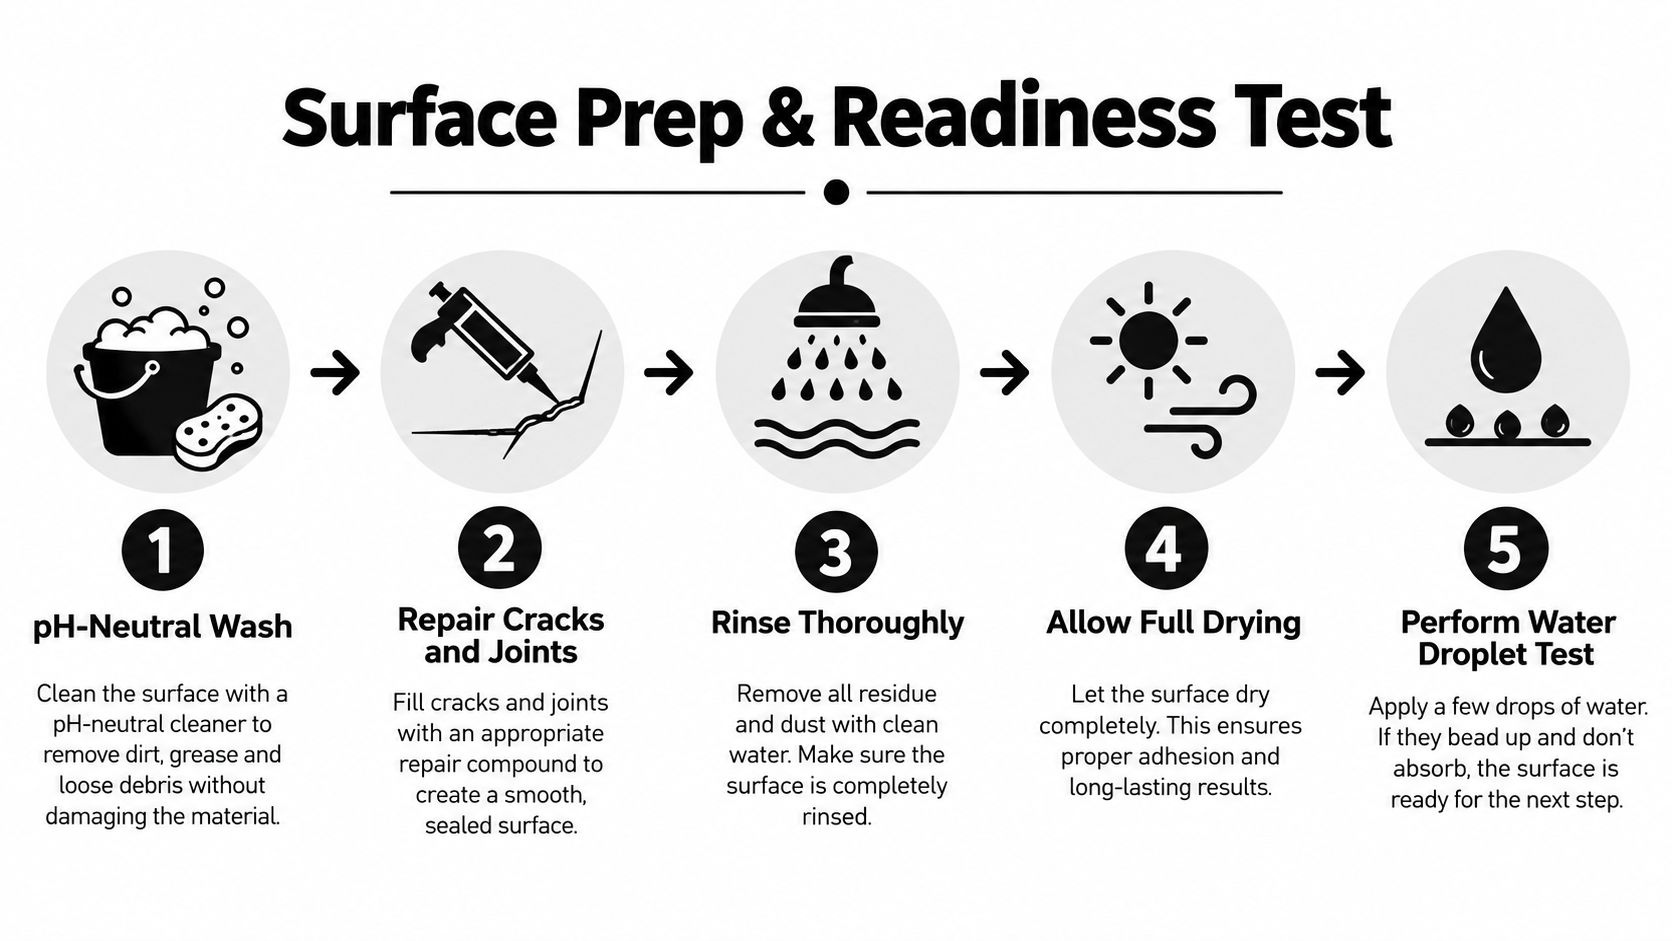
Scrub too late and you seal over grime; seal too early and you trap moisture under the film. Readiness is a coordination problem between cure age, surface moisture, the weather ahead, and whatever coating is already down. Wash the slab with a suitable pH-neutral cleaner, scrub away dirt and contaminants, and rinse thoroughly. While the surface is clean, check the joints and cracks, since a defect may need a compatible repair material and sealer will not fix the problem underneath.
After washing, allow approximately 12–24 hours of drying before sealing. Atlanta humidity stretches that window, so elapsed time alone is not proof. Confirm that no standing water remains and that slab moisture falls within the limit printed for the product. A damp-looking patch, recent rain, or water held in deep stamp texture is a reason to wait. Each manufacturer publishes its own substrate and moisture conditions; the Clear Guard H2O water-based sealer product data sheet shows the kind of limits worth checking before you commit.
Use a water-drop test on older concrete
A clean surface does not guarantee the slab is ready for another coat. An existing cure-and-seal product may still be present, and a new sealer can fail if its chemistry conflicts with what is down there. Try a dime-sized bead of water on the concrete: absorption within roughly 5–10 seconds points to an absorbent surface. If the bead sits on top or soaks in slowly, an existing coating may be blocking it.
Work this diagnostic path before recoating:
- Test absorption. Put a small bead of water on a clean area and watch what happens.
- Identify the prior product if possible. Old invoices, labels, or maintenance records tell you what chemistry is already down.
- If the water sits on top, treat the slab as coated. The existing film may need removal before recoating.
- Test a small, inconspicuous area. Check adhesion and appearance before treating the whole driveway.
- Strip when compatibility is uncertain. A new acrylic over an incompatible styrene-based cure-and-seal can peel.
For homeowners comparing cleaning and maintenance practices, this concrete floor care guide offers broader context, though the driveway's own coating history still decides the approach. If cracks or joint deterioration need attention before coating, review residential concrete and masonry repair options.
Applying the Sealer Step by Step
Work when the weather and slab conditions suit the product, not just when you have a free afternoon. For outdoor work, the slab temperature should generally be falling for 3–4 hours after application, which often makes late afternoon or evening a useful window in Atlanta. Avoid rain, dew, direct sun, and rising slab temperatures, and check the sealer's specified operating range before starting.
Spray evenly, then back-roll
Mask nearby surfaces and protect anything that could be damaged by overspray. Stir the sealer as directed. If you're using a sprayer, check that it's approved for the product, then test the spray pattern on cardboard or a scrap surface before aiming at the driveway.
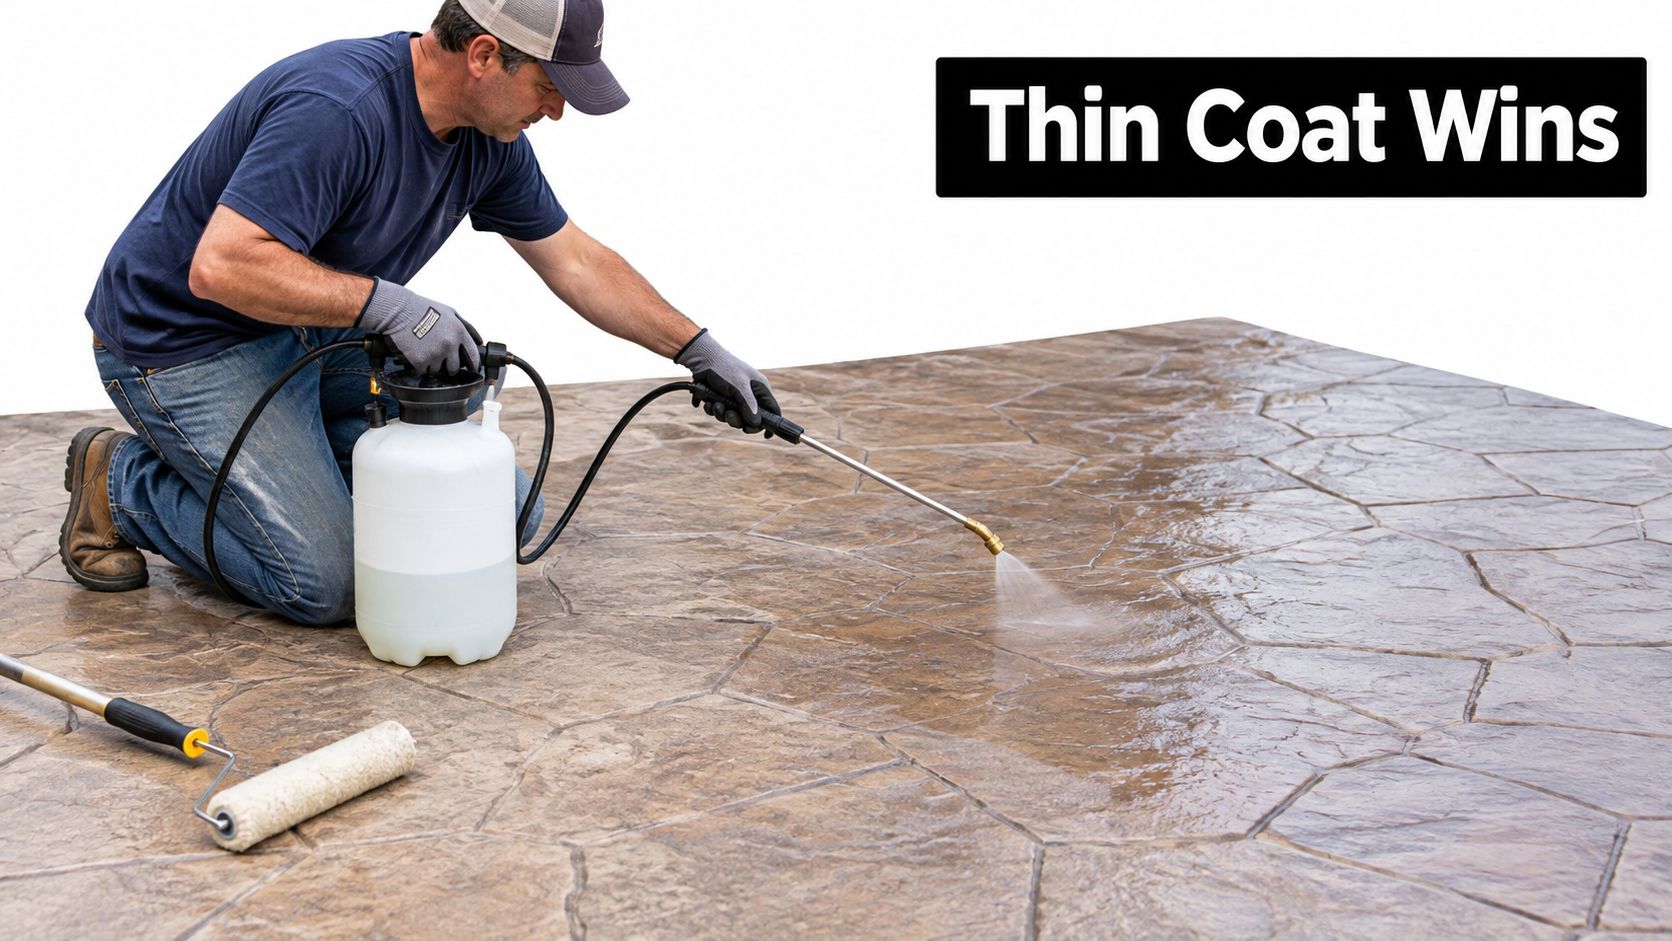
Hold the spray fan roughly 8–12 inches from the concrete where the product specifies that distance. Apply a light, even coat while moving steadily and maintaining a wet edge. Work in manageable sections so the new pass blends into the previous one before it begins to dry.
Back-roll immediately with a compatible roller. The sprayer distributes material efficiently; the roller helps spread it across the raised texture and into the stamp profile. Watch the low areas and grout-like joints closely. If sealer pools, move it while it's still workable. Don't leave puddles in recesses or saw cuts.
Stop when the coat is even. Having sealer left in the bucket doesn't mean the driveway needs more. A thick, glossy layer can dry unevenly and leave a soft film.
For a second coat, follow the product label's recoat window and apply it only when the first coat is ready. The right interval depends on the sealer, so don't borrow timing from a different product. This video demonstrates a stamped-concrete sealing approach; compare its technique with your own product's directions before starting.
Troubleshooting Cloudy, Sticky, or Slippery Results
A defect after sealing doesn't mean the driveway needs another coat. Spraying over a failed or uncured film locks the problem under fresh material. Work through the symptom first, match it to a likely cause, then decide whether to wait, fix a small area, or strip and start over.
| Symptom | Likely Cause | What to Check and Do |
|---|---|---|
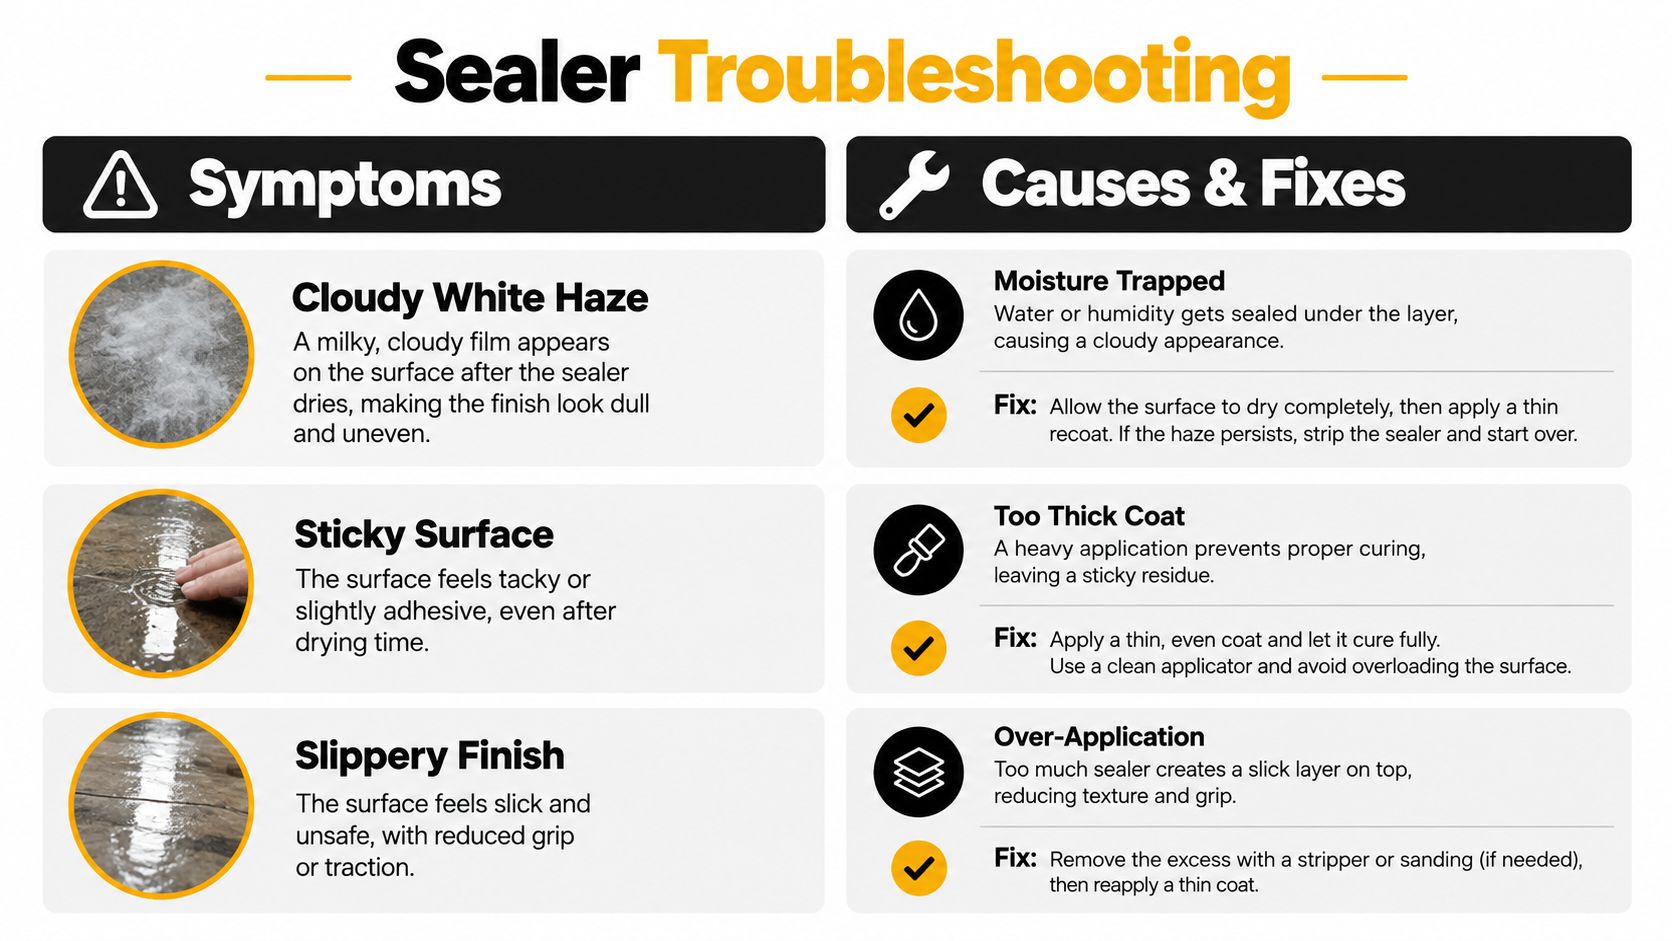
| Cloudy or white haze | Moisture trapped under the coating, surface contamination, or incompatibility | Check whether the slab was fully dry and whether an old sealer remains. Hold off on another coat until you know the cause. |
| Bubbles or blisters | Excess material, moisture, or slab temperature rising during cure | Inspect whether the coating pooled or was applied in direct sun. A heavy film may need professional assessment or removal. |
| Sticky or soft surface | Over-application or unsuitable curing conditions | Keep traffic off and allow more time if the product permits. If it remains tacky, ask the manufacturer or a concrete professional before recoating. |
| Tire pickup | Vehicle traffic before the film cured | Keep vehicles off and follow the product's longer traffic restriction if specified. |
| Slippery finish | Too much surface film or loss of the texture's natural grip | Don't add more sealer. Have the surface assessed for correction, especially on pool decks or walkways. |
Check the temperature and traffic limits printed on the technical data sheet for the sealer you are using. As a reference point, many products list an application range around 40–90°F (4–32°C), and some water-based sealers require the substrate to stay above 60°F (15°C) during application and early cure.
Miss that window and a slab that looked fine at noon can blush white by evening as moisture pushes up through the film. Contamination left on the surface produces the same milky result, so confirm the slab was clean and dry before blaming the new coat.
Older stamped driveways carry one more variable: whatever came before. A solvent-based layer under a new water-based product can cloud, wrinkle, or refuse to bond even when timing and weather were right. When the symptom doesn't match anything from this round, suspect the previous coating and test a small hidden area before stripping the whole slab.
If the surface stays tacky, peels, or looks cloudy past the stated cure period, don't try to hide the defect under a heavy recoat. The right correction usually means removing the failed film and preparing the slab again.
Maintenance, Recoat Timing, and When to Call a Pro
Check the driveway periodically for dull patches, peeling edges, tire marks, and water behavior that changes across the surface. Clean with a product compatible with the sealer, and address small areas before deterioration spreads. Recoat timing varies with the product, exposure, traffic, and coating condition, so use the manufacturer's guidance rather than a fixed calendar interval.
Keep people off until the surface is ready. One product data sheet allows roughly 24 hours before light traffic and 48 hours before heavy traffic, unless its label requires longer. Those are product-specific examples, so follow the instructions for your chosen sealer.
A homeowner can often handle routine cleaning and a small test patch. Call a professional when an older coating won't absorb water, the finish is peeling or persistently cloudy, or a large area needs stripping and recoating. Atlanta Concrete Solutions offers stamped-concrete installation and related services for homeowners weighing professional help with a decorative surface. See its residential stamped concrete services when the job calls for an assessment beyond routine maintenance.
If your stamped driveway is cloudy, peeling, or ready for a careful reseal, Atlanta Concrete Solutions can help assess the surface and discuss stamped-concrete options. Visit Atlanta Concrete Solutions to request a quote and talk through the right next step for your Atlanta home.