
A standard residential driveway may look substantial, but appearance doesn't tell you whether it can support a parked motorhome. The popular advice is to pour a little thicker concrete and add some wire mesh. That approach misses the failures that usually ruin an RV parking area, namely poor subgrade preparation, concentrated jack loads, and water moving beneath the slab.
A durable concrete pad for an RV starts below the concrete. The pad needs a load-appropriate thickness, a compacted crushed-rock base, correctly positioned reinforcement, and a drainage plan that keeps water from washing out the support. Those decisions matter more than a decorative finish or just adding more steel.
Why Standard Driveway Slabs Fail Under RVs
A parked RV doesn't load concrete in the same way as a passenger car. A car rolls across a driveway and distributes its weight through several tire contact points while moving from one position to another. An RV can sit in the same location for months, concentrating substantial force through narrow tire footprints and leveling jacks.
Technical guidance distinguishes ordinary exterior driveway slabs from RV pads because wheel and jack loads are more concentrated. A typical driveway slab may be around 4 inches, while RV pads are often specified at 6 to 8 inches, with reinforcement selected for the expected load, as described in this technical RV pad calculator guide.
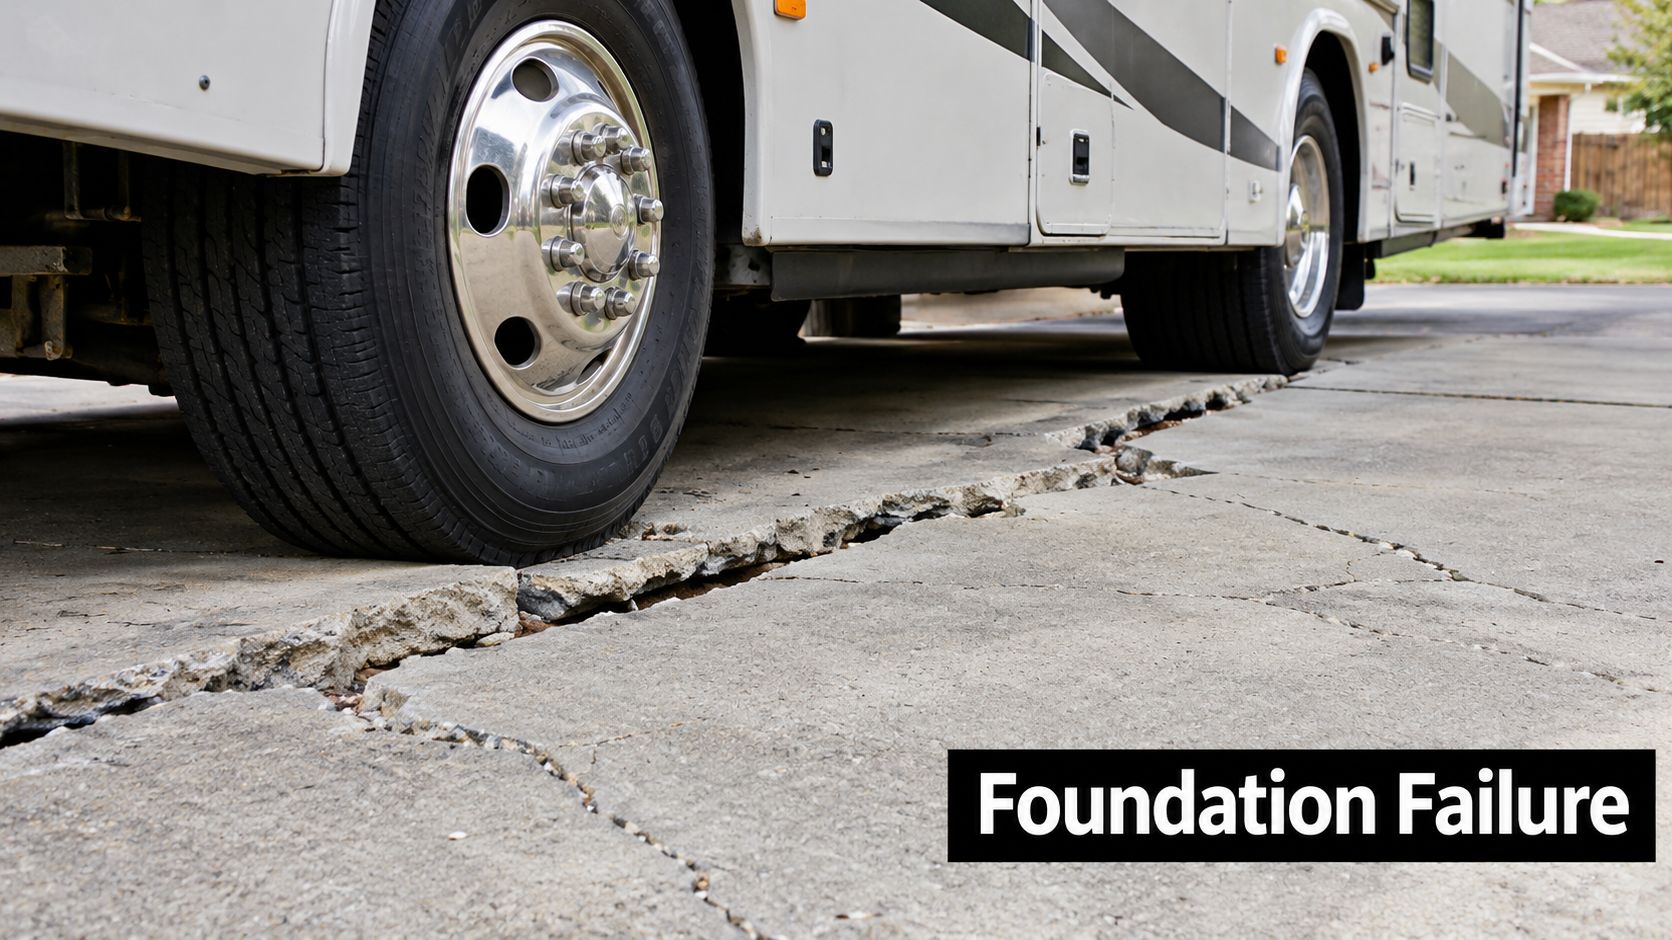
Static storage creates a different problem
The issue isn't only the total weight. A 30,000-pound motorhome can transfer force through a limited number of tires and leveling points, while the jacks can apply high localized pressure to small areas. The same slab might survive occasional vehicle traffic but crack or settle when that load remains in one place.
Small weaknesses become more serious when water enters the system. If the soil below the slab wasn't compacted properly, rainfall can soften it or carry fine particles away. The concrete may remain intact for a while, but unsupported sections eventually flex under the RV and develop cracks, rocking areas, or elevation changes.
Practical rule: Reinforcement can hold a crack together, but it can't replace missing support beneath the slab.
A standard carport or patio design also may not account for how the owner will use the pad. Leveling jacks may land outside the tire paths. Slide-outs require working space. A narrow slab can technically fit the vehicle while leaving no safe room to walk around it, wash it, or service equipment.
What actually needs to change
An RV pad should be treated as a small heavy-load pavement project, not as an oversized patio. That means the contractor needs to evaluate the soil, the anticipated RV class, the drainage path, and the pad's connection to existing concrete.
If the proposed pad connects to a residential driveway, the transition deserves particular attention. An abrupt height difference can collect water and create a trip point, while a weak joint can become the first place where the old driveway and new pad move differently. A contractor evaluating residential driveway concrete work should assess that connection as part of the complete layout rather than treating it as an afterthought.
Sizing and Thickness Rules by RV Class
Thickness should follow the loaded RV, not a generic driveway rule. A lightweight travel trailer and a diesel pusher place very different loads on the slab, and the pad must support leveling jacks, slide-out areas, and the full parking layout.
A standard residential RV pad is commonly designed at 5 to 6 inches thick. 6 inches is a practical minimum for many residential installations. Smaller travel trailers are often suited to 5 inches, large fifth wheels and Class C motorhomes commonly use 6 inches, and heavier Class A motorhomes may require 8 inches of reinforced concrete. Class A motorhomes can weigh about 30,000 to 45,000 pounds, according to this RV pad thickness guidance.
A practical comparison
Use the table as a starting point for a contractor discussion. The listed weight ranges are not substitutes for weighing the loaded rig. Cargo, fuel, water, and equipment can change axle loads substantially, so confirm the loaded axle weight before finalizing the design.
| RV Class / Type | Typical Weight | Min. Thickness | Concrete PSI |
|---|---|---|---|
| Small travel trailer | Typically 3,500 to 7,000 pounds GVWR | 5 inches | 4,000 PSI |
| Large fifth wheel | Varies by loaded configuration. Verify loaded axle weight | 6 inches | 4,000 PSI |
| Class C motorhome | Varies by loaded configuration. Verify loaded axle weight | 6 inches | 4,000 PSI |
| Class A motorhome | About 30,000 to 45,000 pounds | 8 inches may be required | 4,000 PSI |
The practical build standard behind the table is 4,000 PSI concrete. Mix strength alone does not determine performance. Reinforcement, slab thickness, joint layout, base support, and drainage must match the actual rig and site. The recommended mix strength and load-specific design approach are discussed in this RV concrete pad construction guide.
Size for operation, not just parking
Measure the RV at its greatest usable length and width, including mirrors, slide-outs, rear accessories, and the approach to the pad. Mark every leveling-jack location before excavation. A slab that fits the tires but leaves a jack on soil or weak concrete is underdesigned, regardless of its thickness.
Leave room to open storage compartments, connect utilities, inspect tires, and wash the vehicle. A house, fence, retaining wall, or carport can restrict that working space. Those boundaries often determine the practical pad width more than the RV body dimensions do.
Drainage also affects sizing. Extending the slab slightly beyond tire and jack positions can keep concentrated loads away from vulnerable edges, but extra concrete does not solve water flowing beneath the pad. The finished layout should direct runoff away from the slab and prevent roof or driveway discharge from concentrating along one edge.
Avoid automatic overbuilding
More concrete is not automatically better. A thick slab over unstable soil can still settle, while a lightweight trailer does not need the same design as a heavy Class A motorhome. Match thickness and reinforcement to the load, then allocate the remaining budget to excavation, a compacted base, edge support, and water control.
Identify how the RV will sit most of the time. A seasonal parking pad may face different exposure than a full-time storage area, but both need support that will not wash out beneath the wheels. Stationary long-term loading makes weak spots, poor drainage, and uneven support harder to ignore.
Subgrade Preparation and Drainage Planning
Concrete doesn't correct unstable ground. It follows the movement of the material beneath it, so the most valuable work often happens before the first truck arrives.
A reliable preparation sequence begins with evaluating the existing soil and removing organic material, loose fill, soft spots, and debris from the pad footprint. The exposed subgrade should then be shaped so it can accept a well-graded crushed-rock base. That base needs to be placed and compacted thoroughly rather than dumped in one loose layer.
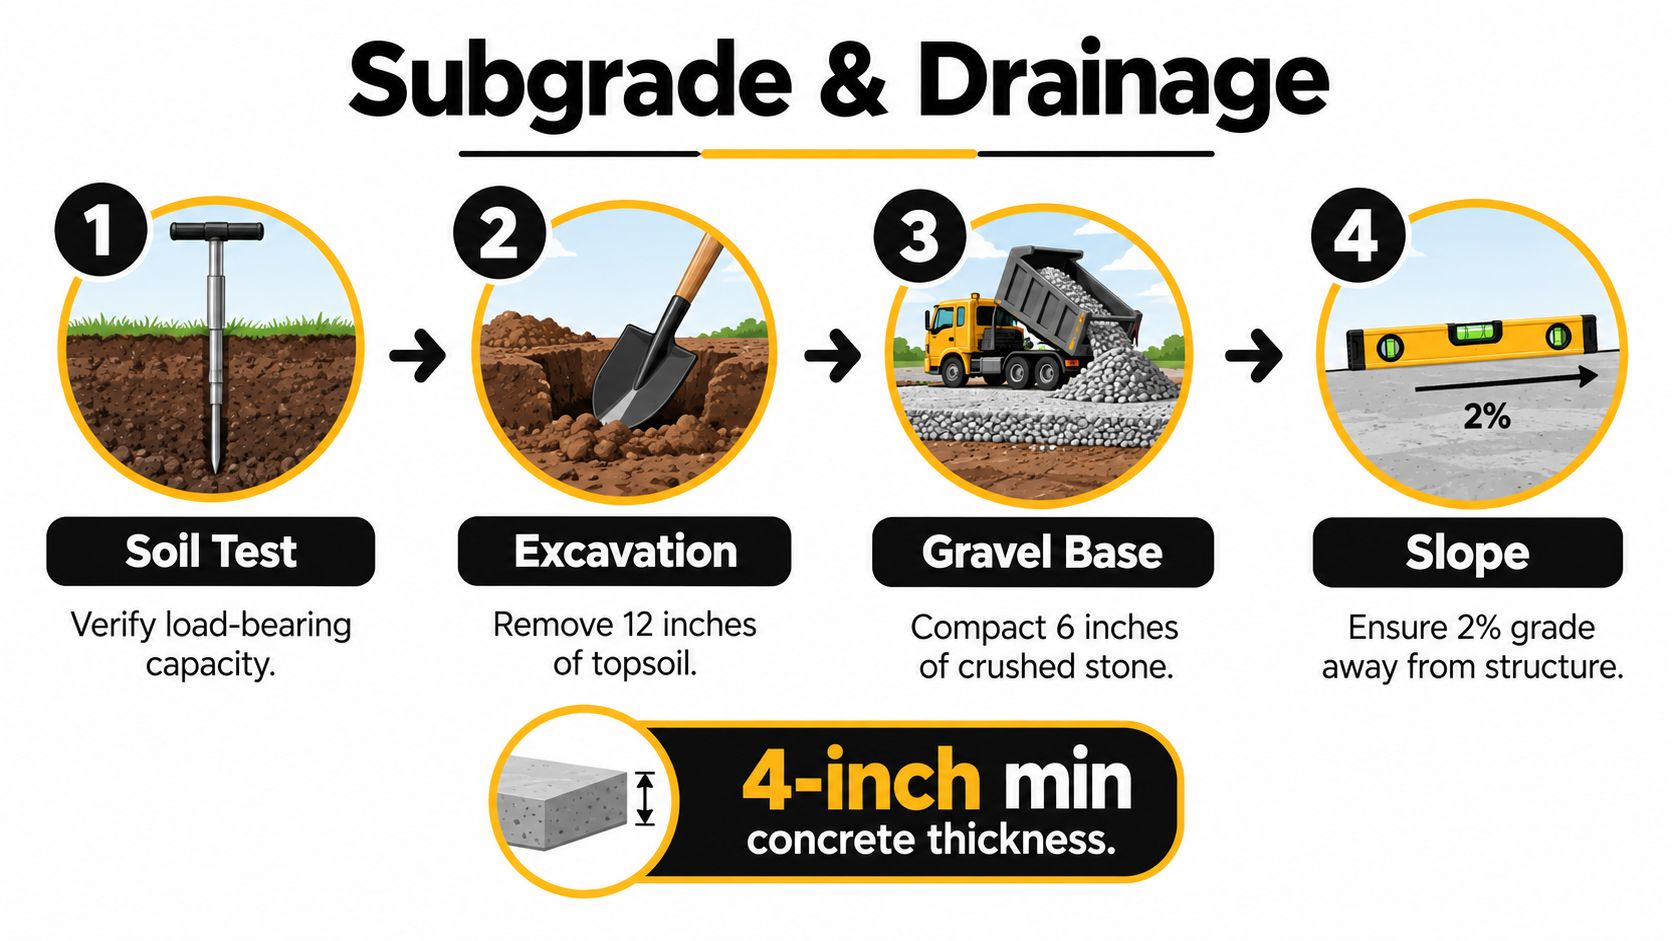
Build support from the bottom up
A competent installer should check the subgrade with physical observation and compaction equipment, not merely assume that firm-looking soil is adequate. Areas that pump, rut, or deform under equipment need correction before concrete placement.
The crushed-rock base must be evenly graded and compacted so it provides continuous support. A thin slab over a loose base may crack even when the concrete mix is strong. Rebar or wire mesh won't stop the slab from following a void or a settled section.
Independent guidance identifies a well-graded, compacted crushed-rock base and proper drainage as the main controls for settlement and moisture-driven movement. Reinforcement helps keep cracks tight, but it doesn't prevent cracking altogether, and it can't compensate for a thin slab or poor compaction, as explained in this RV pad base preparation guide.
Water is often the hidden cause of a failed pad. The visible crack is only the symptom.
Give water a deliberate route
A pad should not be perfectly flat if surrounding grades allow water to collect. Guidance for RV pads varies from 1/8 to 1/4 inch per foot of fall and from 1% to 2% slope, depending on the layout and drainage connection. The range and the available discharge options are discussed in this RV pad drainage planning resource.
The correct solution depends on the property:
- A yard swale can carry runoff away when there is enough open grade and the discharge point won't affect a neighboring property.
- A French drain can intercept water traveling toward the pad, especially on a sloped site.
- A sidewalk or driveway connection may provide a practical outlet, but the elevations must be coordinated before forms are built.
- A channel drain may be appropriate where the pad receives runoff from a structure or meets an existing hard surface.
Don't direct water toward the house, under a carport footing, or into an area where it will saturate the pad edge. In Atlanta-area projects, heavy rain can expose a weak drainage plan quickly. The finished concrete surface is only one part of the drainage system. The surrounding grade, edge treatment, and discharge route all need to work together.
Forming, Reinforcement, and the Pour
Once the base and drainage plan are in place, forming controls the pad's finished dimensions, elevation, slope, and edge profile. Forms must stay rigid during placement. If they shift, the slab can lose its designed thickness or create a low edge where runoff collects. Set forms straight enough to produce a clean transition against an existing driveway or slab.
With thickness already selected by RV class, this phase focuses on holding that thickness. Set rigid forms to the required grade, support #4 rebar in the middle third of the slab, and mark tighter reinforcement spacing where tires and leveling jacks deliver concentrated loads. The steel layout should follow the load pattern rather than treating every part of the pad as equally stressed.
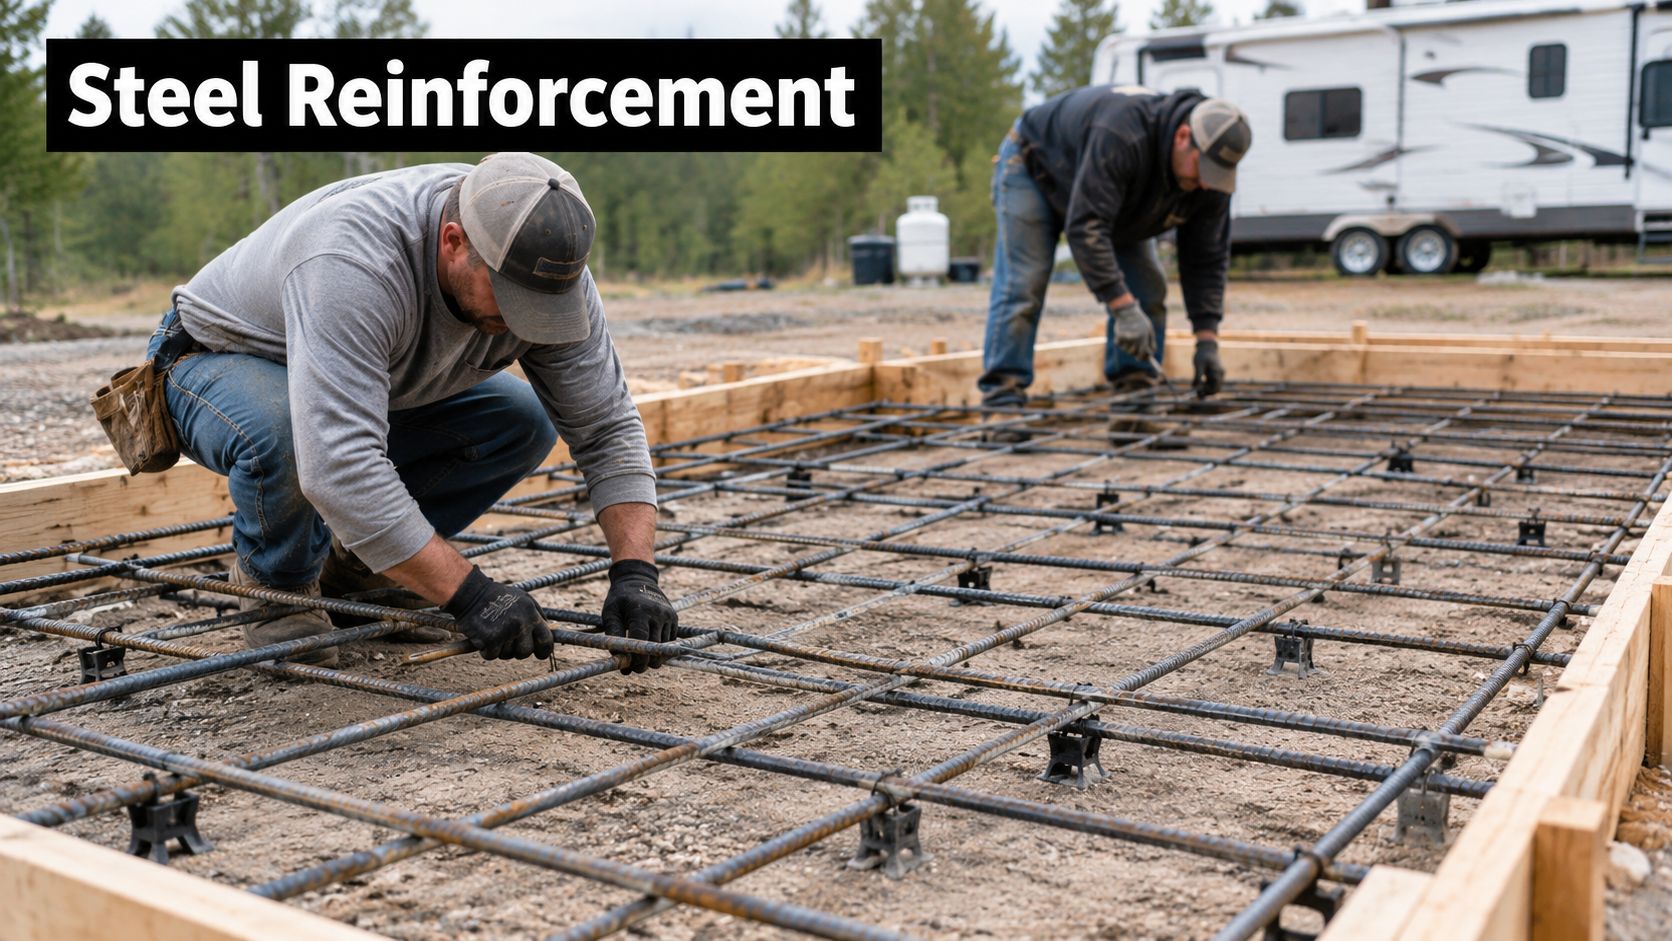
Place steel where the load arrives
Rebar has to remain at its specified elevation throughout the pour. Steel lying directly on the base will not control cracking in the intended part of the slab. Use chairs or other suitable supports, and check the grid before concrete arrives. Lifting steel during placement only works if the crew can return it to the designed position instead of leaving it wherever it settles.
Run the grid across the pad, then reinforce areas exposed to concentrated force according to the design. Primary tire tracks, leveling-jack points, and the transition beside an existing slab may need closer spacing or additional steel. These details matter because a heavy motorhome loads a few contact areas far more intensely than an empty driveway.
Wire mesh can suit lighter residential work, but unsupported mesh commonly ends up on the base. For a heavy RV pad, properly chaired #4 rebar provides a controlled layout and keeps the reinforcement where it can perform.
Place and finish the concrete consistently
Place the concrete in a continuous sequence so one area does not stiffen before the adjoining section is filled. Consolidate the mix around the reinforcement and forms, strike it to the required grade, and protect the planned slope. Do not add water at the site to make finishing easier. Extra water can reduce surface quality and leave the pad more vulnerable to scaling.
A broom finish gives tires and foot traffic practical traction without producing a slick surface. Finishers should avoid bringing excessive water and cement paste to the top, since a weak surface layer can scale under weather and use. Keep the drainage fall visible in the completed work. A smooth-looking pad that holds water at its edge is already showing a forming or finishing failure.
For broader guidance on supported slabs, placement, and finish selection, see this residential poured concrete installation. The same questions apply to an RV pad: how the concrete is supported, how loads reach it, and how exposure will affect the finished surface.
The following video demonstrates reinforcement and concrete placement concepts. Field conditions, structural requirements, and local practice still determine the correct RV pad specification.
Navigating Local Codes and Permit Requirements
A concrete pad can affect more than the surface beneath the RV. It may change how water moves across the lot, connect to a driveway or public approach, occupy required yard space, or conflict with an HOA's rules about vehicle storage and visible improvements.
That makes permitting and compliance part of the design, not paperwork to handle after the excavation begins. Before construction, confirm the requirements with the relevant Atlanta-area city or county department, especially if the pad will connect to an existing driveway, sit near a property line, alter grading, or support a covered RV structure.
Check the site before committing to a layout
The first review should cover:
- Zoning and setbacks: Confirm whether the proposed parking location and RV storage arrangement are allowed on the lot.
- Stormwater and grading: Ask whether the new impervious area or changed drainage path requires review.
- Driveway access: Verify requirements if the pad connects to a public street or changes the existing apron.
- HOA rules: Check architectural standards, screening requirements, and restrictions on RV visibility or long-term parking.
- Utilities and easements: Identify buried services, drainage easements, and other restrictions before excavation.
A permit review can catch a conflict before materials are ordered and forms are set. If the pad is poured in a prohibited location, the owner may face a removal order, redesign costs, or difficulty during a property sale. A written approval path is far less expensive than tearing out a finished slab.
Treat engineering as risk control
Not every residential RV pad needs a stamped structural plan, but heavy loads, poor soil, steep grades, retaining walls, and proximity to existing foundations justify professional evaluation. An engineer or experienced concrete contractor can identify when the standard residential approach isn't appropriate.
This same due diligence matters when a homeowner is considering Concrete Driveway Replacement Atlanta, a driveway apron, Driveway Widening Atlanta, or a Driveway Extension Atlanta. A new RV pad may be part of a larger site change, and the drainage and elevation details should be coordinated instead of designed as separate patches.
Curing, Sealing, and Long-Term Maintenance
A finished surface isn't ready for heavy use just because it looks hard. Concrete gains strength as cement hydrates, and early loading can damage the surface or create micro-fractures that remain hidden until the pad experiences repeated moisture and weight.
Follow the concrete supplier's curing requirements and protect the slab from premature traffic, rapid drying, standing water, and extreme weather exposure. The exact time before parking a loaded RV should come from the project specification and the concrete professional, not from a generic assumption based only on surface appearance.
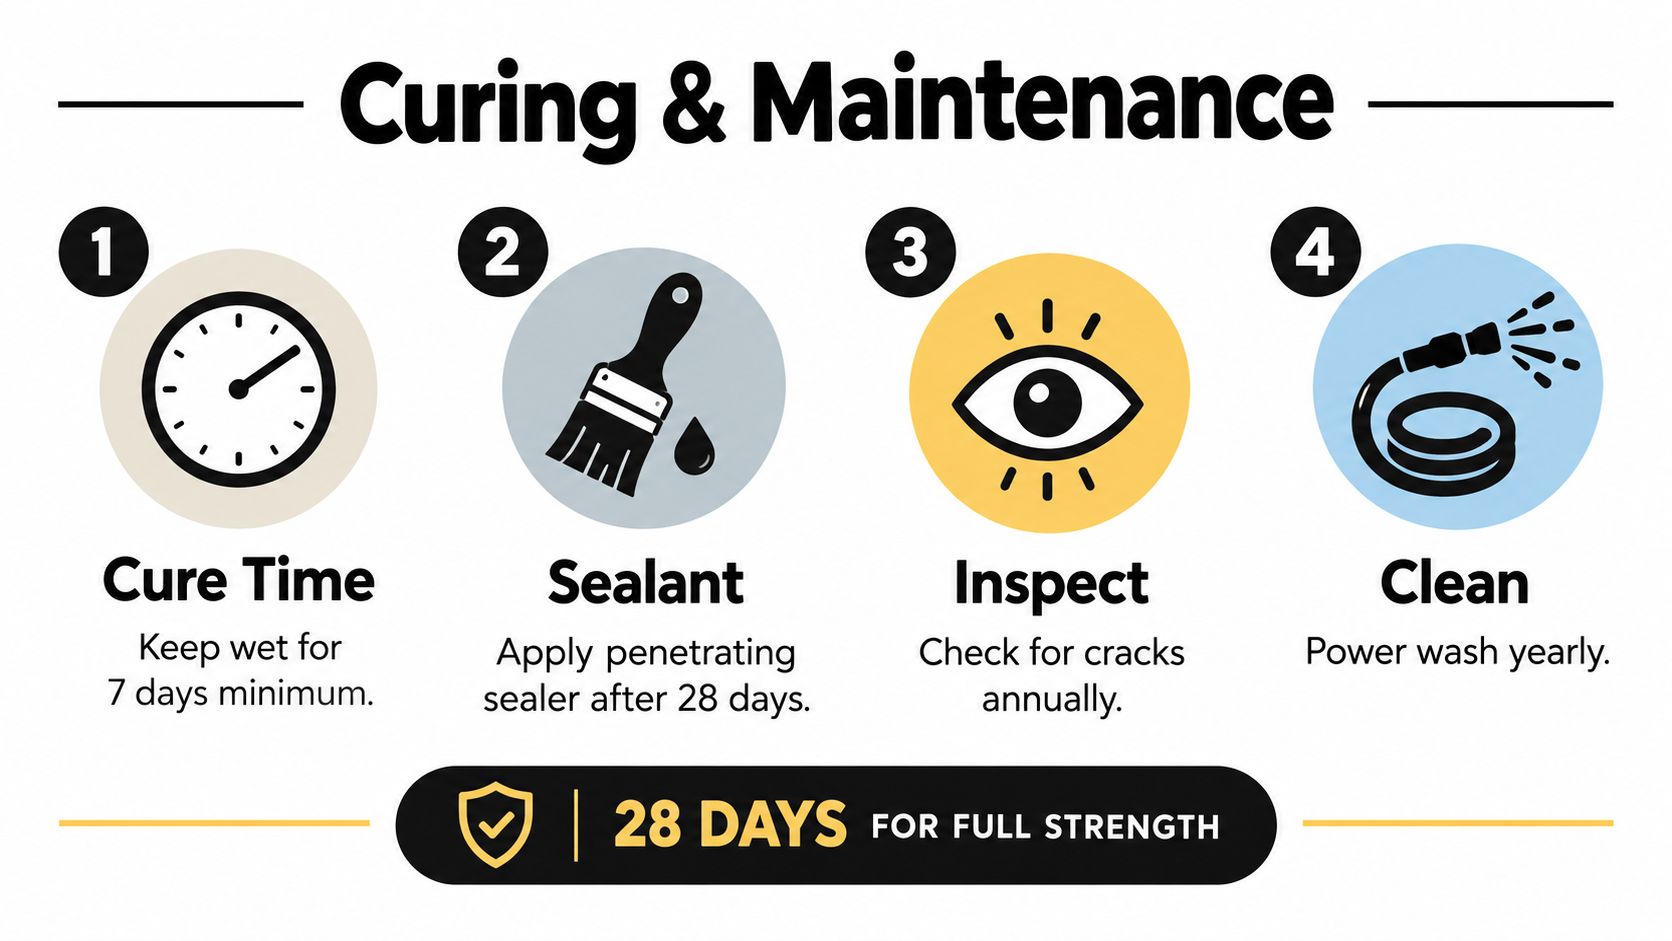
Protect the surface and inspect the edges
A penetrating sealer can help reduce water and contaminant absorption, but it won't repair a moving base or stop a drainage failure. Apply a product suited to the concrete finish and follow the manufacturer's preparation and application requirements.
Residential driveways are commonly built at a minimum of 4 inches, while driveways carrying trucks, trailers, or RVs are often increased to 5 to 6 inches. Some guidance places RV and trailer driveway construction at 6 to 8 inches for added durability, as outlined in this residential driveway construction guide.
Use a simple maintenance routine:
- Keep the surface clean: Remove mud, leaves, and spills before they hold moisture against the concrete.
- Watch the drainage path: Confirm that water leaves the pad instead of collecting along an edge.
- Inspect cracks and joints: Look for widening cracks, rocking sections, settlement, and changes in elevation.
- Protect the perimeter: Repair erosion or washout beside the slab before the void reaches the supporting base.
Know when repair is no longer enough
Minor surface defects or isolated cracks may be candidates for repair or resurfacing. Widespread cracking, settlement, and slab failure point to a deeper support problem, and replacement generally makes more sense when severe cracks occur with elevation differences between slabs, according to this concrete driveway repair and replacement guidance.
That distinction matters for an RV pad because a cosmetic patch doesn't restore missing base support. If the pad has settled beneath the wheels or jacks, the long-term fix may require removing the failed concrete, correcting the subgrade and drainage, and rebuilding the section. For related work, concrete and masonry repair services can be evaluated alongside the pad rather than treating connected slabs independently.
Homeowners researching How Much Does a Concrete Driveway Cost in Atlanta?, Concrete Driveway Replacement Cost Atlanta 2026, How Long Does a Concrete Driveway Last in Atlanta?, and Concrete Driveway vs Asphalt in Atlanta should apply the same principle: price and appearance matter, but the base, water management, load, and maintenance plan determine whether the work holds up. The same applies to Best Concrete Thickness for a Residential Driveway, Do You Need Rebar in a Concrete Driveway?, Concrete Driveway Cracks: When Should You Replace It?, and Concrete Driveway Repair vs Replacement.
Decorative choices still have a place after the structure is right. Stamped Concrete Driveway Atlanta, Concrete Driveway Sealing Atlanta, How Long Before You Can Drive on New Concrete?, Concrete Driveway Maintenance Guide, Concrete Driveway Apron Atlanta, and How to Fix Drainage Problems on an Atlanta Driveway are all practical planning topics, but none of them replaces a compacted base and a drainage route that keeps water away from the slab.
Atlanta Concrete Solutions can evaluate the RV load, pad layout, base preparation, reinforcement, drainage, and connection to an existing driveway before construction begins. If you're planning a durable concrete pad for an RV or need related driveway replacement, apron, extension, or repair work in the Atlanta area, visit Atlanta Concrete Solutions to request a project assessment.