
Exterior concrete slabs should drop at least 1/4 inch per foot, about 2%, away from structures for reliable drainage. ADA pedestrian routes cap cross slope at roughly 2% and running slope at 5%.
That matters when an Atlanta homeowner steps outside after a heavy storm and finds water sitting beside a new patio, garage threshold, or crawlspace wall. A slab can look perfectly flat while still needing a deliberate pitch. If it has no fall, rainwater will choose the low spots, and those low spots may be next to your foundation instead of the yard.
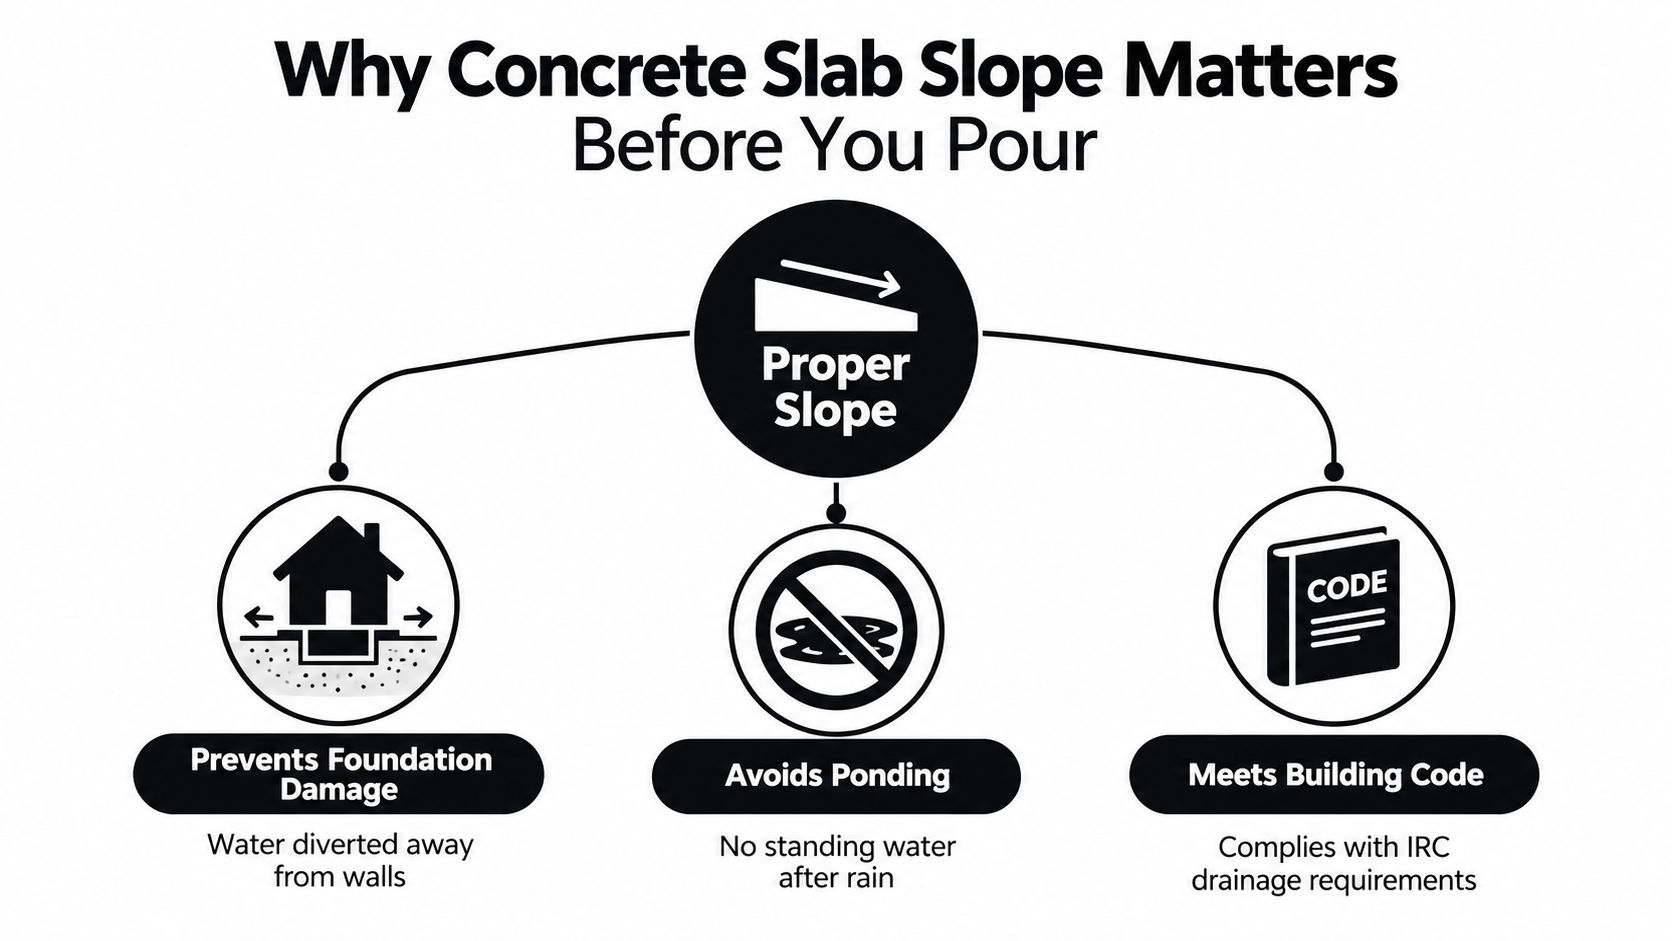
Why Concrete Slab Slope Matters Before You Pour
A new patio can look level after finishing, yet send stormwater toward a crawlspace wall. During an Atlanta downpour, that water may collect along the slab edge, wet nearby siding, or remain beside the foundation. The surface needs a planned fall before the concrete truck arrives.
A concrete slab slope works like a tabletop tilted just enough for a glass of water to move toward one edge. A perfectly flat-looking table can hold puddles in small depressions. The slab does not need to appear steep. It needs a continuous change in elevation that leads water to a drain, yard, or other planned discharge point.
Two slope directions
Cross slope is the side-to-side fall across a walking surface. A sidewalk may use it to move water from the building side toward its outside edge. Running slope follows the direction of travel, such as the gradual descent along a driveway or walkway.
These directions can compete with drainage and accessibility. ADA guidance limits typical pedestrian routes to a 2.0% maximum cross slope and 5.0% maximum running slope. Exterior slab guidance from ACI calls for positive drainage at 1/4 inch per foot, equal to 20 mm/m or about 2.08% grade (ACI 302.1R guidance)).
Set the drainage plan first
Before placement, the crew establishes finished elevations, shapes the gravel base, sets forms, and positions screed guides. Those steps determine whether wet concrete follows the intended fall.
Level-looking forms do not guarantee an even base. An uneven base can create thin areas, low spots, or inconsistent slab thickness. Incorrect form heights can carry the same error across the finished surface. Atlanta homeowners may meet a minimum grade and still see ponding if the discharge path is blocked, the surface contains depressions, or the grade changes abruptly.
Practical rule: A slab's appearance says little about drainage. Finished elevations, measured fall, and a clear discharge path show whether the layout will work.
The Numbers Behind Recommended Concrete Slab Slope
A slab can look level and still drop several inches across its length. The outdoor benchmark from ACI 302.1R is at least 1/4 inch per foot, equal to 20 mm/m and about 2.08% grade, when positive drainage is required (ACI 302.1R exterior slab guidance).
The calculation is straightforward. For every foot of horizontal distance, the surface falls a quarter inch. A 20-foot run at 1/4 inch per foot therefore needs 5 inches of total fall, assuming the finished elevations are measured from the same reference point.
That number is a design target, not a guarantee that water will leave the slab. A blocked outlet, a shallow depression, or an abrupt grade change can still hold water, especially after Atlanta-area rain. Finished elevations, measured fall, and the discharge path reveal the actual drainage performance.
Interior slabs generally face less direct weather exposure. ACI guidance identifies 1/16 inch per foot, or 5 mm/m, as a minimum adequate drainage slope for interior slabs, with 1/8 inch per foot, or 10 mm/m, preferred where drainage is needed (ACI 302.1R floor and slab guide.pdf)). Drains, waterproofing, thresholds, and floor finishes can make a smaller interior pitch workable.
| Slab Type | Inches per Foot | Percent Grade | Intent |
|---|---|---|---|
| Exterior slab | 1/4 inch | About 2.08% | Positive drainage and reduced ponding |
| Interior minimum drainage slope | 1/16 inch | About 0.5% | Minimum adequate interior drainage |
| Interior preferred drainage slope | 1/8 inch | About 1% | More dependable interior water movement |
These figures are planning minimums, not a universal instruction to make every surface steeper. Rainfall, adjacent grades, surface permeability, door thresholds, and accessibility limits can change the appropriate layout. A correct percentage cannot compensate for water directed toward a wall or trapped by a low spot.
Driveway, Patio, Garage, and Sidewalk Slope Compared
A driveway can look nearly level from the street yet still send water toward the garage. A patio may shed rain from the house but hold it beside a low step. Each slab needs a fall direction suited to its use, nearby grades, and drainage outlet.
| Slab Type | Typical Slope | Direction of Fall | Key Consideration |
|---|---|---|---|
| Driveway | About 1/4 inch per foot | Toward the street or swale | Move runoff while keeping the vehicle approach stable |
| Patio | About 1/8 to 1/4 inch per foot | Away from the house | Protect siding, thresholds, and foundation edges |
| Garage floor | About 1/8 to 1/4 inch per foot | Toward the door or center drain | Carry tire splash and snowmelt to a collection point |
| Sidewalk | Cross slope near 1/4 inch per foot, running slope near 1/2 inch per foot where the route design permits | Usually toward the outer edge and along the route | Balance drainage with comfortable pedestrian travel |
The sidewalk values show why code compliance and everyday performance are not identical. A cross slope near 1/4 inch per foot is approximately 2%, close to the ADA maximum for a typical accessible route. A running slope near 1/2 inch per foot is approximately 4.17%, below the ADA running-slope ceiling of 5%. The completed route must still meet applicable standards and local requirements (ADA slope thresholds summarized by ACI).
Patio slope also affects how the space feels. A modest fall can move rain away from the house without making chairs or tables rock. A stronger pitch may improve drainage while making furniture and door transitions awkward. If pavers meet an existing concrete area, compare finished elevations before installation with these 2026 brick paver patio tips.
Driveway replacement calls for more than selecting a fraction. The new surface must meet the garage floor, street gutter, adjoining driveway, and drainage outlet at compatible elevations. Atlanta homeowners can review project-specific information about residential driveway concrete before the crew sets forms.
A code-level slope can still pond when a low spot, blocked outlet, or abrupt grade change interrupts the fall. On an Atlanta-area property, the practical test is simple: trace where rain will go after it leaves the slab, then check that the finished elevations create a continuous path.
ADA and Building Code Limits You Cannot Ignore
A walkway can look flat and still slope in two different directions. Running slope follows the route from one end to the other. Cross slope falls from one side toward the other, guiding water to an edge but also affecting how a person travels across the surface.
For a typical accessible route, ADA limits the running slope to 5%, or 1:20, and the cross slope to 2%, or about 1:48 (ADA Standards for Accessible Design). These limits apply to the finished, unobstructed surface. A walkway may appear level from the driveway, yet its cross slope can still pull a wheelchair sideways, affect balance, or send water toward the wrong edge.
The short-ramp exception
An 8.33% slope applies only to short driveway crossings or ramp-like conditions with the required design features. It does not authorize pitching an entire driveway, sidewalk, or patio at that grade. Landings, edge protection, transitions, and other ramp provisions may determine the final layout.
| Feature | Maximum Slope | Practical Meaning |
|---|---|---|
| Accessible-route running slope | 5%, or 1:20 | The route rises or falls gradually in the travel direction |
| Accessible-route cross slope | 2%, or about 1:48 | Limits sideways tilt while allowing drainage |
| Short driveway crossing or ramp-like condition | 8.33% | Applies only under prescribed conditions, not automatically to a full slab |
Drainage and accessibility can point to different solutions. A 2% cross slope helps move rain, but it also reaches the ADA ceiling for a typical pedestrian route. The contractor may need to adjust landing elevations, spread grade changes across the property, or use drains instead of making the walking surface steeper.
Local building codes and adopted amendments may add requirements. Confirm the design with the authority having jurisdiction before forms are set, especially for a commercial walkway, permitted work, or a slab connected to a public route. For Atlanta-area residential walkway planning, review information about residential sidewalk concrete.
When Minimum Slope Is Not Enough
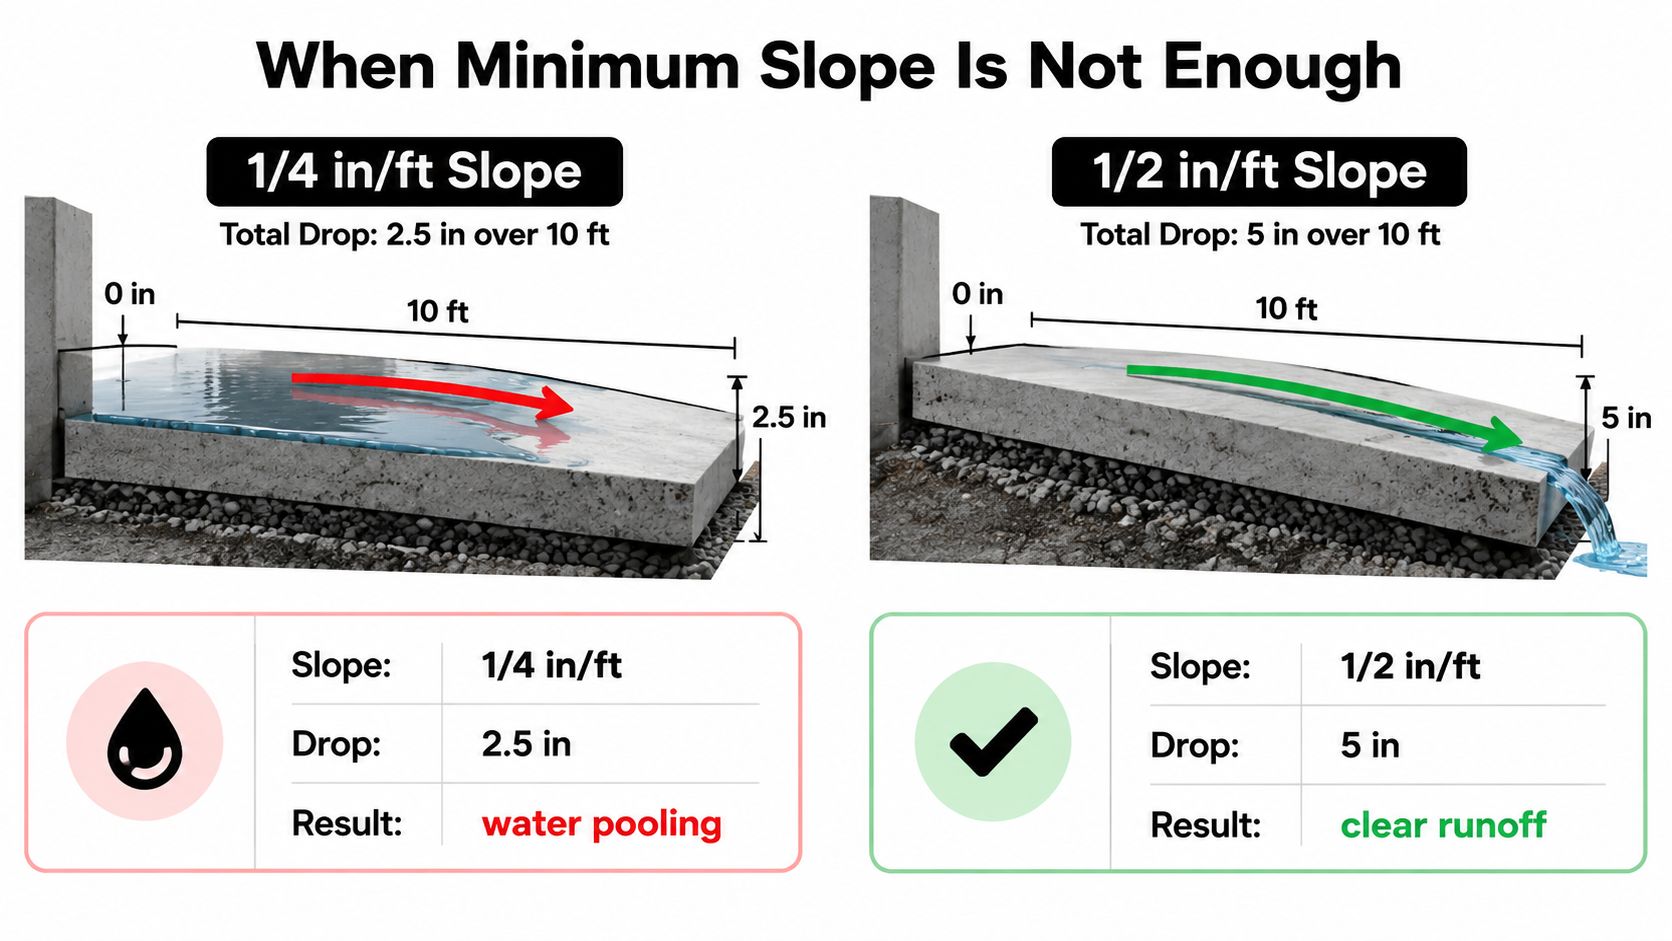
A slab can satisfy the minimum grade and still hold puddles. At 1/4 inch per foot, a 10-foot slab drops just 2.5 inches from high end to low end, as discussed in the ACI discussion of exterior slab drainage. That overall fall works like a shallow path for water, but one low spot can act like a dent in a baking tray. Uneven screeding, construction tolerance, subgrade movement, or settlement can break the intended sheet flow.
The benchmark is a starting point, not a promise that every inch of the finished surface will drain.
Design for the finished surface
For many exterior patios, walkways, and driveways, about 2%, or 1/4 inch per foot, gives water a useful path away from the structure. A larger fall may improve drainage across a broad Atlanta-area driveway or patio, yet it can create awkward door thresholds, vehicle transitions, furniture placement, or walking conditions. An accessible route may limit the available grade.
Some interior areas can use 1% to 2% when drains, waterproofing, transitions, and floor finishes support that design (independent drainage slope guidance). Judge the completed surface, not only its average grade. The high spots, low spots, drain location, and discharge route all matter.
Before forms are fixed, inspect the subgrade and map where runoff will go. Check slab thickness, finish texture, control joints, thresholds, downspouts, and neighboring elevations. Surface ponding and plumbing leaks need different diagnoses, although moisture concerns may warrant reviewing Jays Plumbing and Sewer slab leaks.
Meeting code is the floor. Reliable drainage is the goal.
How to Calculate and Set Concrete Slab Slope
A patio can look level while dropping several inches from the house to the yard. The calculation makes that fall visible. Use rise over run:
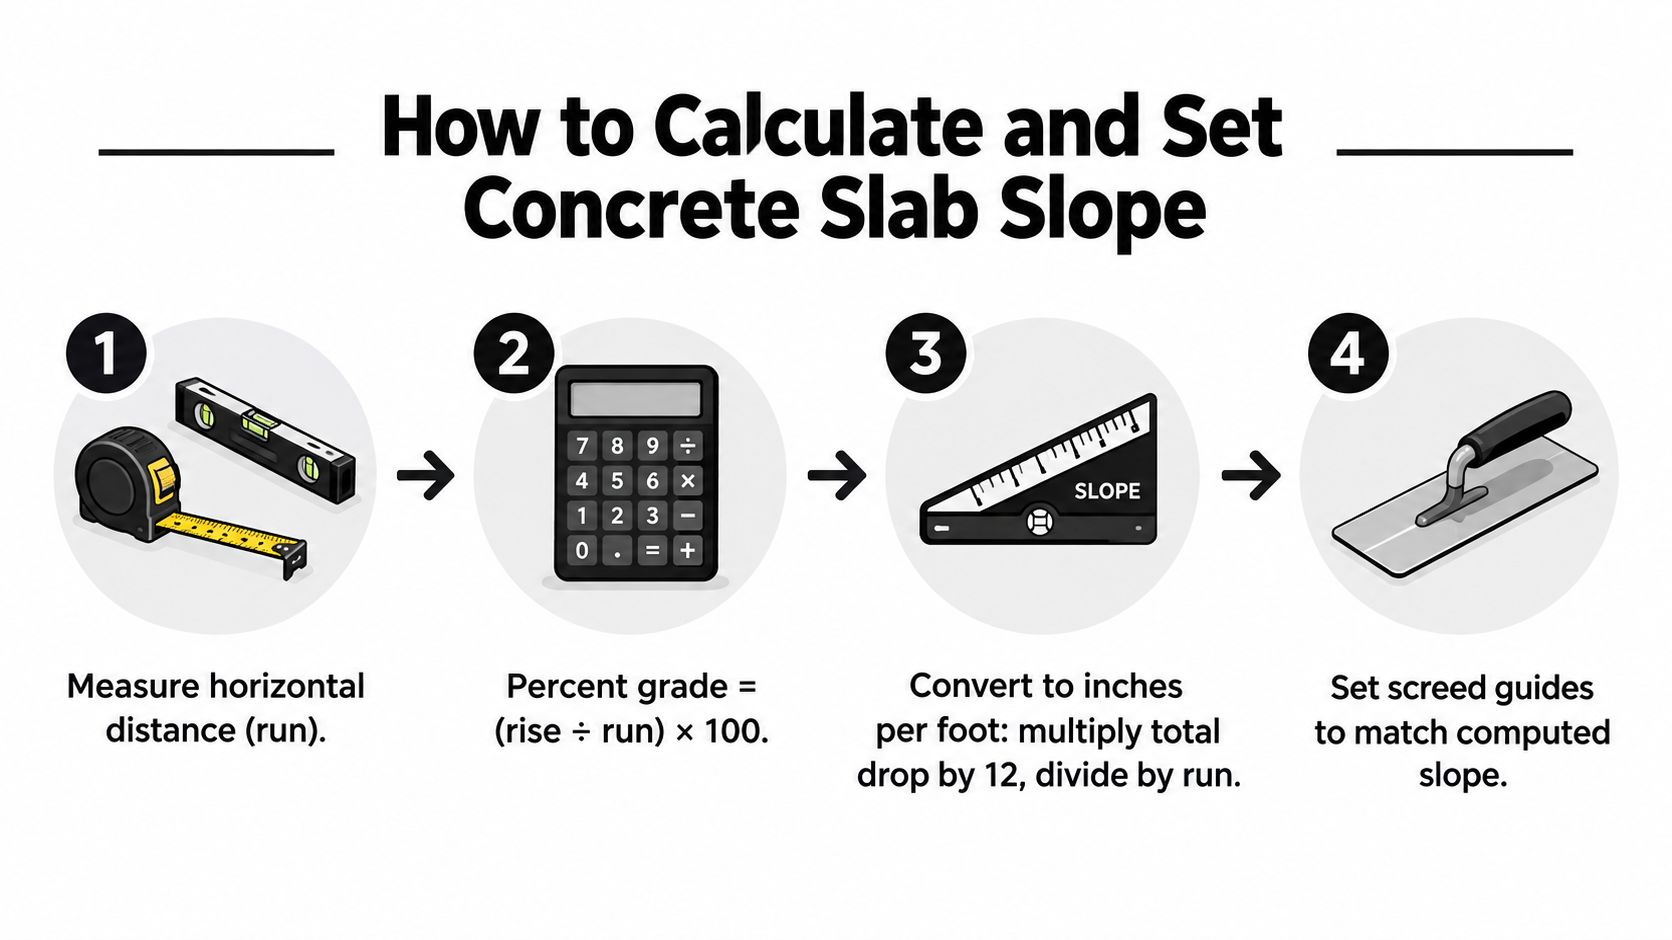
Percent grade = vertical rise ÷ horizontal run × 100
For a slab, measure the total vertical drop and the total horizontal distance. To convert a total drop into inches per foot, multiply the drop in inches by 12, then divide by the slab length in feet.
A corrected example
Suppose a patio extends 20 feet from the house and needs a 1/4-inch-per-foot fall. Multiply 20 feet by 1/4 inch to get a total drop of 5 inches. Convert the run to inches before calculating:
5 ÷ (20 × 12) × 100 = 2.08%
The result is approximately 2.08% grade, matching the exterior benchmark discussed earlier. Do not divide inches by feet without converting the units first. That error makes the slope appear much steeper than the finished slab will be.
Set the elevation in the field
A crew normally establishes two finished-grade points. The high point sits near the structure, while the low point leads toward the outlet. A taut mason's line, line level, builder's level, or laser level then carries that difference across the forms.
- Mark the reference points. Tie finished elevations to fixed features such as a threshold, curb, drain, or swale.
- Set the guides. Place edge forms and screed guides so their top edges follow the calculated fall.
- Secure the layout. Stake the forms firmly, then check diagonal and perpendicular measurements so the footprint stays square.
- Verify the base. Recheck the grade after compacting the subgrade and gravel.
- Screed to the guides. Pull the screed across stable guides that already contain the intended slope. Do not estimate the fall from wet concrete.
Check the forms before the pour and the surface immediately after screeding. Confirm slab thickness, adjoining thresholds, drainage outlets, and applicable grade limits before fixing the final elevations. Homeowners planning residential poured concrete can use this same elevation sequence when reviewing the layout with a contractor.
A visual demonstration of the calculation and layout process can help homeowners understand what the crew is measuring:
Common Mistakes That Sabotage Drainage
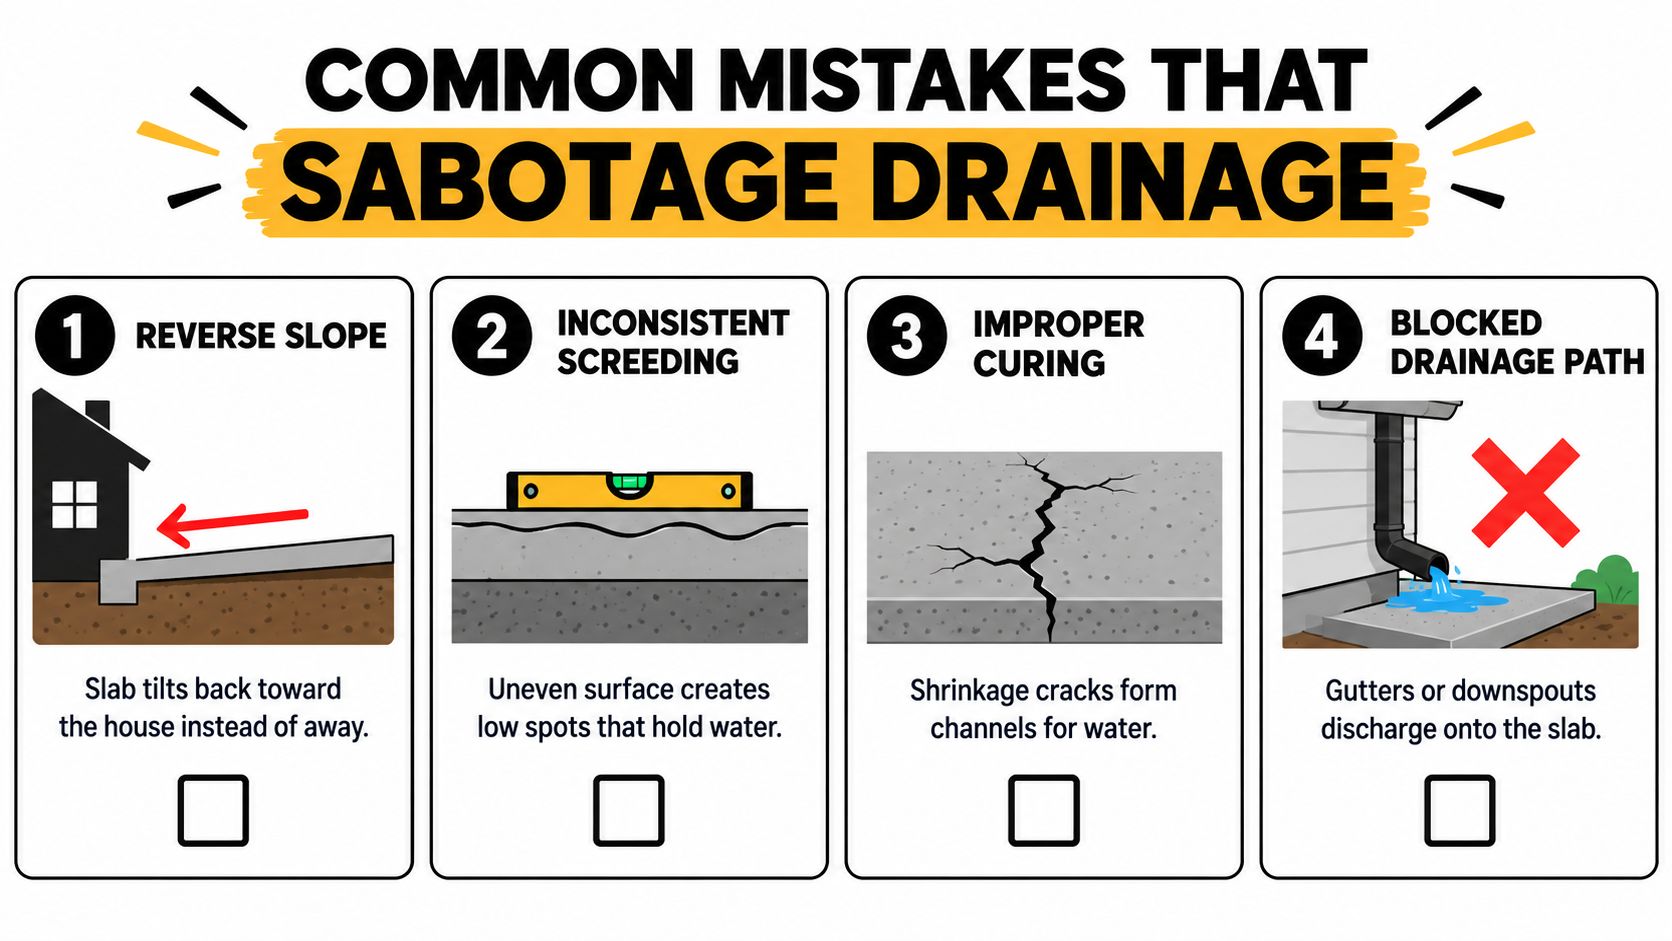
A homeowner may see a slab that looks flat and assume drainage is covered. In practice, a slab needs a controlled fall, and small errors can leave water standing even when the planned grade meets the minimum. The drawing shows intent. The finished surface controls where water goes.
Look for these failure points
- Reverse slope: The low side ends up near the house. Establish the high and low elevations before excavation, then check the direction with a laser or line level.
- Inconsistent screeding: A bowed screed board or rushed pull leaves shallow birdbaths. Straight guides help the crew carry the planned fall across the surface.
- Settlement over trenches: Utility repairs can leave a weak strip below the slab. Compact filled trenches and check for soft areas before placing the base.
- Missing perimeter drainage: A slab can shed water correctly and still receive runoff from a downspout or uphill yard. Send roof water to a suitable outlet instead of onto the concrete.
- Poor joint treatment: Control joints and cracks can become low paths when the surrounding surface lacks a continuous fall. Plan and finish joints so they do not collect water.
- Ignored accessible cross slope: A replacement walkway may feel tilted or fail review if its finished cross slope is not checked. Measure the completed surface, not only the forms.
- Over-troweled surface: Excessive finishing can close the surface and preserve subtle low spots, especially where the fall is already near the minimum.
Atlanta-area homeowners should also watch the gap between code-level compliance and durable drainage. A slab may meet the minimum grade yet pond because of a small screeding dip, settlement, or runoff entering from outside the slab.
Verify before the concrete cures
Walk the surface with a 4-foot level, inspect the form elevations, and confirm the pitch while the concrete remains workable. A controlled hose test can show whether water reaches the intended edge or stops in isolated pools.
Check gutters, downspouts, thresholds, and nearby grades as well. The slab's drainage path includes every feature that sends water onto it.
For homeowners comparing measuring tools, this guide to buying levels for contractors explains why tool accuracy and proper use matter. A level cannot fix poor layout, but it can expose a problem before the pour becomes permanent.
When to Hire a Pro for Concrete Slab Slope
A short pad on open ground gives you room for small corrections. A driveway tied to a garage, sidewalk, street, and stormwater route does not. As the number of connections increases, one incorrect form elevation can send water toward a threshold or leave a low area far from the intended outlet.
Professional layout is a sensible choice when:
- The driveway runs more than 20 feet. A minor grade error becomes a larger transition problem over a long run.
- The slab meets a foundation or crawlspace. Finished elevations must protect thresholds and direct water away from the structure.
- A permit is required. Plans, inspections, or local amendments may apply.
- The walkway serves commercial users or a public route. ADA running and cross-slope limits require field checks.
- The site has expansive clay soil common in the Atlanta area. Movement or weak compaction can change the drainage path after placement.
- An existing slab has sunk or cracked. The visible slope may point to voids, settlement, or subgrade failure, not merely a finishing defect.
A qualified contractor sets form elevations with laser levels, calculates the fall to drains or discharge points, checks local requirements, and verifies the surface during screeding. That process matters because code-level compliance is only a starting line. A slab can meet its minimum grade and still pond after a small screeding dip, settlement, or runoff from nearby ground changes the water path.
Replacement work also requires finding the original failure. Installing a new slab over the same unstable base can reproduce the same drainage problem.
Professional layout usually costs less to address before the pour than afterward. Repairs may involve lifting a sunken slab, filling voids, rebuilding drainage, or removing and replacing concrete. Atlanta Concrete Solutions provides concrete leveling and slab jacking by injecting grout beneath sunken or uneven slabs, which may help when settlement has already altered the grade.
Atlanta Concrete Solutions can evaluate driveway, patio, sidewalk, and poured slab layouts in the Atlanta area, including forms, drainage paths, and finished elevations. Visit Atlanta Concrete Solutions to discuss the project and request a quote before the first pour.