
Yes, most slabs on grade need joints, but the joint is usually a contraction (control) joint cut into the surface, not a regularly spaced expansion joint. A practical starting rule is 2 to 2.5 feet of control-joint spacing per inch of slab thickness, subject to the slab design and site conditions.
Adding more expansion filler isn't a reliable way to prevent cracks. The important distinction is whether you're planning where concrete will crack or separating concrete from something that must move independently. For Atlanta driveways, patios, garage floors and courts, getting that distinction right matters more than counting the filled gaps.
Which Slabs Need Joints and What Kind
Identify what the slab does and what touches its perimeter. Those two facts decide the joint schedule. A residential driveway needs a contraction layout across its field, while the connection to a garage wall or foundation needs an isolation detail. Treating both locations as the same joint leaves one of those jobs unfinished.
Joint requirements by slab type
| Slab type | Joints needed | Joint type | Notes |
|---|---|---|---|
| Residential driveway | Yes | Contraction (control) joints, saw-cut | Add isolation joints where the slab meets the house, garage wall or curb |
| Sidewalk | Yes | Contraction joints at fixed intervals | Expansion joint at curb, driveway apron or building wall where independent movement is required |
| Patio or walkway | Yes | Contraction joints | Isolation joint at house wall, posts or steps |
| Garage floor slab | Yes | Contraction joints plus isolation joints | Layout set by slab size and thickness |
| Foundation or structural slab on grade | Per engineer's drawings | Control joints for panels, isolation at columns and walls | Follow the engineer's joint layout |
| Slab abutting a fixed structure | Yes | Expansion (isolation) joint with compressible filler | Required when the slab must move independently of the fixed structure |
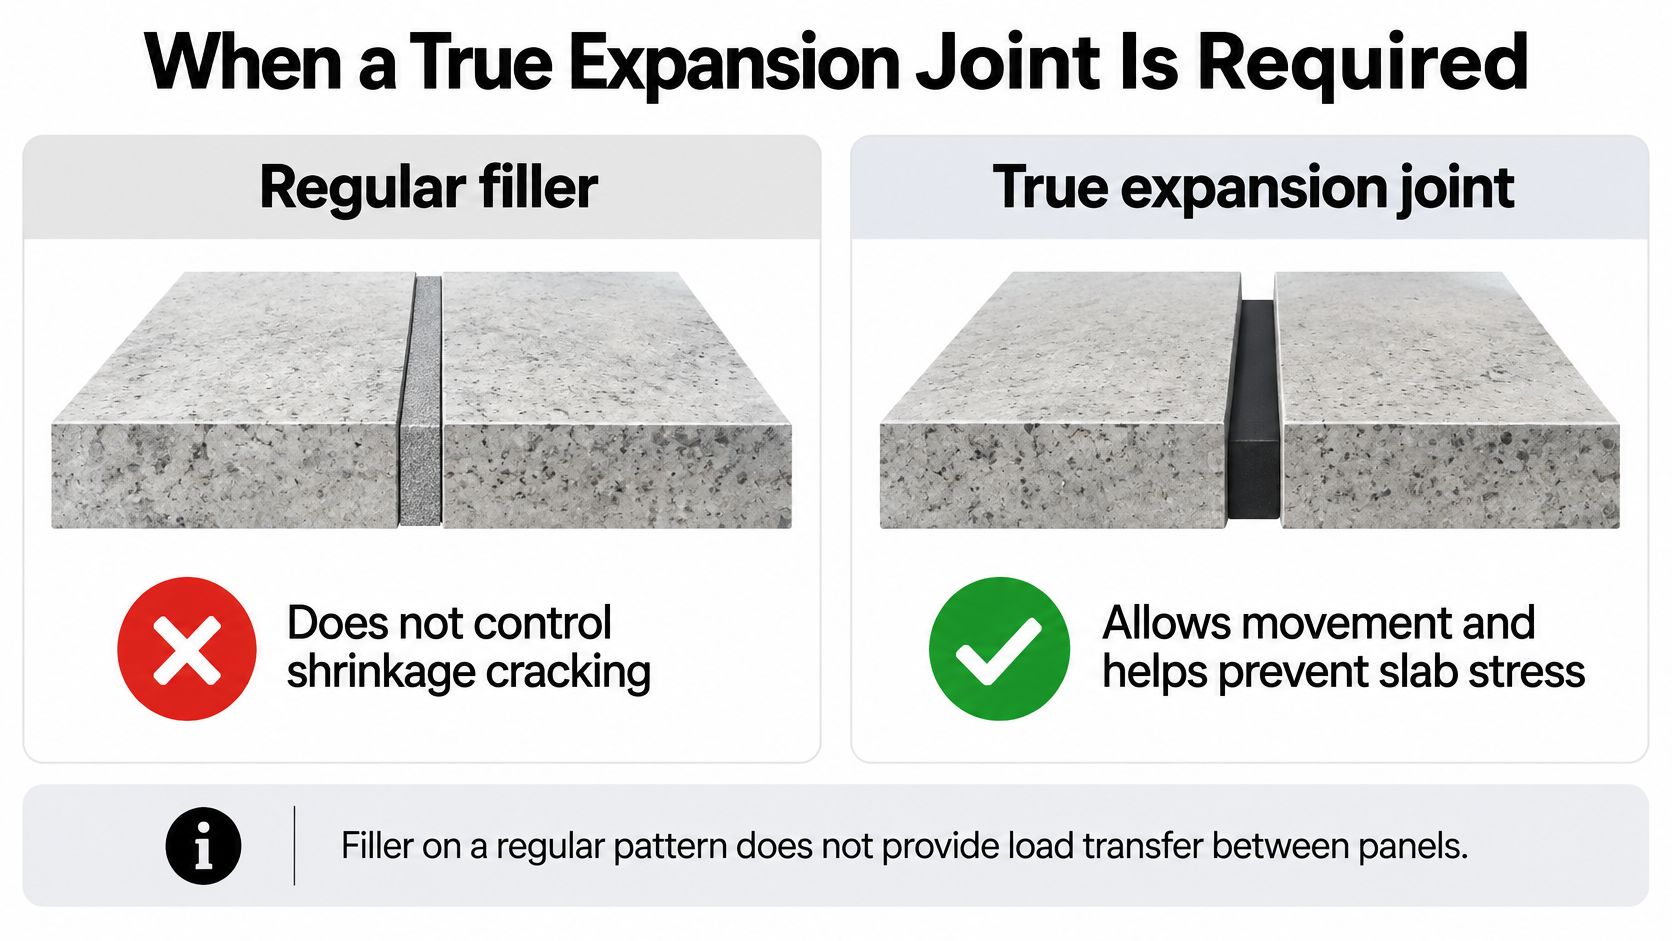
The distinction matters because contraction joints and expansion joints solve different problems. A contraction joint creates a planned weak plane so drying shrinkage cracks form along a controlled line. An expansion joint with compressible filler lets the slab move against a wall, curb, column or other fixed object. Filler on a regular grid does not stop shrinkage cracking across the field. That is why driveways, sidewalks and patios still need a contraction layout even when isolation joints are detailed at walls and curbs.
Driveways, sidewalks and patios need deliberate panel boundaries rather than cuts placed wherever the finishing crew finds convenient. Garage floors also need attention around walls and columns. A doorway, drain or change in slab width can alter an otherwise straightforward layout.
Structural slabs need their own instructions
A driveway detail does not govern a structural foundation. An engineer may specify reinforcement continuity, special connections or a joint arrangement that differs from ordinary residential flatwork. The drawings govern those decisions.
Interior alterations also require coordination before anyone cuts concrete. A renovation that moves plumbing beneath a slab involves cutting and patching concrete, so concrete slab toilet relocation pricing can help frame the renovation budget. The cut and patch detail still needs contractor and engineer review before work starts.
Before placement: Mark every location where the new slab touches a fixed object. Resolve the isolation detail before the concrete arrives, not while the crew is finishing it.
Treat the table as a baseline for joint type, not a universal construction specification. Slab thickness, reinforcement, anticipated loading and ground conditions can change the final layout.
Why Concrete Cracks Without Planned Joints
Concrete can crack even when the surface looks well finished. As it dries, it loses volume; temperature and moisture changes also make it move. If the ground, reinforcement or adjacent construction restrains that movement, tensile stress develops.
A small surface crack can be the visible result of that restraint.
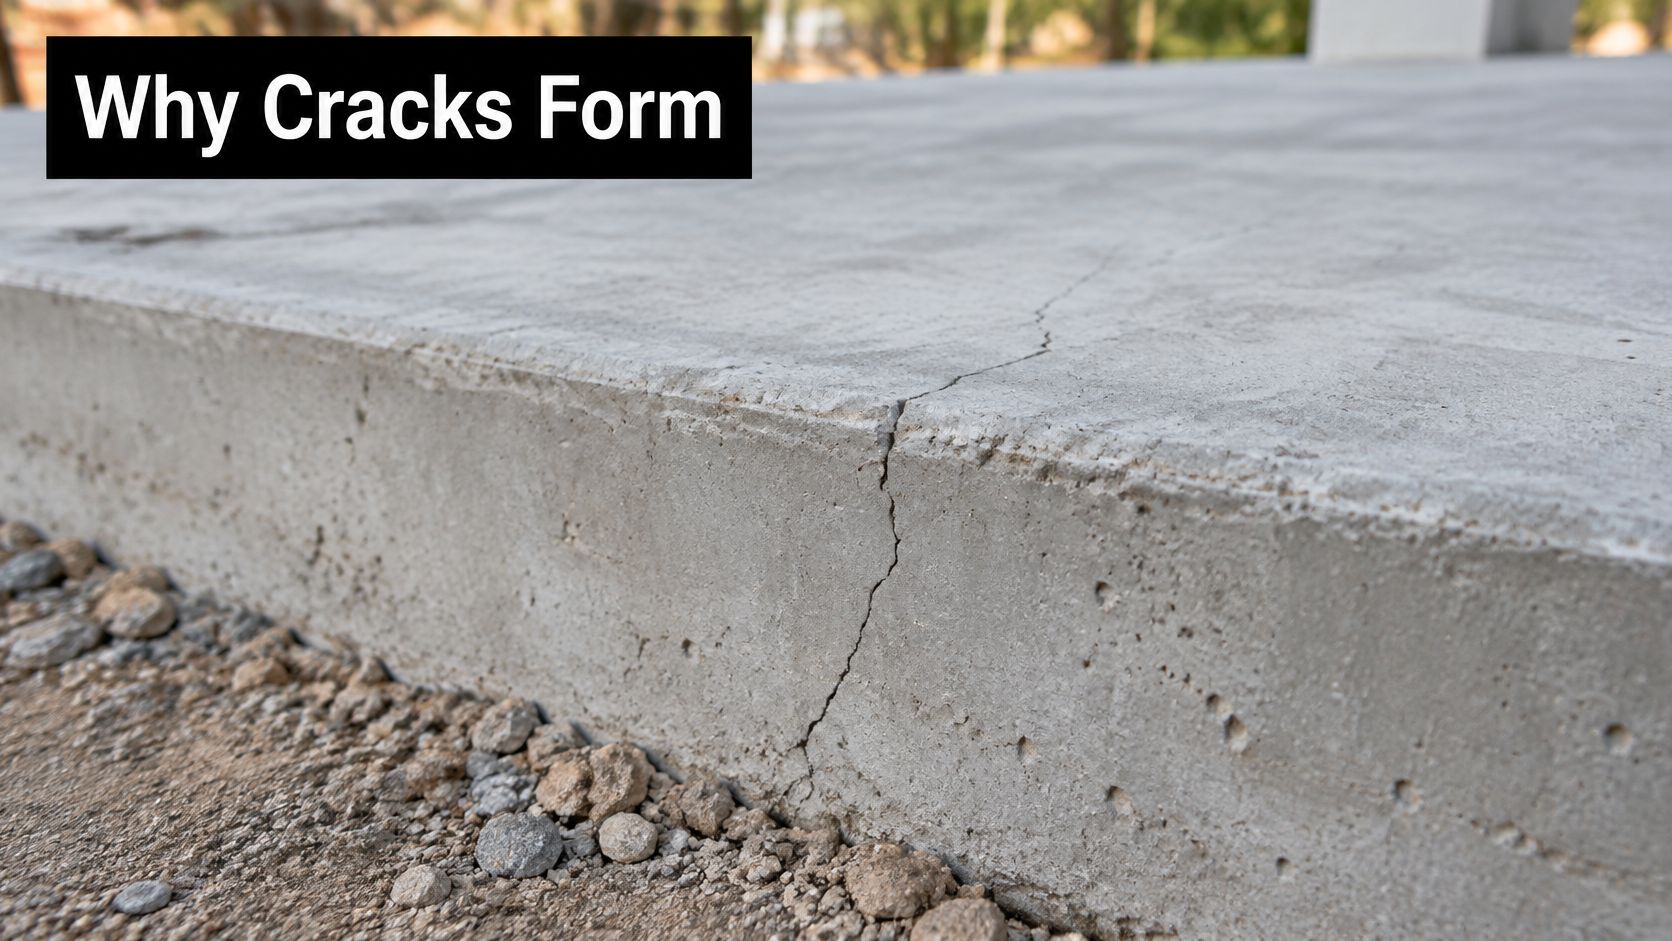
The American Concrete Institute's slab-on-ground guidance explains that restrained shrinkage can produce uncontrolled cracking and identifies slab thickness, reinforcement, mixture characteristics, placement temperature and joint spacing as design factors. For typical unreinforced or lightly reinforced slabs, it recommends nearly square panels, with 1:1 preferred and a maximum aspect ratio of about 1.5:1.
A control joint plans the weak plane
Think of a perforated sheet of paper. The perforation doesn't prevent tearing; it gives the tear a preferred path. A contraction joint does something similar by reducing the concrete section along a planned line.
For a conventional saw-cut detail, the designer commonly calls for a cut around a quarter of the slab depth. As a worked example, a slab assumed to be 4 inches thick would receive an approximately 1-inch cut under that detail. Early-entry systems and engineered reinforcement arrangements can require different instructions, so the specified cutting method matters.
The crack beneath a functioning joint isn't automatically a defect. The relevant question is whether it developed at the intended location and whether the panel remains supported and serviceable.
The following video provides additional visual context for concrete jointing.
Timing matters as much as the line
The crew must cut early enough to intercept shrinkage cracking but late enough to avoid tearing aggregate and raveling the edges. That window depends on concrete behavior, weather and equipment, not just a promised return time.
- Coordinate pours: Keep planned joints continuous rather than staggering them without a design reason.
- Check the cutting method: The blade, equipment and specified depth must work together.
- Diagnose existing damage: A concrete and masonry repair assessment should distinguish a stable crack from movement or loss of support.
A useful field distinction is simple: a saw cut or tooled groove directs cracking; a compressible filler separates adjoining elements.
How Far Apart to Space Control Joints
Use slab thickness to establish a preliminary spacing range, then adjust the pattern to produce compact panels. Treat the spacing guideline as an upper planning range, not a requirement to make every panel as large as possible.
Control joint spacing and depth by slab thickness
The following examples calculate spacing using the opening rule and assume a conventional quarter-depth saw-cut detail. The listed uses describe possible applications, not proof that the thickness is adequate for a particular vehicle or ground condition.
| Slab thickness | Joint spacing | Joint depth | Typical use |
|---|---|---|---|
| 4 in. | 8-10 ft | About 1 in. | Residential driveway, sidewalk, patio |
| 5 in. | 10-12.5 ft | About 1.25 in. | Heavier residential or light commercial slab |
| 6 in. | 12-15 ft | About 1.5 in. | Garage slab or truck-access drive, subject to load design |
A thicker slab doesn't automatically justify stretched panels. The designer still has to account for restraint, shrinkage potential and geometry. Nor does a thickness selected for a passenger-car driveway automatically suit delivery trucks.
Work through the panel layout
Suppose you're planning a 20-by-20-foot pad, assume a 4-inch slab, and select 10-foot spacing for this hypothetical layout. Cutting through the midpoint in both directions creates four approximately 10-by-10-foot panels. That produces a compact pattern without leaving a long, narrow strip at an edge.
A sidewalk requires a different reading of the same principle. Transverse joints divide its length into short panels; a longitudinal cut alone doesn't resolve an excessively long panel. Width can therefore require closer transverse spacing than the thickness guideline would otherwise suggest.
Plan check: Divide each panel's longest side in feet by slab thickness in inches. A result above the opening guideline deserves review, but a smaller result isn't automatically wrong, especially where narrow geometry requires closer joints.
For an Atlanta residential driveway project, mark garage edges, sidewalk connections and widening transitions before settling on a regular grid. Those boundaries can determine where the grid should begin.
Put joint design into the wider replacement decision
Concrete Driveway Replacement Atlanta planning should connect joint design to the rest of the project. Useful supporting topics include:
- Budget and lifespan: How Much Does a Concrete Driveway Cost in Atlanta?; Concrete Driveway Replacement Cost Atlanta 2026; How Long Does a Concrete Driveway Last in Atlanta?; Concrete Driveway vs Asphalt in Atlanta.
- Structural decisions: Best Concrete Thickness for a Residential Driveway; Do You Need Rebar in a Concrete Driveway?; Concrete Driveway Cracks: When Should You Replace It?; Concrete Driveway Repair vs Replacement.
- Site configuration: How to Fix Drainage Problems on an Atlanta Driveway; Concrete Driveway Apron Atlanta; Driveway Widening Atlanta; Driveway Extension Atlanta.
- Finish and ownership: Stamped Concrete Driveway Atlanta; Concrete Driveway Sealing Atlanta; How Long Before You Can Drive on New Concrete?; Concrete Driveway Maintenance Guide.
For example, widening a driveway changes panel geometry, while replacing an apron can introduce a new isolation boundary. Neither decision should be made solely by extending the old saw-cut pattern.
When a True Expansion Joint Is Required
Expansion filler doesn't control drying-shrinkage cracking. Regularly inserting compressible strips can leave the actual shrinkage-crack pattern unplanned.
The American Concrete Institute's guidance on pavement expansion joints warns that these joints are often misused: regularly spaced filler doesn't reliably control shrinkage cracks, provides no load transfer by itself and can weaken pavement behavior. The proper reason for a separation joint is differential movement, meaning adjoining elements need to move relative to each other.
The distinction is shown below.
Look for restraint at fixed contacts
Common locations that need an isolation decision include:
- Building connections: House foundations, garage walls and porch footings.
- Vertical obstructions: Columns, posts and their supporting footings.
- Pavement boundaries: Curbs, gutters and adjoining pavement sections.
- Drainage structures: Manholes, catch basins and other relatively fixed structures.
- Special infrastructure: Bridge elements and transitions requiring a designed separation.
For example, a driveway apron meeting a curb may need a full-depth compressible separation along the curb line. The purpose isn't to decorate the boundary or create another surface groove. It's to keep the apron from bearing rigidly against a separate element.
Specify a movement detail, not just a strip
A true isolation detail uses compressible filler through the slab depth and interrupts bonded reinforcement that would otherwise tie the elements together. Common filler choices include asphalt-impregnated fiberboard and closed-cell foam. Where sealing is specified, the top detail must accommodate a compatible flexible sealant.
A hypothetical half-inch-wide filler detail may suit a particular design, but that dimension isn't universal. Required movement, product properties and the connection determine the width. Any load-transfer device must also be detailed to permit the intended movement rather than accidentally locking the joint.
Filler is only one component. A joint can't isolate two elements if a rigid concrete bridge or bonded reinforcement still connects them.
The common practice of placing filler at long, regular intervals in a sidewalk or driveway doesn't eliminate the need for contraction joints. If a proposal contains periodic filler strips but no shrinkage-control layout, ask the contractor to explain where cracking is intended to occur.
Walk the perimeter with the drawing in hand. Mark each fixed contact, then confirm how the detail separates the slab from that object. Being outdoors isn't, by itself, a reason to add an expansion joint.
How Atlanta Heat, Rain and Drainage Change Your Joints
For Atlanta properties, joint design has to address summer heat, winter cold, rainfall and changing ground moisture together. A filled gap can't compensate for poor curing or unsupported slab edges.
The Federal Highway Administration's pavement-joint guidance identifies temperature change as the most influential factor in joint opening, with drying shrinkage, slab length and thermal expansion characteristics also contributing. It also explains that adequate curing reduces both temperature-related movement and drying shrinkage.
Manage movement through construction quality
Hot-weather placement requires a curing plan that prevents the surface from drying prematurely. The contractor should choose a moisture-retention method suited to the finish and site, such as wet coverings or an appropriate curing compound. Don't replace that plan with occasional, unscheduled spraying after the surface has already dried.
Temperature also changes how an existing joint looks during an inspection. A narrow opening in warm weather doesn't prove that the joint never moves, and a wider opening in cold weather doesn't establish that filler is missing.
- During construction: Coordinate placement, finishing, cutting and curing rather than treating them as separate visits.
- During inspection: Record weather and look for edge damage, displaced panels and trapped debris, not opening width alone.
- During maintenance: Keep incompressible grit out of movement joints and inspect failed sealant before covering it.
More expansion joints aren't automatically better. Each unnecessary separation adds installation and maintenance work without solving an unsuitable panel layout.
Drainage protects the support beneath the joint
For paved driveways without curb and gutter, GDOT's driveway guidance recommends maintaining at least a 2-foot shoulder before the surface slopes toward the drainage ditch, including around driveway radii. That guidance is particularly relevant where an Atlanta-area entrance crosses an open roadside ditch.
The practical issue is continuity of support. Runoff should move toward a planned outlet without eroding the material beside or beneath the concrete. A replacement project may therefore need edge grading or a ditch transition, not merely a new slab.
Sealant maintenance helps limit water and debris entry where the design calls for sealing. It doesn't correct a low spot or rebuild an eroded base. If water repeatedly collects along a joint, investigate the runoff path before ordering another tube of sealant.
Joint Layout Mistakes and How to Fix Them
A random crack between joints can indicate excessive spacing or late cutting, but sealing it won't undo the original layout. First determine whether the crack is stable and whether the adjoining concrete remains supported.
Joint symptoms, causes and fixes
| Symptom | Likely cause | Fix |
|---|---|---|
| Random crack between joints | Joints spaced too far apart or cut too late | Crack-seal the crack and add a planned joint on the next repair |
| Chipped or raveled joint edge | Cutting outside the proper window, unsuitable equipment or an incorrect cut detail | Re-saw sound edges to a clean line and seal where appropriate |
| Slab edge rising against the house | Missing isolation is a possible cause; ground movement also needs investigation | Have the wall-line separation and support assessed before cutting and filling an isolation joint |
| Water pooling at a joint | Poor grading; failed sealant may also allow infiltration | Correct the drainage route and reseal the joint as appropriate |
| Diagonal corner crack | Long, narrow panels or restraint at an inside corner | Revise the panel layout during repair or replacement; assess whether an additional cut is useful |
Geometry determines where stress concentrates
GDOT standard detail 9017L specifies roadway slab widths of 12 to 30 feet, aligns joints with lane lines and calls for additional longitudinal joints as pavement width increases. These are roadway details, not residential driveway dimensions to copy.
The transferable principle is that joint locations follow geometry. A wide garage approach narrowing into a driveway, a sidewalk connection or an inside corner requires deliberate treatment. Pouring one uninterrupted shape and applying a visually pleasing grid afterward can leave poorly proportioned panels.
Choose repairs that address the cause
Re-sawing can establish clean boundaries for an edge repair, but it won't restore concrete that's already fractured beneath the surface. Likewise, adding a cut after a diagonal crack has formed doesn't make the existing crack disappear.
Avoid treating raveling as proof that the crew cut too late or too deep. Cutting too early can tear the concrete, while late cutting can allow uncontrolled cracks before the saw arrives. Blade selection and concrete condition also warrant inspection.
- Surface-level repair: Seal a stable crack or repair localized edge damage when the surrounding concrete is sound.
- Drainage correction: Regrade adjacent ground where feasible, but recognize that an incorrectly pitched slab may require replacement.
- Movement investigation: Assess raised panels before cutting near foundations, reinforcement or concealed utilities.
- Panel replacement: Replace badly displaced, extensively fractured or inadequately supported concrete when a surface treatment won't restore serviceability.
Repair boundary: Sealant can protect a serviceable joint. It can't flatten a displaced panel or replace missing support.
For facility managers, record which panels move and where water collects. That information helps distinguish a localized repair from a replacement layout that needs redesign.
Questions to Ask Your Contractor Before the Pour
Require answers on the drawing and in the scope of work. Verbal agreement about adding joints later isn't enough to establish locations, responsibilities or repair expectations.
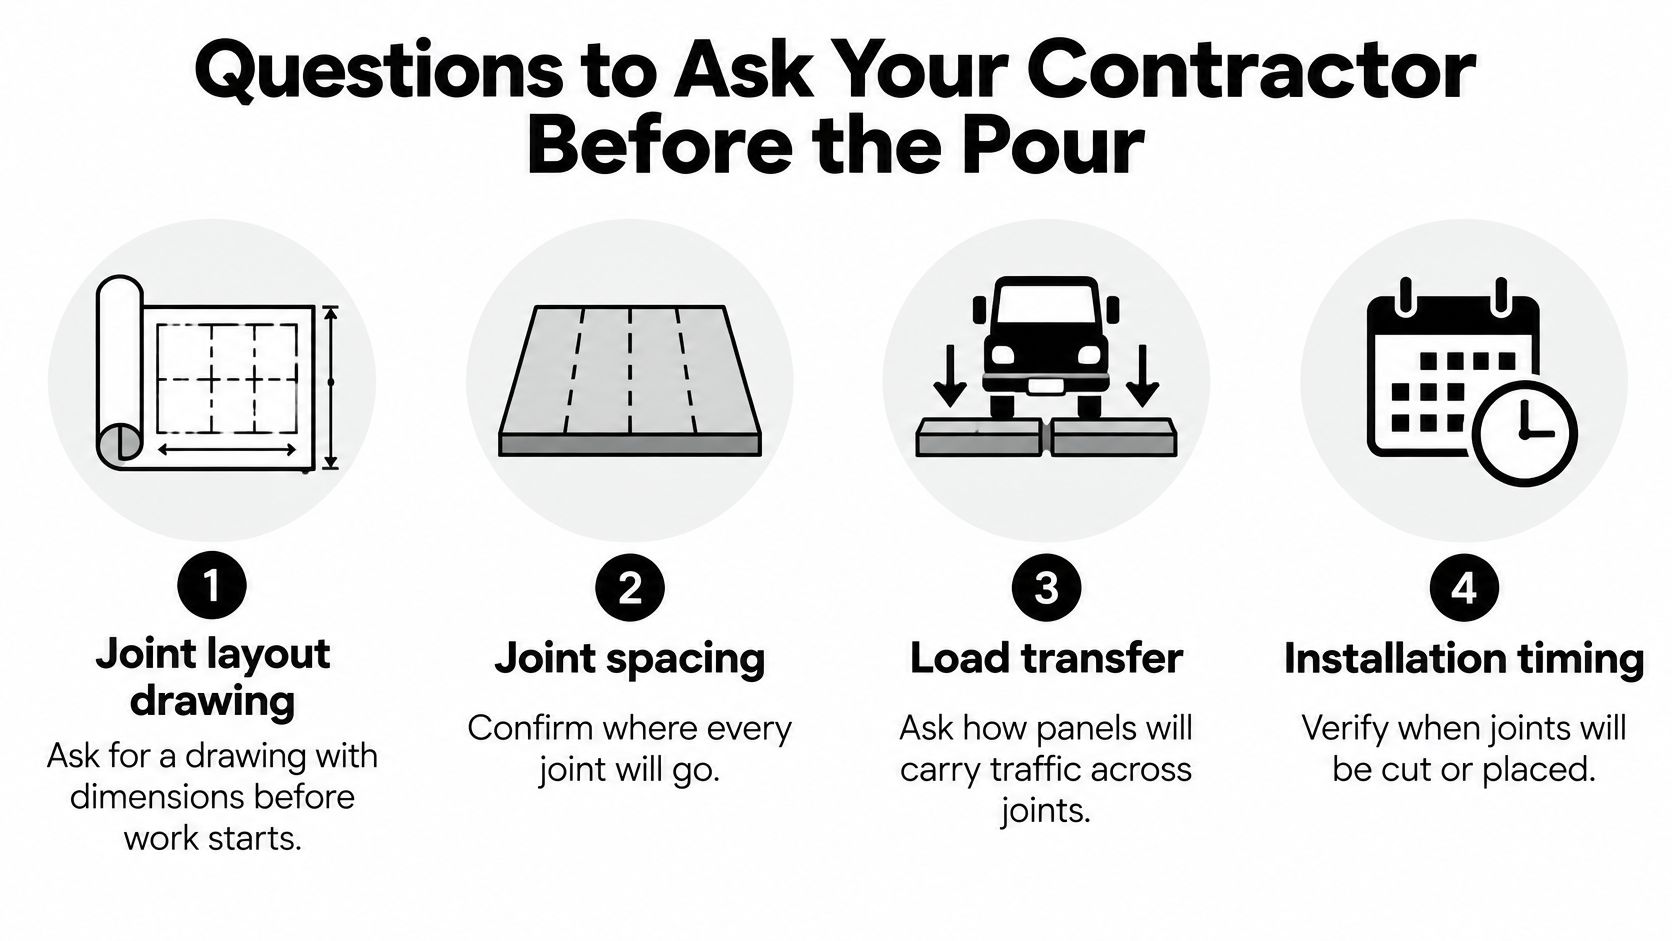
Use this checklist during the pre-pour discussion.
Get the construction decisions in writing
- Where is the dimensioned layout? Ask for every saw cut, its specified depth and each isolation boundary at walls, curbs, columns and drainage structures.
- What does the design assume? Confirm slab thickness, loading, reinforcement and how traffic will cross the joints.
- Who controls cutting? Establish who decides when concrete is ready and what happens if raveling or cracking begins.
- How will curing work? Request the method, duration and responsibility for maintaining coverings or protecting curing compound.
- Who seals the joints? Specify the product, preparation, installation timing and whether the work is included.
- What happens after movement appears? Clarify inspection and repair responsibilities if a joint opens excessively or a panel rises after hot weather.
For commercial scopes, Trail Star Development's guidance to compare commercial contractors before hiring provides useful context for checking scope and accountability. Apply that scrutiny to the joint details, not just the total quote.
Bring a marked-up plan
Include the perimeter contacts and anticipated loads in a residential poured-concrete consultation. We're licensed and insured and hold the necessary licenses to operate in our service area.
Our hours are Monday to Friday, 8am to 8pm, and Saturday, 10am to 3pm; we're closed Sunday. Have the layout reviewed before ordering concrete so unresolved connections aren't left to a field decision.
Atlanta Concrete Solutions provides free estimates for concrete projects, including driveway replacement and poured-concrete work where joint layout needs careful coordination. Bring your marked-up perimeter plan and proposed joint drawing to Atlanta Concrete Solutions for a consultation about panel geometry, fixed contacts and drainage before concrete is ordered.