
You've got a panel lifted by roots, a neighbor who nearly tripped on it last week, and a contractor ready to break it out tomorrow. That's exactly when you should slow down. Knowing how to replace a sidewalk isn't mainly about mixing concrete. It's about confirming who owns the walk, who pays, what grade it must hold, and how you'll prove the new slab is sound before anyone walks on it. Skip those decisions and a clean looking pour can still pond, crack, or fail an inspection.
Sidewalk Replacement at a Glance
A sidewalk replacement is a chain. Each phase sets up the next, and most failed walks trace back to one skipped checkpoint rather than bad concrete. A weak base undermines good finishing. Forms set to the wrong grade lock in bad drainage. Joints cut late let the slab choose its own crack pattern.
Work through the eight phases in order and don't advance until the checkpoint passes. That discipline matters more than speed, especially where a walk crosses a driveway, meets a door threshold, or ties into older panels that aren't level themselves.
| Phase | Main Task | Checkpoint Before Moving On |
|---|---|---|
| 1. Ownership and permit | Confirm who owns the walk and whether a permit applies | Written owner decision and issued permit |
| 2. Layout and utility locate | Stake width and grade, call 811, mark utilities | Utility marks visible, width and grade staked |
| 3. Saw cut and removal | Cut clean boundaries, break out and haul the slab | Vertical edges, no damage to adjacent panels |
| 4. Subgrade and base | Excavate soft soil, compact in lifts, add base | Firm footprint, uniform base, drainage falls away |
| 5. Forms and reinforcement | Set forms to grade and place steel on chairs | Forms level and staked, steel raised off the base |
| 6. Placement and finishing | Pour, strike off, float and broom | Thickness at target, even texture, no ponding |
| 7. Curing and joints | Cut control joints and protect the slab | Joints cut on time, curing covers the full surface |
| 8. Accessibility check | Measure width, slopes and level changes | Slopes and widths within limits before reopening |
Many owners can handle layout, saw cutting and curing themselves if they're careful and patient. The base, the pour and the slope checks are different. Those steps need a plate compactor, a reliable level, enough hands to place concrete before it stiffens, and someone who'll measure instead of eyeballing grade. That's where a licensed crew earns its fee.
A walk that clears every checkpoint lasts. One that skips them tends to crack, heave or pond within the first wet season.
Confirm Ownership and Permits Before Demolition
Most homeowners assume the walk in front of the house is theirs to replace and theirs to pay for. That assumption is often wrong, and it's expensive when it is. Start with one question: is this walk public or private?
Walk the boundary from your property line to the curb. A sidewalk inside the public right-of-way often belongs to the city or county, even if you mow the strip beside it. A walk entirely on your lot, running from your driveway to your front door, is yours. The Baltimore sidewalk program guidance shows how split this can get, since Baltimore generally places maintenance responsibility on property owners while assigning costs to the city when damage is caused by a public-right-of-way tree or utility.
Identify the Cause Before You Get Quotes
Cause decides who pays as much as location does. Ordinary deterioration usually stays with the owner. Damage from a city owned tree root or a utility line can trigger a claim or cost sharing. Photograph cracks and displacement with dates, and measure the lift at the highest point with a tape so you've got a record, not a memory.
Say you've got a 40-foot front walk on a 1950s bungalow, lifted by roots from a city oak in the planting strip. If you demolish first and ask later, you've destroyed your own evidence. If you document first, the city may share the replacement cost. Same concrete, very different bill.
Four Questions for Public Works
Call the local public works or building department and ask these directly:
- Permit: Does this replacement need a permit at this address?
- Right-of-way: Does the work touch a curb, driveway apron or public right-of-way?
- Inspections: Are utility or city inspections required before the pour?
- Scheduling: Who schedules those inspections, you or the contractor?
If the walk meets a state route, GDOT rules apply on top of local ones, and that changes apron and drainage details. Don't let a crew start demolition until those answers are in writing. Put the same written question to every contractor: who owns the walk, who pays, and who pulls the permit? A contractor who won't answer in writing is telling you something.
This matters most for commercial owners, HOAs, and anyone selling soon. A simple replacement can create a violation, a lost reimbursement, or a liability problem at closing.
The lowest installation quote can cost more in total if the owner pays for work a public agency covers.
Get a Free Quote Before You Demolish
Put every decision in writing before a crew breaks out any concrete. Start with your ownership and permit answers, then request a site survey that records grades, utility locations and the drainage path. A quote based on a driveway glance won't catch a threshold that's already tight or a low spot at the curb.
Ask for a written scope listing base depth, slab thickness, reinforcement, joint layout, curing method, and final slope and width checks. Compare quotes line by line. The cheapest bid that omits base work or slope verification isn't a bargain, it's an incomplete job priced low.
Ask each contractor these five questions and get the answers in writing:
- Who pulls the permit?
- What base depth and compaction do you specify?
- How will you measure the finished walk against width and slope limits?
- What's the curing plan, and how long before pedestrians return?
- How will you handle temporary pedestrian access during construction?
For example, an HOA board comparing three bids on a 120-foot common-area walk found the lowest bid left out base compaction and slope testing. Once the board required a revised scope, the price gap narrowed sharply.
We're licensed and insured, we provide free estimates for concrete projects, and you can call (678) 554-4433 to request a free quote. Our residential driveway concrete work runs on the same written scope discipline, because a driveway apron and a sidewalk crossing it have to be graded as one system. Keep notes on every decision so the next owner or HOA board can see the record.
How to Remove the Old Slab and Prepare the Base
Demo looks simple. It's where replacement jobs go wrong, because what you leave under the new slab matters more than what you pour on top. Follow the sequence and check off each step.
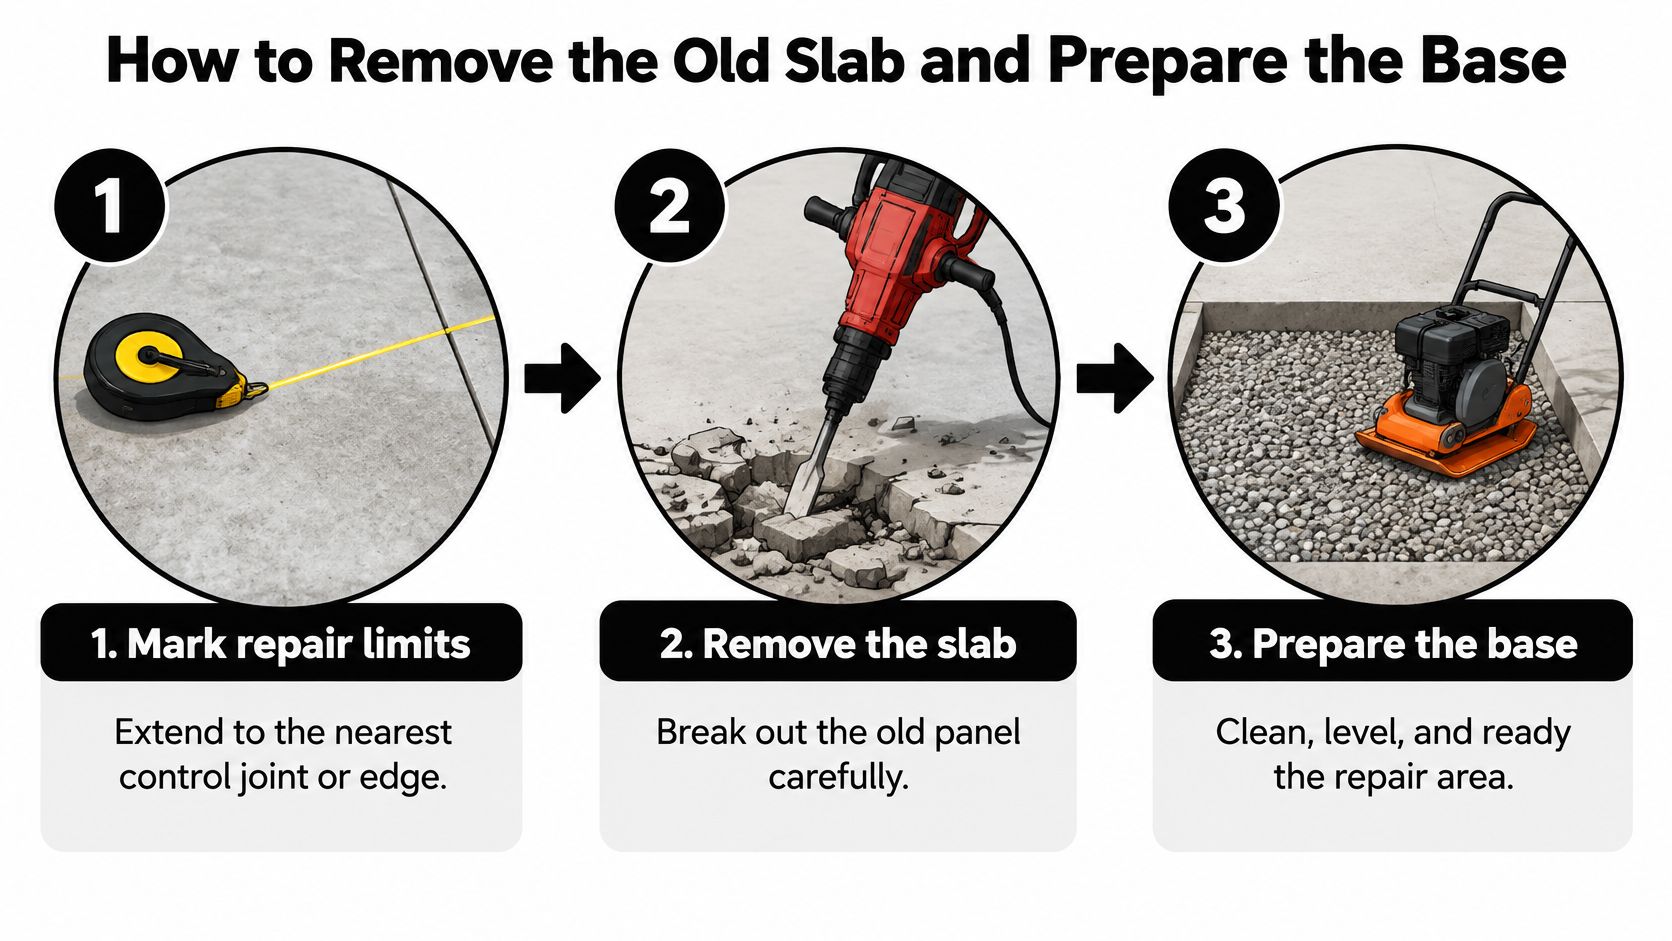
The infographic below compresses the removal and base work into its three core moves.
Removal and Base Sequence
- Mark repair limits: Chalk the boundaries and extend them to the nearest control joint or edge so the new panel doesn't end on a weak spot.
- Confirm utility marks: Hand dig within 2 feet of any marked line. Don't run a breaker over a shallow service.
- Saw cut full depth: Cut along each limit with a concrete saw, keeping the blade vertical for a clean butt joint.
- Break out from the middle: Work toward the cut edges with a sledge or breaker and lift pieces out. Breaking at the edge first undermines neighboring panels.
- Handle roots carefully: Clean cut roots over about 2 inches and check with an arborist before cutting anything larger. Butchering a structural root can kill the tree that's shading your house.
- Excavate to base depth: Plan for 4 inches of compacted crushed stone under a standard slab.
- Compact in lifts: Run a plate compactor over the subgrade in passes, then walk it. You want no visible footprint and no rocking underfoot.
- Set final grade: Grade the base to fall 1 to 2 percent away from the house or curb and verify it with a level, not your eye.
That order mirrors the FHWA full-depth repair sequence, which includes defining repair limits, sawing and removing old concrete, preparing the repair area, placing load transfer where required, placing and finishing concrete, curing, and sawing and sealing joints. It's a pavement sequence, but the logic transfers directly to a sidewalk panel. Skipping ahead to the pour is how owners end up paying twice, a pattern we also see in residential concrete and masonry repair work.
Atlanta Clay and the Three Common Slips
Metro Atlanta red clay holds water and swells. It'll support a walk fine when it's compacted and drained, and it'll move a slab when it's wet and soft. Thicken the base where clay stays damp and make sure drainage leads away from the walk, not under it.
Watch for soft fill left from old trench lines, which compacts differently than undisturbed soil and settles later. Don't over excavate into clay and backfill loose, because loose fill is just a future low spot. And never let the base slope back toward the house. Water follows that grade every single rain.
How to Build Forms, Reinforce and Pour the Concrete
The truck is ten minutes out and one form sits half an inch high. At that point the cheap fix is to stop and reset the form, not pour and hope the finisher hides the lip. Build forms to finished height, check slope with a tight string line and a level, and schedule concrete only after the form line, base and steel pass inspection.
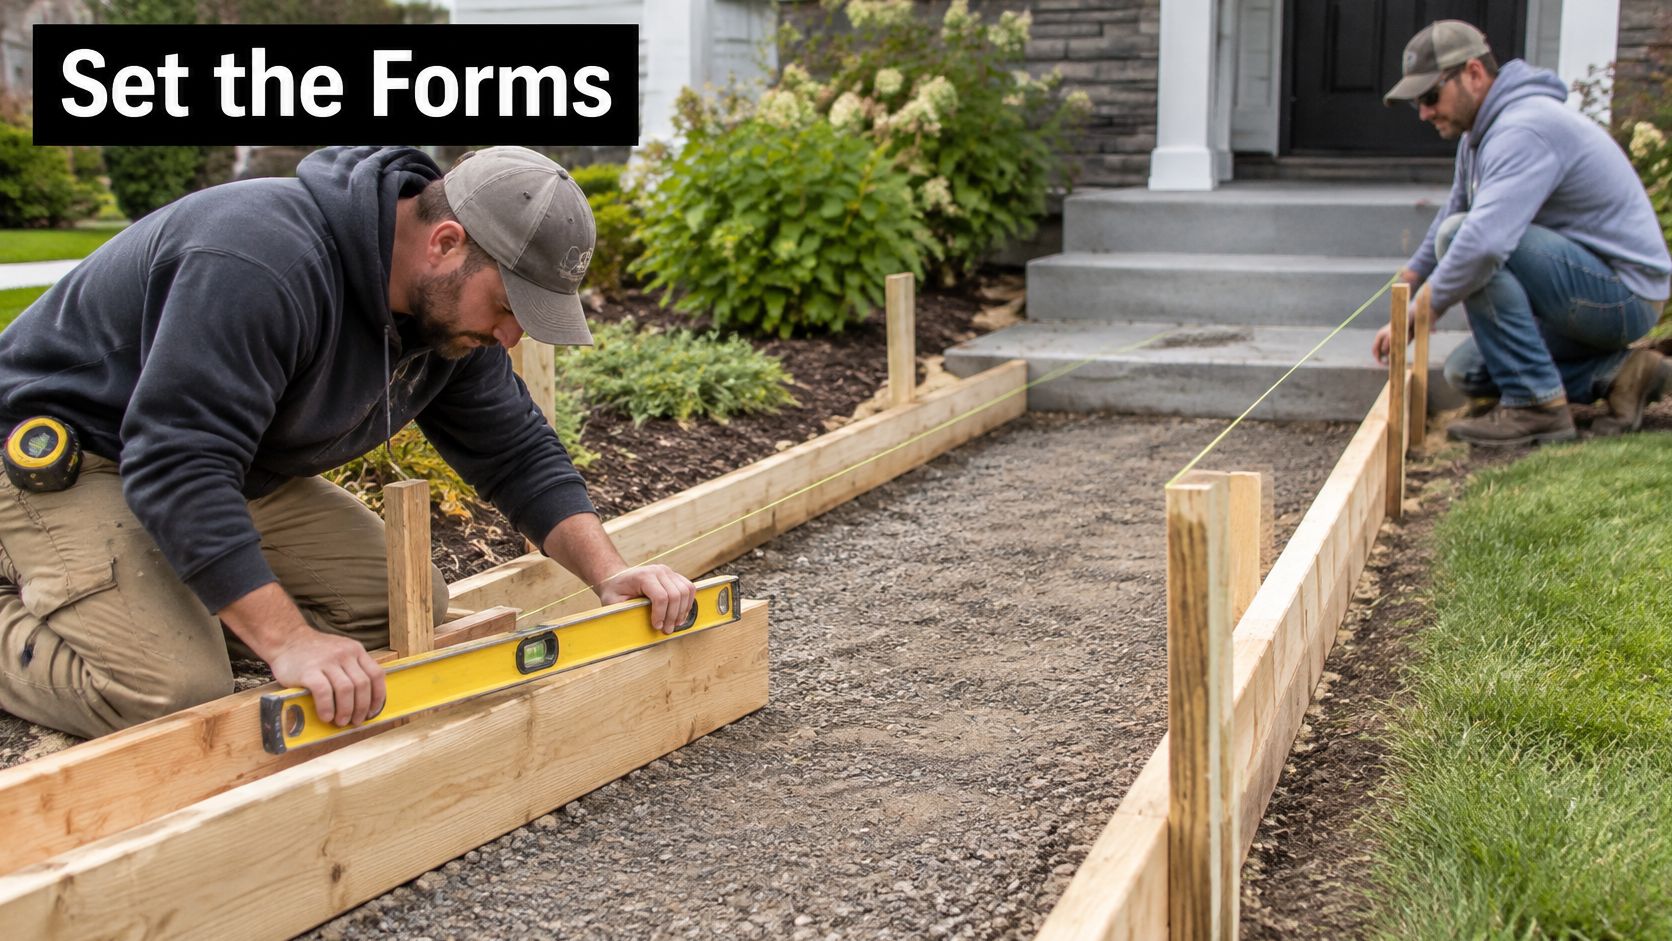
Set 2×4 or 2×6 forms to the finished height of the walk and pin them with stakes every few feet. Pull a string line along the top edge and measure down to the subgrade at several points. If the line shows a high spot, fix it before the truck arrives. A form that is high by a quarter inch creates a lip at every joint and a puddle at the low end.
The photo below shows form setting at the stage where corrections are still cheap.
Place expansion joint material where the walk meets a foundation, driveway, step or other fixed object. Concrete expands, contracts and shifts slightly, and a walk locked hard against a foundation will crack or push. Use welded wire mesh or a rebar grid on chairs so the steel sits in the upper half of the slab. Steel lying on the subgrade does almost nothing for crack control.
The FHWA pedestrian facilities guidance sets the dimensions that matter at the form: a minimum concrete thickness of 4 inches for ordinary sidewalks and 6 inches where a driveway crosses the pedestrian path. It also identifies concrete as the preferred sidewalk material for long service life and puts contraction joint depth at about one-quarter to one-third of slab depth and joint width at no more than 0.20 inch, or 5 millimeters.
| Element | Standard Sidewalk | Driveway Crossing | Check Before Pouring |
|---|---|---|---|
| Slab thickness | 4 inches minimum | 6 inches minimum | Depth stakes or form height |
| Reinforcement | Welded wire mesh raised on chairs | Rebar grid raised on chairs, or as the engineer specifies | Steel above the subgrade and at mid to upper depth |
| Control joint depth | About 1 to 1.3 inches (one quarter to one third of 4 inches) | About 1.5 to 2 inches for 6 inches of slab | Depth gauge measured after cutting |
| Control joint spacing and width | Roughly the sidewalk width, commonly 4 to 6 feet; no wider than 0.20 inch | Same spacing, tighter on long panels; no wider than 0.20 inch | Tape measure and depth gauge on each joint |
Order an exterior flatwork mix and keep the delivery window short. A load sitting in a turning drum on a hot street loses workability, and the temptation is to add water. Don't allow it. Water added on site raises the water to cement ratio and cuts final strength. Ask any supplier or crew to reject loads that arrive outside spec rather than adding water on site. The same mix discipline carries into other flatwork, including residential poured concrete, where the slab's use decides thickness, reinforcement and joint layout.
Pour Sequence
- Place from one end: Work continuously so you don't create cold joints between batches.
- Strike off: Screed across the forms with a straight board in a sawing motion.
- Bull float: Bring up paste and level ridges before bleed water pools.
- Edge and joint: Tool the edges and control joint lines so they don't chip later.
- Broom finish: Pull a broom across the slab for slip resistance. A slick trowel finish on an outdoor walk is a fall waiting for rain.
The video below shows placement and finishing pace on a live pour, which is the part written steps can't fully convey.
The failures at this stage usually come from four mistakes. Forms set too high create a lip at every joint. Joints cut too shallow don't control cracking, they just decorate the surface. Steel resting on the subgrade wastes money. On hot Atlanta summer days, concrete sets fast, so pour early and have finishers ready to move. I would rather start at dawn than race a stiffening slab at noon.
Finishing, Curing and Joint Timing
Finishing and curing decide how long the slab lasts, and both run on a clock you don't control. Work the timeline in order and have tools staged before the pour, not fetched during it.
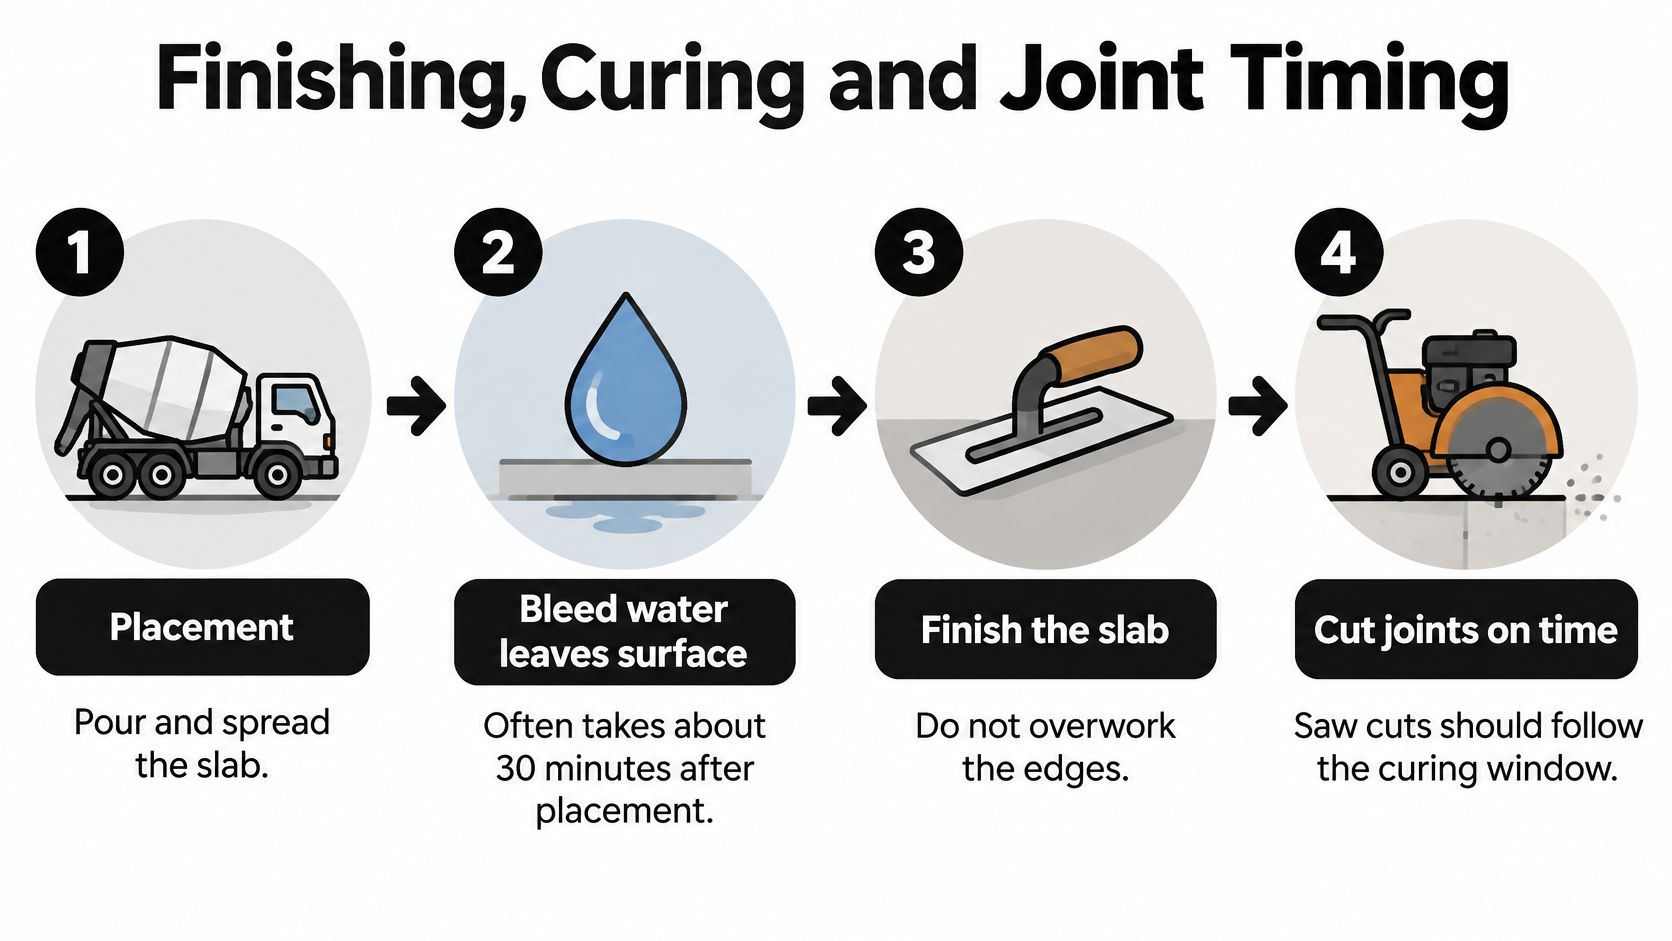
The timeline below shows the sequence from placement through joint cutting.
The First Hours
Wait until bleed water leaves the surface before final finishing. That often takes about 30 minutes after placement. Finishing over bleed water traps it under a sealed skin and weakens the surface. Then finish without overworking the edges, since repeated troweling brings up excess paste that scales later.
Cut control joints as soon as the concrete can be cut without raveling the edges. In warm weather that window can open within a few hours. Have a helper and a saw ready before the pour starts. Cut too early and you tear the edge. Cut too late and the slab has already cracked where it wanted to. Test a small area first if you're unsure.
Start curing right after finishing. Spray a curing compound at full coverage, or cover the slab with plastic or wet burlap and keep it damp for several days. The first several hours after finishing are the most critical period for durability, because rapid moisture loss in that window stops cement hydration at the surface where you need strength most. Protect fresh concrete from heavy rain, which washes out paste, and from fast drying on hot, windy Atlanta afternoons.
First Use and Early Care
Expect pedestrians back after about 24 to 48 hours. Keep vehicles off the walk for about a week, and longer at driveway crossings where loads concentrate. Set out cones and a sign, and keep pets and bikes off. It sounds minor until a dog crosses at hour three.
Keep a simple log of pour time, weather, joint cutting times and the curing product used. That record shows the next owner or HOA board what was done.
Post installation care continues after the slab sets:
- Sealer timing: Wait about 28 days before applying a penetrating sealer, the same patience that applies to a Concrete Driveway Sealing Atlanta job.
- Joint care: Keep joints clear of debris so they can move.
- First wet season check: Look for hairline cracks, edge lift and ponding.
- Early fixes: Fill cracks with flexible sealant and correct drainage before water works under the slab.
That last point connects to the wider driveway questions owners ask us, from How Long Before You Can Drive on New Concrete? to How to Fix Drainage Problems on an Atlanta Driveway. The concrete doesn't care whether it's a walk or a drive. Water underneath and loads too early damage both.
ADA Slope and Width Checks Before Reopening
Walk the finished route before anything reopens, tape and digital level in hand. A smooth looking slab can still be too steep across its width, too narrow at a utility pole, or lifted at a driveway crossing. Measure it while corrections are still possible.
The checklist below covers the four checks to run on every finished walk.
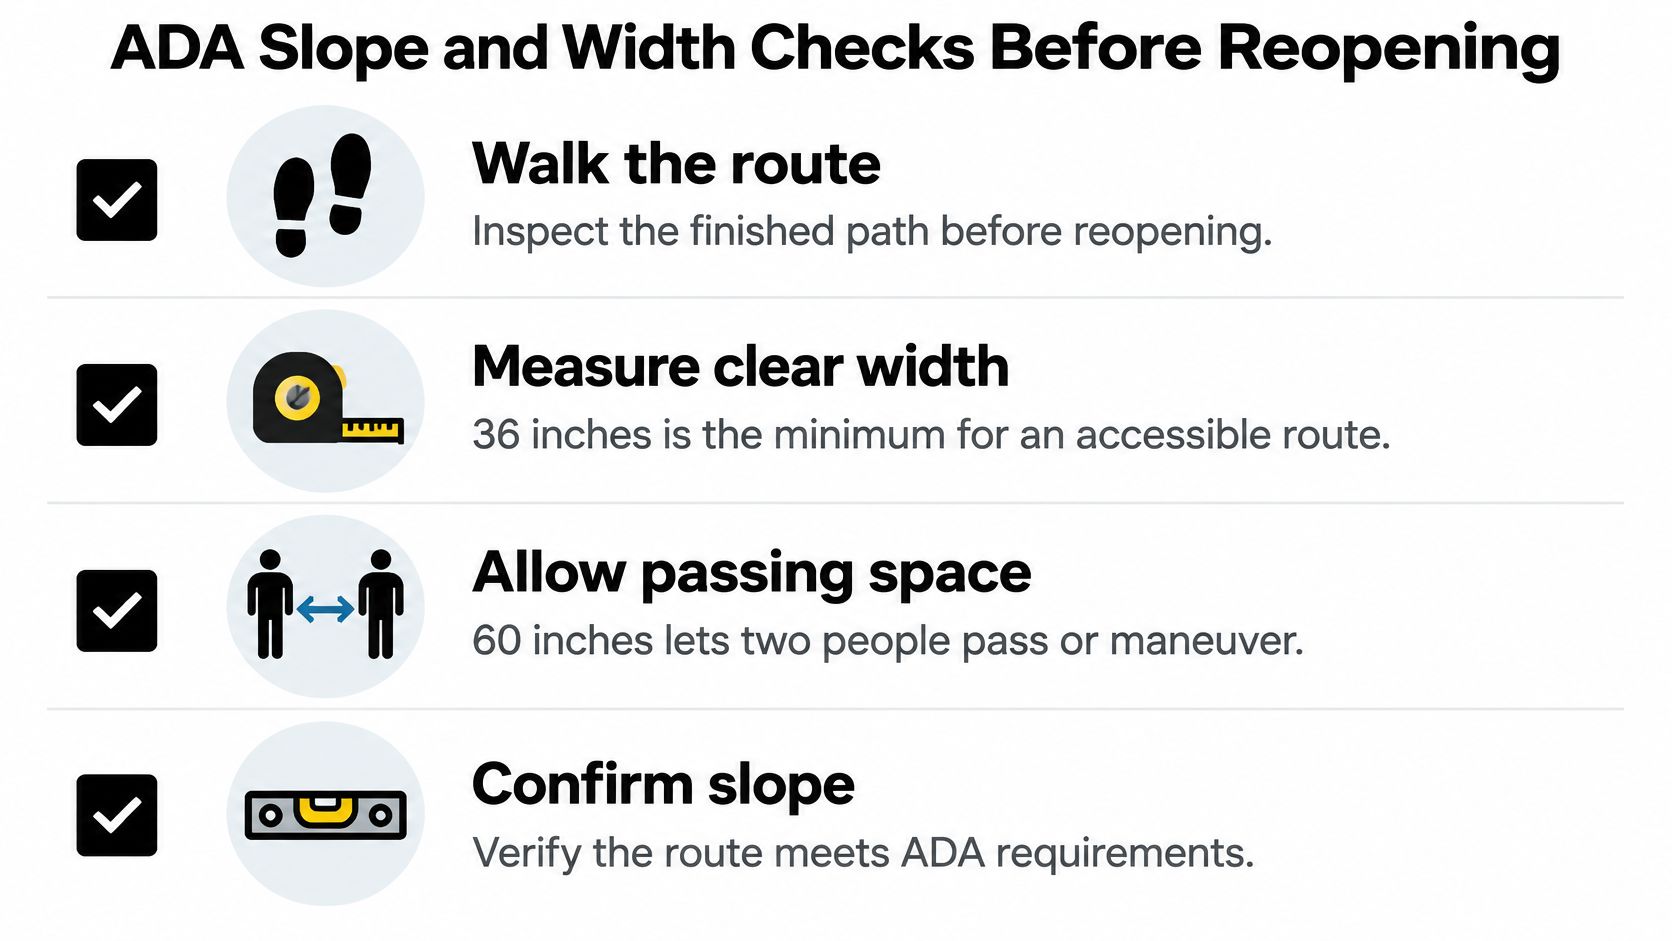
The framework comes from the ADA Title III regulations, under a law that became effective on July 26, 1990. For a replacement sidewalk on an accessible route, that framework supports at least 36 inches of clear width, a maximum running slope of 5%, equivalent to a 1:20 grade, and a cross slope not exceeding 2%, or approximately 1:48. Vertical level changes should generally be no more than 1/4 inch, with limited 1/2-inch transitions permitted only when beveled.
| Measure | Limit | Practical Target | Check With |
|---|---|---|---|
| Clear width | 36 inches minimum | 60 inches where space allows | Tape measure at the narrowest point |
| Running slope | 5 percent maximum (1:20) | Follow the existing grade | Digital level along the walk |
| Cross slope | 2 percent maximum (1:48) | 1 to 1.5 percent | Level across each panel |
| Vertical level change | 1/4 inch without bevel; 1/2 inch with bevel no steeper than 1:2 | Flush transitions where possible | Straightedge and feeler gauge |
| Curb ramp slope | 1:12 (8.3 percent) maximum | Match ramp to curb height | Level on the ramp face |
Where Walks Fail the Check
Measure clear width at the narrowest point, not mid panel. Aim for 60 inches where space allows, since that width lets two people pass or a wheelchair user turn. Check cross slope on each panel and target 1 to 1.5 percent where geometry allows. That range drains water without making the walk hard to roll on.
Then walk every driveway crossing slowly. Vehicle aprons force grade changes, and that's where abrupt lips and ponding at curb returns hide. Check door thresholds too. A walk raised against a threshold traps water and creates a trip edge indoors and out.
Where full compliance conflicts with existing site geometry on an older, sloped Atlanta lot, document the constraint and ask the permitting office what they'll accept. Don't guess. During construction, keep a clear signed detour so pedestrians, including wheelchair users, aren't pushed into the street.
A visually smooth slab with excess cross slope or a driveway lip is a failure, even if it looks better than the old walk.
If your walk is lifted, ponding or flagged by the city, we can inspect it, confirm ownership and permit questions with you, and quote a written scope covering base, thickness, joints and slope checks before any demolition starts. That's the same standard we bring to Concrete Driveway Replacement Atlanta work, where aprons and walks meet. Visit Atlanta Concrete Solutions to request your free estimate and get the checkpoints handled in the right order.