
You're backing out in the morning and feeling that same thump where one panel has settled below the next. After the last heavy rain, water sat against the garage, a crack widened across the middle, and patching it again feels pointless. That's usually the moment replacement stops being a cosmetic idea and becomes a drainage and subgrade project.
Learning how to replace a driveway in Atlanta starts with an uncomfortable truth. A new surface won't fix a wet, weak base. If downspouts dump onto the slab, the slope sends runoff toward the house, or red clay softens under the concrete, I'd fix those problems first and pick the finish last. Thickness, reinforcement, joint layout, and curing still matter, but they work only when water has somewhere to go and the soil can support traffic.
Use the sequence below to judge any quote. A solid proposal explains removal, excavation depth, compaction, drainage outlets, apron work, and first use. A vague one talks mostly about square footage and a pour date.
Replacement Phases and Timeline at a Glance
Permit review is the phase homeowners underestimate most. The pour may take a day, but quotes, measurements, drainage drawings, and right-of-way approval have to line up first. If you choose a start date based only on the crew's availability, you'll probably lose that date.
Curing creates the second surprise. Your driveway isn't back in service when the forms come off or the surface feels hard. Plan where you'll park, how deliveries will reach the house, and which path visitors will use while vehicles stay off the slab.
| Phase | Main task | Typical duration | What makes it slip |
|---|---|---|---|
| Planning and estimate | Measure, compare quotes, confirm scope | 1 to 2 weeks | Waiting on quotes and design choices |
| Permits and right-of-way review | Submit permit if the drive touches public right-of-way | 1 to 3 weeks | Incomplete drainage drawings |
| Demolition and haul-away | Break out old slab and load debris | 1 to 2 days | Hidden utilities and large slab area |
| Base prep and compaction | Excavate, add and compact granular base | 1 to 2 days | Soft soil that needs undercutting |
| Forming and pouring | Set forms, place reinforcement, pour and finish | 1 day | Weather and rushed finishing |
| Curing and first use | Keep moist and wait for strength | At least 7 days before vehicles | Driving on it too early |
How to Read the Schedule
Planning isn't paperwork for its own sake. It locks in width, thickness, drainage, finish, and any widening or extension before old concrete is broken. Changing the footprint after demolition can mean new forms, different permit drawings, and another material calculation.
Weather can move more than the pour. Rain can saturate exposed soil, delay compaction, and turn a prepared base into mud. Heat creates a different problem because the surface can dry faster than the crew can finish and cure it properly.
Practical rule: Pick a realistic first driving date, count backward through curing, the pour, base work, and permit review, and only then set demolition day.
That backward count protects you from the common trap of tearing out a usable, ugly driveway before approval, materials, and hauling are ready. Keep vehicles, trash carts, and heavy delivery trucks off the new work until the crew confirms it's ready.
Permit, Drainage and Layout Checks Before Demolition
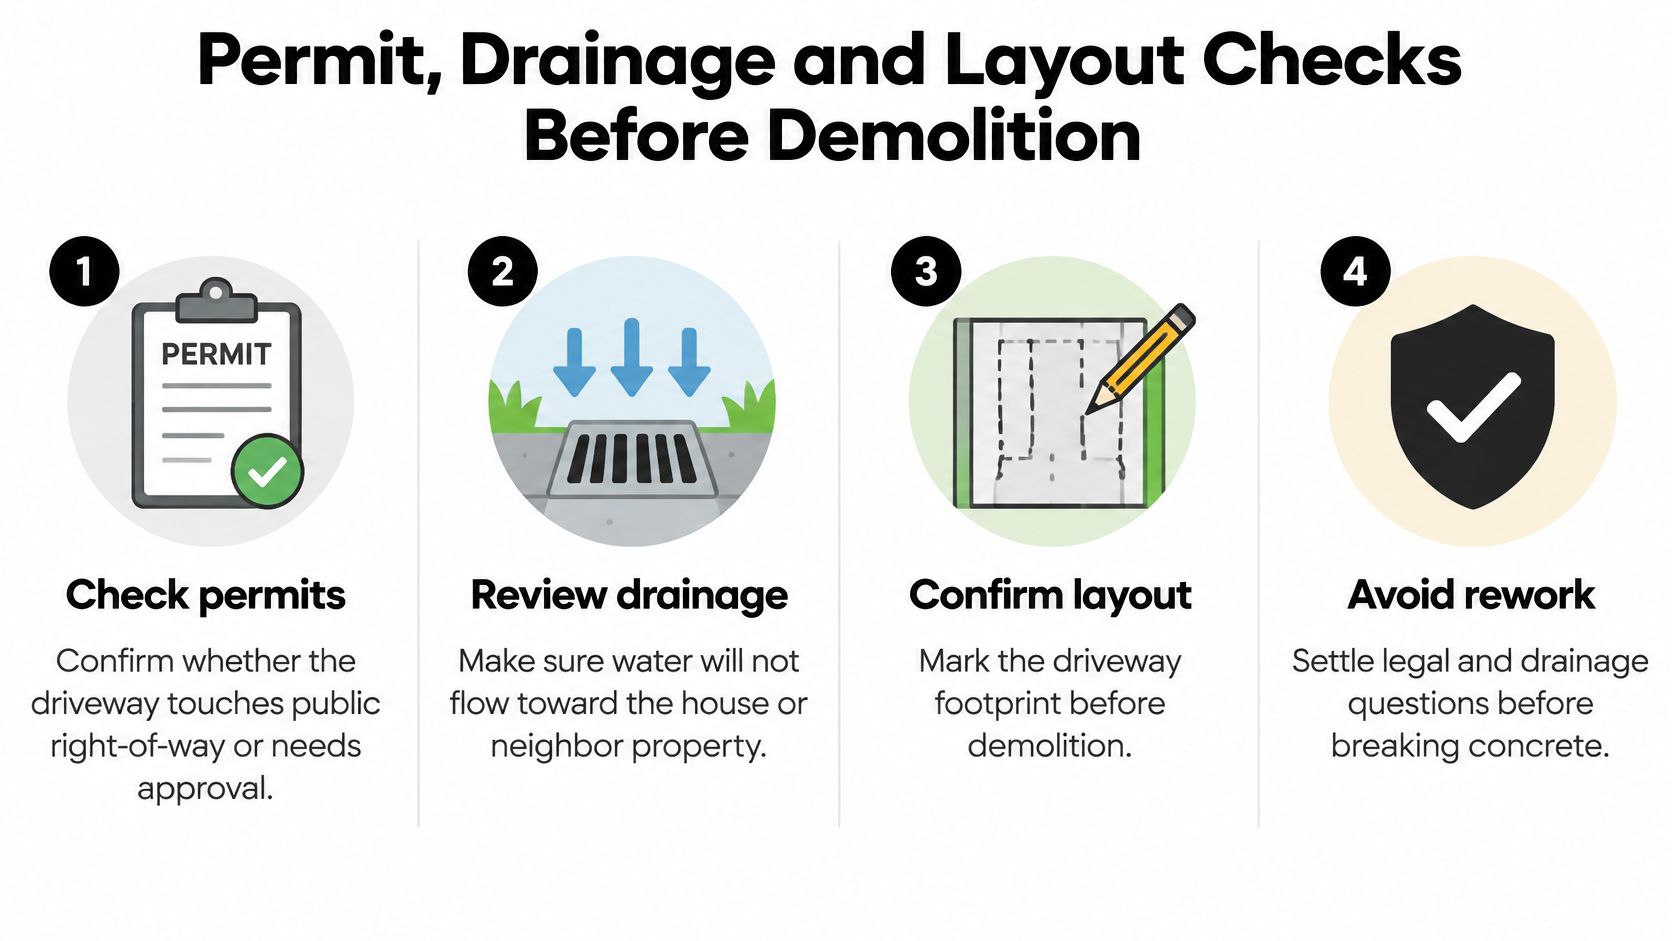
Start with one question. Does the driveway touch public right-of-way or connect to a state highway? The answer affects the apron, culvert, ditch, and outlet design, and it may determine whose approval you need before demolition.
Confirm the Drainage Design
For an Atlanta driveway connected to the Georgia State Highway System, Georgia DOT driveway guidance requires the driveway drainage design to function consistently with the highway drainage system, with a low point before the highway connection so runoff doesn't flow across the roadway. Ditches and side-drain systems along the driveway must accommodate the 25-year storm, while curb inlets and grated inlets must accommodate the 10-year storm.
The accepted solutions include on-site detention, drainage systems along the driveway, or a connection to the highway drainage system. That doesn't mean every residential lot needs the same structure. It means the outlet has to be deliberate, legal, and sized for the water it receives.
Walk the Lot After Rain if You Can
Mark where each downspout discharges, where puddles remain, and where soil has washed from the slab edge. Check whether the driveway falls toward the garage, traps water at a low corner, or sends runoff toward a neighbor. Photograph those spots and give the photos to every contractor bidding the work.
If you're also considering planting beds, a wider parking pad, or a changed walkway alignment, trying landscape design software for homeowners can help you test the footprint before stakes go into the ground. Software won't replace grading measurements, but it can expose conflicts between parking, planting, and drainage early.
Finish the Paper Layout
Call 811 before digging so buried utilities are located and marked. Then book demolition hauling and ask where broken concrete will go. Leaving debris stacked beside the excavation creates access problems and can contaminate clean base material.
Finish with a written layout showing:
- Dimensions and elevations: Length, width, apron shape, garage threshold, sidewalk tie-in, and finished slope.
- Water routes: Downspout outlets, swales, drains, culvert location, and discharge point.
- Constraints: Property lines, utility marks, trees to protect, HOA requirements, and right-of-way limits.
Don't approve demolition until that drawing resolves where water goes. Breaking out new concrete because an outlet was missed costs far more than delaying the old slab's removal by a few days.
How to Remove the Old Slab and Build a Stable Base
Before the breaker starts, diagnose why the old driveway failed. Map cracks, settlement, heaving, edge erosion, rocking panels, and wet areas. A pattern of cracks along a utility trench points to different work than surface scaling across the whole drive.
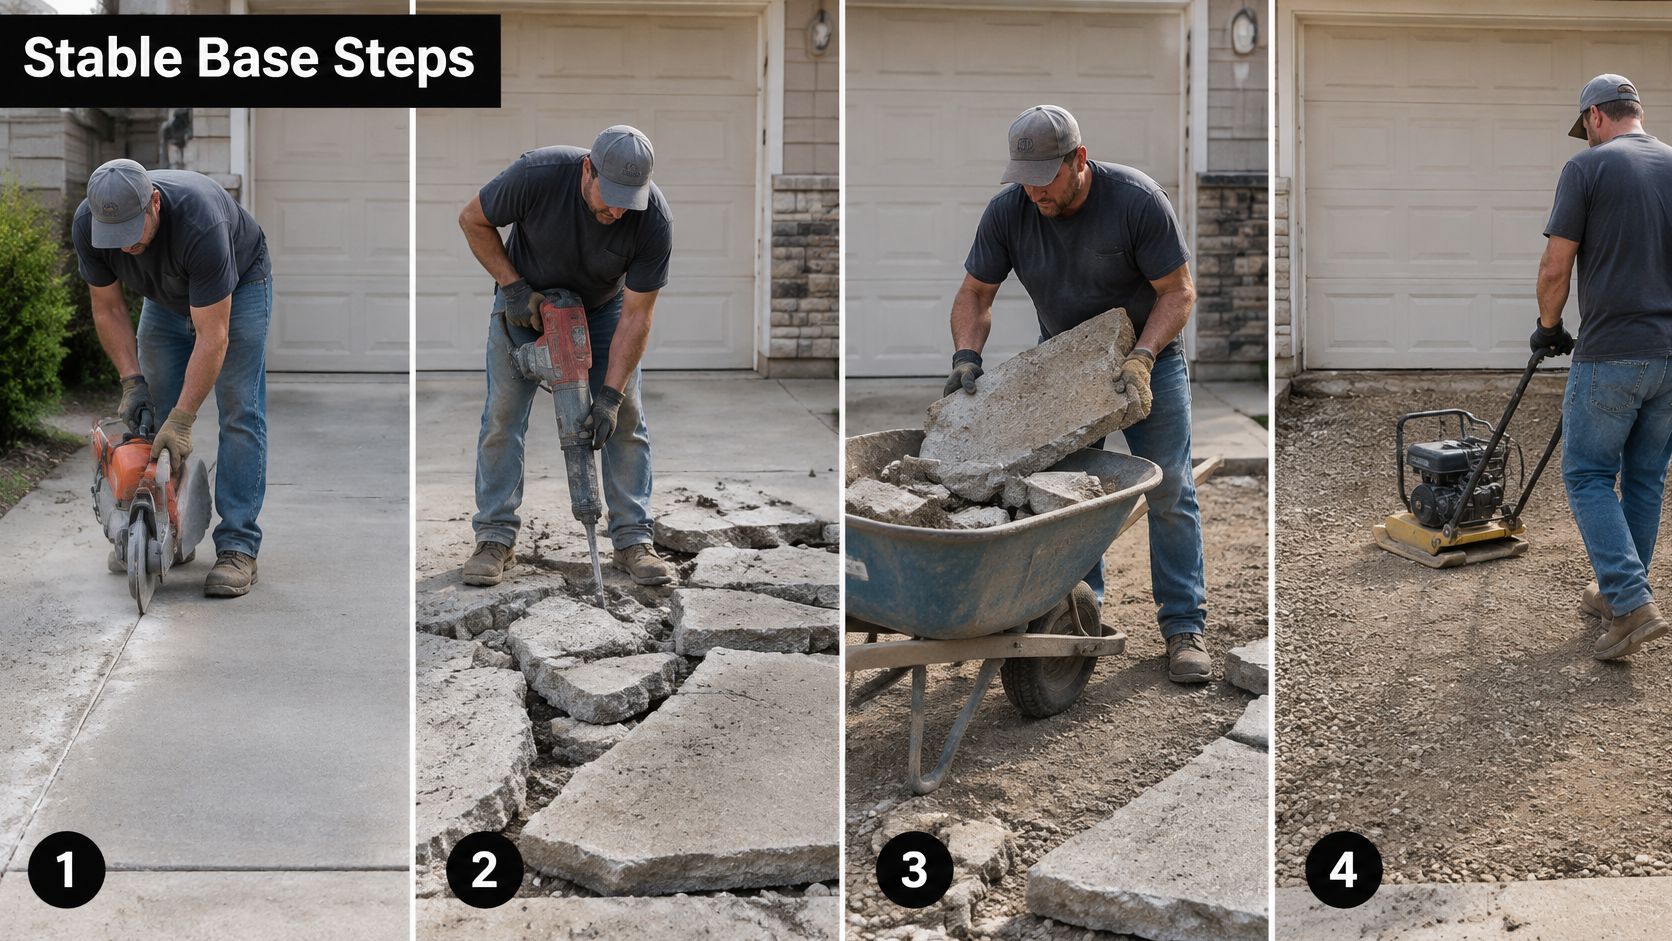
The removal sequence below shows the break-out work and the tools a crew uses to reach a clean excavation.
The Eight-Step Removal and Base Sequence
Score or saw the perimeter. Cutting clean boundaries protects the garage slab, sidewalk, and street apron that will remain. Break the old driveway into manageable pieces with a breaker or excavator, load it promptly, and keep reinforcing steel separated from clean concrete where the recycler requires it.
Excavate to design depth. The hole must hold both the new slab and its granular base. Remove roots, topsoil, buried debris, and dark organic material because those materials compress and decay under load.
Proof-roll the exposed soil. Run a loaded truck or roller over the excavation and mark areas that rut, flex, or pump water. This test finds weak pockets that a quick visual inspection can miss.
Undercut failed areas. Dig out soft or saturated soil instead of burying it under extra stone. Replace it with engineered granular fill that's moisture-conditioned and placed in controlled lifts.
Build the base in thin lifts. Spread each lift evenly and compact it before adding the next. One thick, loose layer may look level, but its lower portion can remain poorly compacted.
Test compaction. FHWA pavement guidance specifies testing the soil's moisture-density relationship and compacting the upper 305 mm of reconstructed subgrade to at least 95% of AASHTO T99 maximum dry density, with a separate 90% benchmark for expansive soils. Atlanta red clay needs site judgment here, so ask which target applies and how the crew will verify it.
Set final grade. Use a string line, laser, or level to confirm water discharges away from the building. Check transitions carefully so runoff isn't trapped at the garage threshold, walkway, or property line.
Document the work. Photograph the prepared subgrade, record lift thickness and compaction results, and confirm elevations before forms conceal the evidence. Those records help everyone if settlement appears later.
Watch the Trench Lines
Watch the short process video for the order of sawing, breaking, loading, and preparing the area before new material arrives.
Paving over uncompacted utility-trench backfill is a classic failure. The new slab can look perfect at first, then develop differential settlement, longitudinal cracking, or rocking panels as the trench consolidates. I'd rather pay for undercutting and recompaction than buy a thicker slab to bridge bad soil, because extra concrete doesn't restore lost support evenly.
Ask the hauler whether broken material will be recycled into aggregate. According to the U.S. Environmental Protection Agency, concrete represented approximately 67.5% of the construction-and-demolition debris stream in 2018. Clean, crushed concrete can be useful where local specifications allow it, but contaminated chunks mixed with soil and roots don't belong in your new base.
A level base isn't enough. It must be uniform, drained, moisture-conditioned, and compacted at every lift.
Form, Pour, Finish and Cure the New Slab
Once the base is ready, the pour depends on preparation: forms, reinforcement, joint layout, truck access, finishing tools, curing materials and saw equipment must be set before concrete arrives. A rushed setup can leave uneven edges, variable thickness or uncontrolled cracks.
Forming, Thickness and Reinforcement
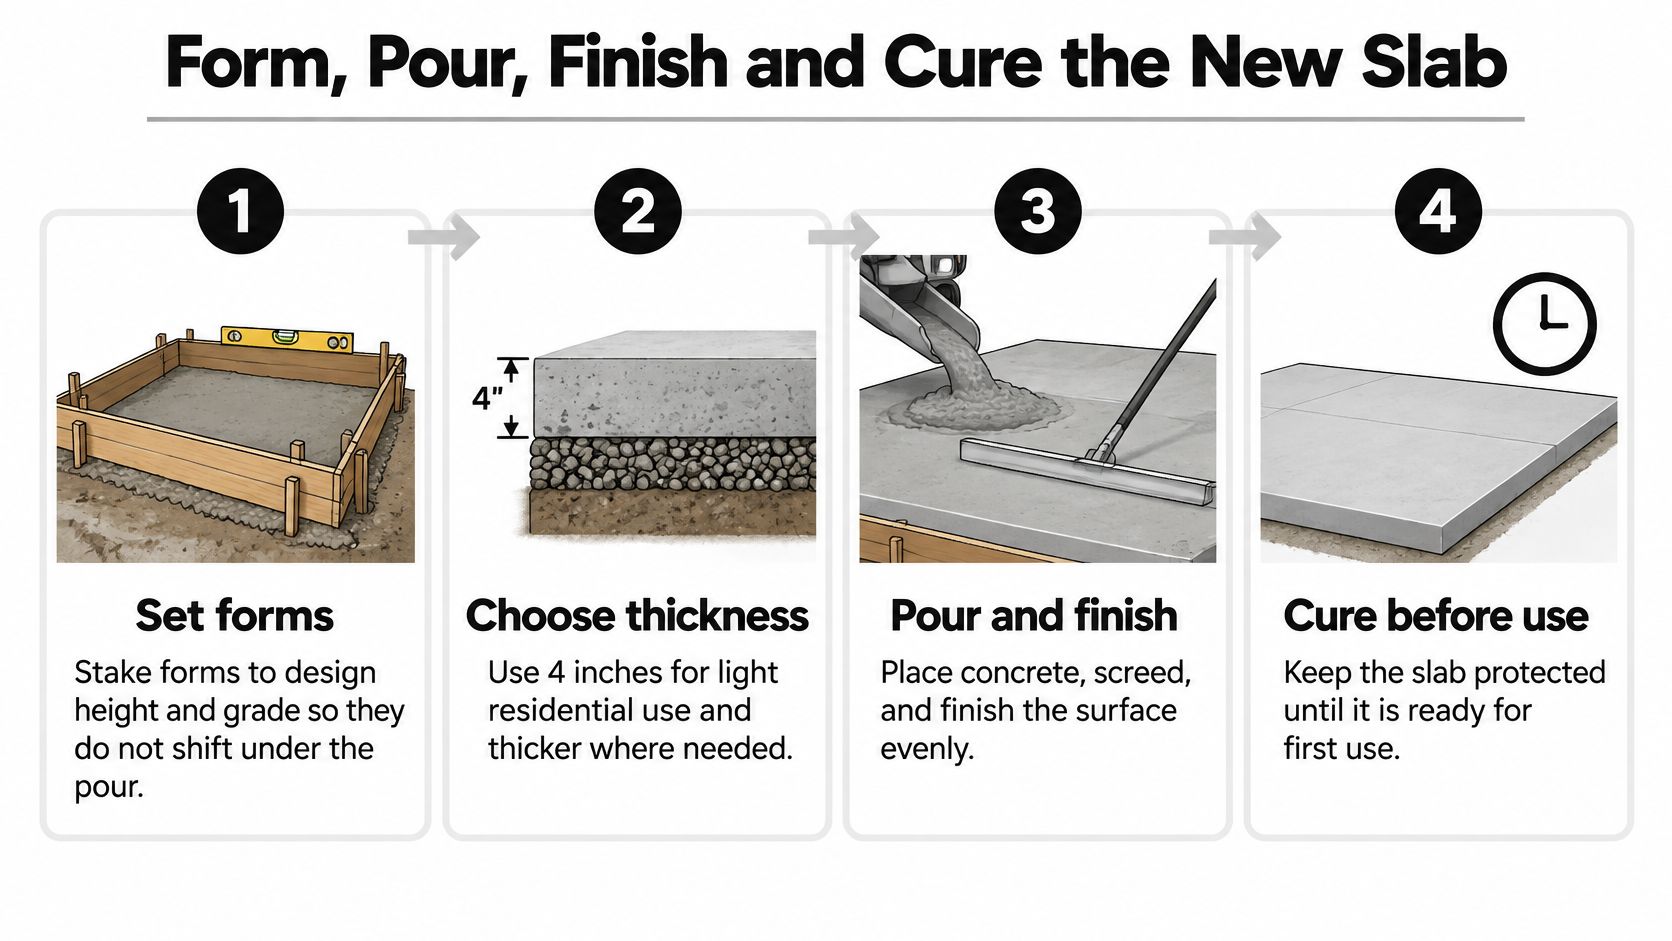
Set and stake the forms. Build them to the planned height and grade, brace them against movement, and check that the surface falls toward the drainage outlet. A form that bows during placement creates a wavy edge and inconsistent slab thickness.
Choose thickness for the vehicles you'll park. A 4-inch slab suits ordinary passenger cars on a sound base. Use 5 to 6 inches where heavy trucks, delivery vehicles or an RV will park, especially near turning areas and edges.
Place reinforcement on chairs. Wire mesh or rebar should sit near mid-depth rather than on the base, where it may remain too low. Reinforcement helps hold cracks tight, but it cannot replace properly spaced joints, a compacted base or adequate thickness.
Lay out near-square panels. For a 4-inch slab, roughly 6-foot joint spacing is a practical starting point, subject to the driveway's width, loading, climate and specifications. On a 24-foot length, cuts near 6, 12 and 18 feet divide the slab into four panels.
Placing and Finishing
Pour continuously and consolidate carefully. Place concrete close to its final position and spread it without dragging it long distances. Consolidate it without overworking. Adding water at the jobsite to make finishing easier can weaken the surface and increase shrinkage.
Strike off, float, then wait. Screed to the form height and bull-float to level ridges. Let bleed water evaporate before final finishing. Trapping it under a sealed surface can contribute to dusting, scaling or delamination.
Texture for traction. A broom finish is a practical choice for a sloped driveway. Stamped, colored, exposed-aggregate and other decorative treatments need to be planned before the truck arrives because they affect finishing time, release agents, joint appearance and sealing. Atlanta Concrete Solutions offers residential poured concrete, with decorative finish options selected to suit the project.
Saw joints and begin curing promptly. FHWA training on concrete pavement joints recommends contraction joints about one-third of the slab thickness deep and cut as soon as possible without raveling. Its rules of thumb limit spacing to roughly 1.5 times slab thickness in feet or about 21 to 24 times thickness in inches under specific base conditions. Keep each panel's length-to-width ratio near 1.25 or less to reduce curling and restrained-shrinkage stress.
Crack control depends on coordinated thickness, panel geometry, curing and saw-cut timing. More steel cannot make up for joints cut too late. Start an appropriate curing method after finishing to limit surface water loss and plastic-shrinkage cracking. One FHWA approach describes moist curing for at least 24 hours.
Plan truck access, washout location, protection for nearby landscaping and a rain response before placement. Hot, dry weather can speed surface water loss; cool weather slows strength gain. The calendar alone does not determine when the slab is ready for traffic.
Curing Milestones After the Pour
| Time after pour | What to do | Why it matters |
|---|---|---|
| 0 to 24 hours | Keep off the slab, protect it from rain and sun, and start curing | Early drying can cause plastic-shrinkage cracks |
| 1 to 3 days | Allow light foot traffic only and keep the surface moist | The surface can still mark under foot traffic |
| 7 days | Keep vehicles off unless strength has been confirmed | Concrete may need more time to reach adequate strength |
A slab that feels hard underfoot may not be ready for a vehicle. Ask for strength results or a maturity estimate before allowing access for a moving truck, dumpster or contractor vehicle. Check the sealer manufacturer's timing instructions as well; sealing too early can trap moisture and cloud or weaken the finish.
Crew-lead advice: A joint cut at the right depth and in the right place can help control where shrinkage cracks form.
Watch for late saw cuts, joints that stop at re-entrant corners, thin isolated edges and broom finishing before bleed water clears. Keep the first car off until strength is confirmed and the joints are clean and tight.
What a Replacement Really Costs in Atlanta
A driveway that drains poorly may need more than a new slab. Cost depends on the area and thickness of the concrete, the condition of the subgrade, how much material must be removed or replaced, drainage work, and whether the street apron needs rebuilding. Those factors matter more than a single price-per-square-foot figure.
Atlanta Driveway Replacement Cost References
| Scenario | Size or scope | Cost guidance | Notes |
|---|---|---|---|
| Standard concrete driveway | 12 x 24 ft | Get a project-specific quote | Cost depends on base condition and site requirements |
| All-in replacement | 520 sq ft | Get a project-specific quote | Scope varies with removal, drainage, and apron work |
| Atlanta replacement benchmark | Residential projects | Get a project-specific quote | Project conditions determine the total |
| 5-inch slab, smaller drive | 12 x 30 ft | Calculate concrete volume, then request a quote | Include demolition, base, labor, and finishing in the scope |
| 5-inch slab, larger drive | 20 x 24 ft | Calculate concrete volume, then request a quote | Include demolition and any required permits in the scope |
| Drainage add-on | French or channel drain | Price separately | Requirements depend on how water moves across the site |
| Street apron add-on | Concrete street apron | Price separately | Scope depends on the apron's condition and layout |
Concrete volume is based on length × width × thickness, with all dimensions converted to consistent units. For a 12-by-30-foot driveway at 5 inches thick, the calculation is 12 × 30 × 5/12, or 150 cubic feet, which is about 5.6 cubic yards. A 20-by-24-foot driveway at the same thickness needs about 7.4 cubic yards before any allowance for waste.
The quote should separate slab work from drainage and base corrections. Ask for the proposed excavation depth, undercut allowance, base material and compaction, concrete thickness, and any apron or drain work. A low total can leave the subgrade problem unresolved, while a properly scoped estimate shows what the price covers.
If the damage is localized, compare repair with replacement before committing to a full tear-out. Residential concrete and masonry repair services may suit limited damage, but patching will not correct widespread settlement, failed drainage, or a base that shifts after rain.
Atlanta Concrete Solutions provides free estimates for concrete projects. Request a line-item quote so you can compare the removal, base, drainage, concrete, finish, and site-restoration scope across bids.
Book Your Estimate Before Demolition Day
Get the estimate while the old driveway is still intact. A site visit lets us measure the slab, inspect cracks and drainage, check truck access, and identify apron or right-of-way issues before anyone commits to a demolition date. We provide free estimates for concrete projects and give a project timeframe during the initial consultation.
What to Ask for in Writing
Ask for three things. First, request a line-item quote separating demolition and haul-away, subgrade and base, drainage, apron, reinforcement, concrete, finish, and curing. Second, request the proposed layout with elevations and drainage outlets. Third, request the schedule from permit submission through the first day passenger vehicles may return.
Confirm that the contractor is licensed and insured. We're licensed and insured and hold the necessary licenses to operate in our service area. You can call us at (678) 554-4433 to request a free quote, or use our contact page to book a consultation at a convenient time.
Bring these items to the first call:
- Measurements and photos: Overall dimensions plus close views of cracks, settlement, edges, and standing water.
- Site history: Approximate slab age, prior patches, utility work, tree removal, and vehicles that regularly park there.
- Rules and notices: HOA requirements, city correspondence, survey information, and any right-of-way restrictions.
Compare quotes line by line. A bid that omits base correction or drainage isn't a bargain, it's an incomplete scope. The right estimate explains how the new slab will be supported, where its water will go, and when you can safely drive on it.
Ready to replace a cracked, settled, or poorly drained driveway without guessing what's hidden under the surface? Atlanta Concrete Solutions provides free estimates, explains the project timeframe during the initial consultation, and scopes demolition, base preparation, drainage, placement, finishing, and curing before work begins. Visit Atlanta Concrete Solutions to request your consultation and get a clear plan for your Atlanta driveway replacement.